Up next in 10


Check out the hobby deck from Frontier Wargaming: https://frontierwargaming.com/product/hobby-deck/
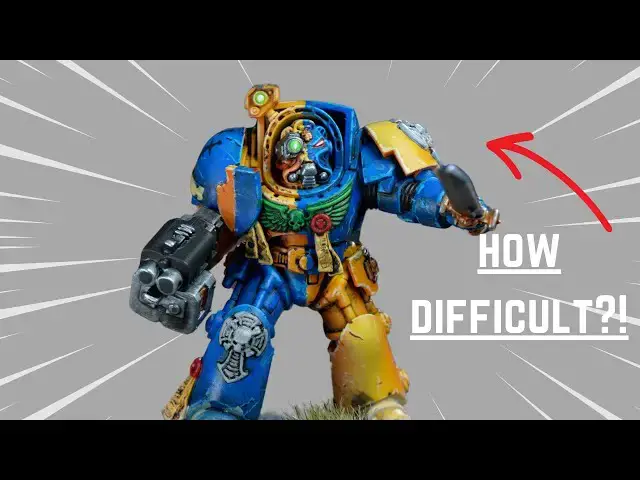
Whilst the Dark Angels have their time in the sun we check out some of the wild paint schemes from their successor chapters. Halves, quarters, we draw schemes at random and try to paint them to the best of our ability.
Join our Patreon: https://patreon.com/thepaintingphase
Merch: https://thepaintingphase.creator-spring.com
Streaming: https://www.twitch.tv/thepaintingphase01
Help Support the channel with our affiliate links:
UK & EU: https://affiliates.waylandgames.co.uk/idevaffiliate.php?id=1214
UK: https://elementgames.co.uk/?d=10835
EUROPE: https://taschengelddieb.de/?affiliate=tpp
US: use code paintingphase to get 10% off at https://www.goblinshut.com/
H&S Airbrush: https://harder-airbrush.net/?sca_ref=5530415.aOjOVt339C
Gaahleri airbrush: https://www.gaahleri.com/?ref=Thepaintingphase
We Print Miniatures: https://weprintminiatures.com/thepaintingphase
THEPAINTINGPHASE for 10% off
Follow us:
Show More Show Less View Video Transcript
0:00
this video has been sponsored by
0:01
Frontier wargaming successor chapters
0:04
quite often they take a backseat to the
0:06
first founding when it comes to Space
0:08
Marines the schemes are quite often
0:10
split with either shoulder pads or an
0:12
arm being a different color or having
0:15
your hared and quarted schemes with the
0:18
release of the Dark Angels codex me and
0:19
Jeff were looking through some of the
0:22
successor chapter schemes and we thought
0:24
to ourselves let's draw some names out
0:25
of a hat and try and paint some never
0:29
done any kind of split scheme before see
0:31
if I get one could be a train wreck
0:33
let's see what happens right I'm up
0:35
first and I
0:39
have oh
0:42
piss penison blades I'm going to have to
0:46
think about this one I'm using my harder
0:48
on Steam back Ultra Link in the
0:49
description I'm really liking valo
0:52
surface primer at the minute so starting
0:54
there Ultra set to Prime and we're off
0:56
more rare paints to get my pink layer
0:58
set my ultra to base for this one and
1:01
everything that I've used so far has
1:02
been diluted 50/50 through the airbrush
1:04
Works a treat this did take a couple of
1:07
coats now that I've got a nice pink
1:08
layer over the miniature I'm going in
1:10
with my Tamia flat white using their
1:12
specific thinner with a 3:1 ratio great
1:14
for building up those layers I've
1:16
definitely over thin this in the past so
1:17
trying to be a bit more aware of that
1:19
then it's on to my favorite yellow
1:21
Imperial fist contrast and Blasting that
1:23
all over with the pink being a bit
1:25
brighter than some of the ones that I've
1:27
used in the past the Shadows are a bit
1:29
less Orange which I quite like but it's
1:31
definitely in need of a highlight so I'm
1:33
grabbing the brightest yellow air paint
1:35
that I've got mix it in a little bit of
1:37
white and just trying to stick some
1:39
volumes of light on what I think will be
1:42
the brightest areas that's all the
1:43
airbrushing done and I'm super happy
1:45
with how this looks currently that
1:47
airbrushing took a little while so I'm
1:48
going to continue painting at home with
1:51
a hobby deck from Frontier wargaming
1:53
I've moved house recently and don't have
1:55
the space for a permanent painting setup
1:57
the hobby deck is perfect for me cuz it
1:59
allows me to to paint anywhere I can
2:01
paint on the sofa as it comes with a
2:03
Comfy Cushion that just veles onto the
2:04
bottom or as it's removable I can take
2:07
that off and it doubles up as a painting
2:09
tray on any flat surface that you've got
2:12
available the standard kit comes with an
2:14
enamel mug it's secured with magnets so
2:16
the chances of it flying anywhere a slim
2:18
awesome design choice you also get a
2:20
phone stand great if you're following a
2:22
tutorial whilst you're painting or
2:25
catching up on a series The version I'm
2:26
using has some storage racks for your
2:29
paint and an LED light the lighting in
2:32
my house is crap for painting So I
2:35
really love this I stuck it into a power
2:37
bank via the USB cable and managed a
2:40
solid evening of painting you can also
2:42
get custom engraving as well so let's
2:44
take this home and see it performs
2:47
whilst I try and quarter this Terminator
2:50
going in with akd blue the great thing
2:52
with these Terminators is there's only
2:55
really two to three straight lines that
2:57
you need to paint the but cover thing
2:59
being the first one and then the top of
3:01
the armor being the second maybe the
3:03
crotch the rest are quite small patches
3:06
and and generally okay to do the Aquilla
3:09
very kindly gets in the way I took the
3:11
helmet one angle at a time and that
3:13
seemed all right I plan to weather these
3:16
up anyway to cover up any mistakes or
3:18
splodges next up from the comfort of my
3:20
own home I'm blacking out the details
3:22
putting on some chippy highlights and
3:24
then trying to add some glazes to that
3:27
blue to give it a bit more shape and
3:29
match what I've done with the
3:31
airbrushing shading down with the dark
3:33
blue and then up with the light it's a
3:34
bit rough in places but definitely
3:37
better for it using the same duap blue
3:39
for some highlights on the blue
3:41
following that same sort of chippy
3:42
method and then I'm just basing in the
3:44
rest of the colors and adding a few
3:45
highlights here and there and then I'm
3:47
ready to take it back to the office for
3:49
an oil wash thoroughly enjoyed my time
3:51
painting on the sofa and the hobby deck
3:53
is awesome so back in the studio it's a
3:55
quick coat of gloss then breaking out
3:57
the oils and odorless Spirits I love get
3:59
tired of watching it shoot around the
4:00
miniature this is always really good fun
4:03
because I'm a bit messy I've always got
4:04
to clean up afterwards using a damp
4:07
brush damp with spirits and then wiping
4:10
away any
4:12
imperfections with the transfers these
4:15
guys have three swords on the puldon
4:17
which I'm going to grab off a dark
4:18
Angel's upgrade sheet I think I
4:21
contaminated the brush that I'd used
4:23
with Spirits however as when I went to
4:25
apply them they just disintegrated
4:28
brutal freehanded
4:34
is I was definitely found wanting here I
4:37
feel like this was some of my best
4:39
airbrush work to date on this mini but
4:42
my brush skills were were lacking a bit
4:45
I improved my sort of banana shaped
4:47
swords a bit by cutting back in with the
4:49
blue to try and straighten up some of
4:51
the angles and yeah just kind of decided
4:54
to to leave it there m vanish over and
4:57
then just the metallics to finish we
4:58
haven't really used kill in ages on the
5:01
channel so wanted to give them a go
5:03
definitely not used to how thick the
5:05
paints are and it took a while to get a
5:08
dilution I was happy with I'm not going
5:09
to say that I don't like using them I
5:12
think I'm just not not used to them uh
5:14
I've been using a lot of valo game Air
5:16
at the minute and these are very
5:18
different n oil and R and flesh shade
5:20
for the silver and gold I've been using
5:22
quite matte Shades recently and I don't
5:24
know if I like them over metallics the
5:27
shades from Workshop kind of dry
5:29
slightly shiny so going to give them a
5:31
go for metallics fluo green for the
5:33
lights red for the eyland done some
5:37
erors here and there some highs and lows
5:39
I really like the yellow the Blue's a
5:41
bit messy but you get the idea of the
5:42
shading I need to spend a bit more time
5:45
cleaning up the oil wash too I think but
5:47
all in all first successor chapter
5:49
Marine that I've painted and I think
5:52
I've successfully quoted it so I'm
5:53
pretty happy I can definitely see why GW
5:56
don't put these guys front and center on
5:58
boxes it would
6:00
absolutely put me off starting an army
6:03
it' be very very time intensive has been
6:05
super fun painting this one Marine has
6:08
been a blast a kill team potentially an
6:11
army absolutely not massive respect to
6:15
anyone that does send me pictures of it
6:17
I want to see anyway uh yeah let's go
6:20
and see what Jeff draws first Disciples
6:22
of calaban who
6:25
the
6:28
thanks all right okay Disciples of
6:31
calaban are a fleet-based chapter that
6:34
strikes with blistering speed they were
6:35
founded an M37 under circumstances that
6:38
have never been disclosed rumors abound
6:41
of their creation and Unforgiven
6:43
chapters theorize that they were created
6:45
for the pursuit of the Renegade known as
6:47
Cipher they bear oh i't gone a minute
6:51
they're always chasing somebody aren't
6:53
they they never do anything new I think
6:55
I'm going to go the buer and Artis Opus
6:58
method and do some dry brushing for that
7:00
greens that should make it look pretty
7:01
good and I think I'm going to have to
7:03
push a little bit on the brightness cuz
7:04
they're going to be the rest of is going
7:06
to be black I'll start as I've done
7:08
before with this sort of thing I've
7:09
going with calaban green as my base coat
7:13
which I'll then slowly blend through
7:15
with warpstone green and then eventually
7:18
get all the way up to mute but I'm going
7:21
to do this through Dry brushing on my
7:23
texture pad and just push it and push it
7:26
till it goes through so hopefully not
7:29
getting it looking too much like
7:30
salamanders will be the
7:32
plan I repainted all of the black after
7:35
the undercoat with black Legion paint so
7:38
it gave me space if I made any mistakes
7:40
I highlighted it with administratum gray
7:43
using the culter paint method of Tippy
7:45
tappy highlights basically meaning I did
7:47
a scratched effect throughout all of the
7:49
black the Aquilla the Crux terminatus on
7:52
the shoulder and the matching one
7:54
underneath were all painted with a mid
7:56
gray and then highlighted with a light
7:58
gray I then used the panel liner just to
8:01
get into all the little grooves on the
8:03
two
8:04
symbols as per the image the storm
8:07
Bolter is just gunmetal effect I give it
8:10
a quick washover with non oil the wing
8:12
skull and ammunition has been painted in
8:16
retributor gold with a with a quick wash
8:19
of raikin Flesh
8:21
heed the lenses were done in the tried
8:24
and tested method of a red base orange
8:27
highlight and then just two little white
8:28
dots right at the very ends of the
8:31
lenses the last thing I did was to give
8:34
the green armor a weathered and
8:35
scratched effect I did this by going
8:37
back to calaban green and using that as
8:40
the dark scratch color and using mute as
8:43
the Highlight Edge alongside
8:48
it a disciple of calaban all
8:51
completed for what I thought was going
8:54
to be a really boring looking miniature
8:56
black against Green I actually quite
8:58
like him
8:59
I really went to town on the scratching
9:01
to try and make him and the battle
9:03
damage to make him look as interesting
9:04
as possible and it's created quite a
9:06
Punchy looking green effect I'm quite
9:09
pleased he's no blood Angel to look at
9:13
but yeah he looks fine he looks like he
9:15
uh he's Dark Angel adjacent I'm quite
9:18
pleased with how that came out for what
9:20
is a relatively simple paint Scheme
9:23
yeah go and look for Cipher off your pop
9:26
so for my final Marine I've just drawn
9:28
angels of redemption another split
9:29
scheme thankfully only half this time
9:31
let's just dive in starting off the same
9:34
as last time and getting my priming out
9:35
of the way with the ultra black primer
9:37
but then I'm going to use a brown as a
9:39
base coat on this
9:45
one back to my Tamia flat white and
9:48
speaking of over thinning I think I did
9:50
that here few mistakes few bits of
9:52
spider webbing as you can see I mixed up
9:54
a bit more of a concentrated mix and
9:56
then went over it again and hopefully
9:58
sorted it for airbrushing I've really
10:00
been enjoying Tamia flat white I've
10:02
tried using inks but had problems with
10:04
reactivation at a various degree of
10:07
leaving things for hours and sometimes
10:09
even days so I'm I think I'm just
10:11
avoiding them from from here on in yeah
10:14
can't recommend this enough time to get
10:16
the bone sorted I'm going to use a thin
10:17
down mix of skeleton horde all over I
10:20
think I probably went a bit too
10:22
heavy but at the time I thought it was
10:24
okay moving on to the green I wanted to
10:27
try and use my work on the zeni so tried
10:29
out a contrast paint in the hope that
10:32
I'd get a bit of a gradient built in
10:36
having done all that work previously in
10:38
short it didn't work and I just painted
10:41
over it with black green from AK and
10:43
approached it with a similar glazing
10:45
techniques the last
10:47
[Music]
10:54
[Applause]
10:56
[Music]
10:58
time
11:01
[Music]
11:05
had a brief Interruption from this
11:07
ladybug so threw that outside and then
11:10
chipped up the
11:13
green I know pale sand gets a lot of
11:15
love online but I've really been
11:16
enjoying buff recently so chipped up the
11:19
bone with that I should have highlighted
11:22
the bone with the airbrush like I did
11:24
with the yellow um but we live and learn
11:27
it Strays a bit too far into muddy is
11:31
bone here and there I think the contrast
11:33
between the brown and the bone is is is
11:36
quite strong so we meet again whilst I'm
11:37
just waiting for a layer of gloss
11:39
varnish to dry I'm going to go in with
11:40
an oil wash just to get the
11:43
recesses can't be bothered using two
11:46
colors for each side or one color for
11:49
each side so I think I might just mix a
11:52
black and a brown together and and see
11:54
what happens I also need to try and do
11:55
the transfer and I'm looking at the um
11:58
at the shoulder pad
11:59
and I I think I might be able to chop
12:03
up a raven guard symbol and then plun a
12:07
skull in the middle of it that's going
12:09
to be the plan if I can uh if I can find
12:13
find
12:24
everything chopping up the transfers
12:26
work pretty well I wouldn't want to do
12:27
this for a whole Army but it was quite
12:30
rewarding having spent the time cutting
12:32
all those uh decals up and then having
12:35
it actually
12:44
work back to the air metallics same wash
12:46
as last time jobs are good overall I'd
12:50
probably say I'm not quite as happy with
12:52
this one as my penitent blade I think
12:55
the bone lets it down a bit quite happy
12:58
with the green maybe too much Brown not
13:01
enough of a highlight I'm not 100% sure
13:04
where I went wrong I think you know I
13:06
could say it's it's Grim dark but I
13:09
think it's just a bit a bit muddy
13:11
especially at the back so maybe more
13:13
white and then less of the contrast
13:16
maybe I don't know let me know what you
13:17
think all that side though it definitely
13:19
looks like an angel of redemption so I
13:21
will take it Guardians of the Covenant
13:25
comes up with these bloody names right
13:27
let's have a look at them it's not known
13:29
from what founding the warrior monk of
13:30
the Guardians the Covenant came only
13:32
that they too are Unforgiven they
13:35
adopted home World morath 7
13:41
possibly they are looking like they are
13:44
lead Bel and quite simple scheme
13:47
actually black shoulder pads they yeah I
13:49
think I'm going to be all right with
13:50
these you know um yeah ah there we go
13:53
actual some Terminator ones as well okay
13:56
yeah so let's get cracking on with them
13:58
as as well then so after priming the
14:01
Terminator black he was then primed
14:03
again with lead Bel spray from Games
14:06
Workshop so I decided to paint all of
14:09
the black bits first being the shoulders
14:11
and the unders suit and both of the
14:12
weapons
14:14
casing and did this mainly because I
14:17
thought if I get the black onto the lead
14:20
Bel it's easily corrected once I'd done
14:23
that I then went ahead and used a very
14:25
thin down mix of basilicum Gray and
14:29
contrast medium to be able to get a just
14:32
enough that I took the slightly strange
14:34
shine of lead belter off the miniature
14:37
once that was all done I went to my
14:39
favorite and tried and tested method
14:42
when it comes to painting anything
14:43
silver is I cracked out the panel liner
14:46
my one coming from Tamia and went round
14:49
the whole miniature doing my best to
14:51
catch all of the small grooves give the
14:53
miniature just a bit more depth all of
14:55
the lead belter armor was highlighted
14:57
with AK dark aluminium and this gave it
15:00
a nice Punchy effect I also at the same
15:03
point in time went in and did some small
15:05
scratches mainly on the legs and the
15:07
Power Fist I highlighted the Aquilla the
15:10
Crux terminatus and the matching one on
15:12
his knee all in standard gray followed
15:16
by a light gray and a very small spot
15:18
highlight of white I used a medium gray
15:21
just to give the black shoulder pads a
15:23
quick Edge
15:25
highlight the terminator's lenses were
15:28
faed by painted in Black just to leave a
15:30
nice Outer Edge I then used AK white to
15:33
fill them in I then went in with frost
15:35
heart contrast paint filled the eye
15:37
socket once it was dry gave it another
15:39
dash of the white the Terminators
15:41
actually have one leg halfed into red
15:45
which wasn't really in me planned to be
15:47
fair but um I think I'm going to have to
15:49
crack out some tape and put that in that
15:52
way I think it'll be fine see how we get
15:54
on although it was difficult to do with
15:56
using the trailing leg with it being the
15:58
one which doesn't have the crooks
16:01
Terminator symbol on it I had to try and
16:05
get the tape in there as best I could I
16:07
wasn't massively sure how this was going
16:09
to work out I took it as near as I could
16:11
and then just filled in at the very very
16:13
end left it to dry took the tape off and
16:16
it looked if I do say so myself pretty
16:18
good to make the leg of the Marine match
16:20
the rest of the Marine I gave it some
16:22
light chipping after that was the bit
16:24
that I've been dreading most which was
16:26
the decals managed to find reasonably
16:29
large white swords on a black Templar
16:32
sheet and thankfully we had two of those
16:35
sheets so we got these swords and
16:37
decided what angles we think they would
16:40
work at and cross them
16:42
[Music]
16:54
over oh he nailed it in a
16:57
one
16:59
you you
17:02
zenos once both lots of decals were dry
17:05
I went back in and I chipped them up
17:06
with the base colors that was underneath
17:08
them here he is Terminator of the
17:11
Guardians of the Covenant
17:13
chapter I thought like the last one he
17:16
was going to be a bit boring if I'm
17:18
honest silver Marine black shoulder pads
17:21
thought yeah but I'm actually really
17:23
pleased with the results I did a little
17:25
bit of chipping on him which has helped
17:26
him stand out a bit more and as much as
17:29
I was dreading doing it I think the
17:31
half red stri the red stripe on the leg
17:34
has worked out quite well decals look
17:36
good they've just helped the miniature
17:38
punch through a little bit you look all
17:39
right little man off you go you can go
17:42
and help your make fine Cipher as well
17:45
so there we go success of chapter is
17:46
complete uh I've had an absolute blast
17:48
um and thank you so much for watching if
17:50
you've made it this far hopefully you
17:52
have two if you're thinking about doing
17:54
a Haled or a quartered sort of Space
17:56
Marine um go for it it's it's
18:00
not as scary maybe as uh as as you might
18:05
think just just dive in and and and have
18:08
a go I think that's the best the best
18:11
advice um and if you mess up you'll do
18:13
better next time um but yes I've got
18:16
this Dark Angels box and I might that's
18:19
going to be my next video painting all
18:21
of
18:22
this I might do normal death wi um we
18:27
might do want these let me know in the
18:30
comments what I should do Bully me into
18:31
doing
18:32
something yeah anyway uh thank you so
18:35
much for Frontier War gam sponsoring
18:36
this video If you uh want a cozy
18:40
painting station this this really is a
18:42
great way to go I've had uh really great
18:44
fun um really really comfortable uh
18:48
painting sessions um using it on the
18:50
sofa and uh being a bit more social
18:53
whilst painting rather than locking
18:55
myself in a room or something like that
18:57
so uh
18:58
thoroughly uh recommend that if it's
19:01
something that you want to try thank you
19:03
so much for watching and thank you so
19:05
much to our
19:06
patrons we shall see you in the next one
#Visual Art & Design
#Games
#Hobbies & Leisure