Up next in 10


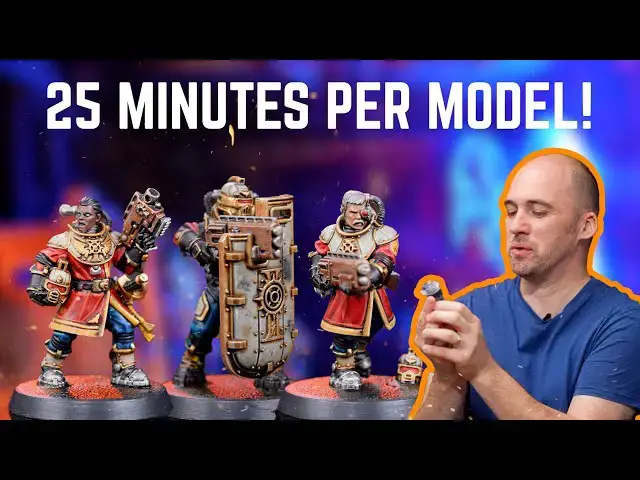
Peachy has joined the Painting Phase and in his first tutorial he's showing you how to paint the Imperial Navy Breachers from the Kill Team Into The Dark boxset, warhammer 40K. This is part one of a three part series where we show you how to paint everything in the into the dark box, subscribe for more!
Join our Patreon: https://patreon.com/thepaintingphase
Help Support the channel with our affiliate links:
https://elementgames.co.uk/?d=10835
Follow us:
https://www.instagram.com/thepaintingphase/
https://www.instagram.com/__peachy_tips__/
https://www.instagram.com/geoffsavory/
https://www.instagram.com/pileofshamepaints/
Check out Faith and Damnation Hobby Group:
https://www.facebook.com/groups/14562…
Contact us:
thepaintingphase@gmail.com
The Paints used in this video:
Show More Show Less View Video Transcript
0:00
hey I'm peachy and in this video we're
0:02
going to be showing you how to paint the
0:03
Navy breeches from the into the dark
0:05
kill team set now this is part one of a
0:08
three-part Series where we'll take you
0:09
through how to pay absolutely everything
0:11
within the into the dark box set that
0:14
includes obviously the galadox scenery
0:15
as well as the crude so grab your Navy
0:18
armsman and get ready to repel borders
0:20
welcome to the painting phase
0:23
[Music]
0:26
so the aim of this series of videos is
0:28
to take you through how to paint your
0:30
into the dark set with minimal Force so
0:32
making your teams and your scenery look
0:34
efficient and as smart with minimal
0:36
effort I wanted to do something a bit
0:38
different with my Navy breaches and I've
0:40
had a lot of requests on how I've
0:41
painted my voidsmen arms that you may
0:43
have seen on Instagram and Twitter so
0:44
what I'm going to do here is basically
0:45
take you through how I painted those so
0:47
I'm killing two birds with one bolt
0:50
round
0:51
wow
0:52
as there's been a whole swave of new
0:54
paints added to the Citadel range such
0:56
as contrasts I'm going to take you
0:57
through how I'd paint those voidsmen now
0:59
also what we're going to do is start off
1:01
getting our models up to a certain point
1:02
and after that we'll then make them a
1:04
little bit smarter by adding some
1:05
highlights after that so let's crack on
1:07
[Music]
1:15
starting from a gray set undercoat what
1:18
we're now going to do is pick out those
1:19
red tunics using bar red now don't worry
1:21
if you make any splodges or areas here
1:23
we can easily fix this later on
1:26
[Music]
1:30
foreign
1:32
[Music]
1:36
after that what we're going to do is
1:37
pick out the blue trousers with storm
1:39
feed if you do find you've got any red
1:41
on those trout to just get some grease
1:43
here and just tie it back up before you
1:44
apply the stove
1:46
next up is using black Legion when
1:48
coating the black details with black
1:49
Legion don't worry if there is any red
1:51
or blue on these sections as it's a
1:53
fantastic paint and will easily cover
1:55
those areas
1:56
[Music]
2:05
[Applause]
2:07
foreign
2:10
[Music]
2:24
[Music]
2:25
with all those areas blacked out what
2:27
we're now going to do is pick out the
2:28
gold trim and any of the gold details
2:29
with retributed armor again just thin it
2:31
down a little bit just for ease of
2:33
application
2:40
[Music]
2:46
next we're going to coat over the
2:48
weapons using Balthazar gold at this
2:50
point don't be too concerned about
2:51
neatness because we can always tied it
2:52
back up with a little bit of iron hand
2:54
steel after
2:59
and as I just said we're now going to
3:00
apply iron hand steel over those silver
3:02
details again you might want to do a
3:04
second coat just be on the safe side
3:06
[Music]
3:13
and now we're going to pick out the trim
3:14
in avaland Sunset and don't forget the
3:16
badge on the left arm as well
3:22
When painting faces use whichever skin
3:24
tone you wish here I'm using blood
3:25
Reaver flesh
3:29
it's a champ flesh and Cadian flesh tone
3:31
to get a nice mix of skin tones across
3:33
the unit at this point you'll probably
3:35
find you've got a few bits and Bobs over
3:37
that white armor so what we're going to
3:38
do now is just tidy up that armor using
3:41
gray skin gray skin
3:43
gray skin
3:45
the next step and my favorite part is
3:47
we're going to be getting no no I'm
3:48
going to apply this all over the
3:49
miniature so I'm going to start for the
3:51
top and work our way down
3:52
[Music]
4:04
thank you
4:06
when applying your Shades all over the
4:07
model just be mindful and just to check
4:09
out those models as it starts to work
4:11
its way down because it might start to
4:12
pull in some of those researches you
4:13
don't want it to so just get a brush dry
4:15
it off and just soak off any of that
4:17
excess once the known oil is dry we're
4:18
going to apply seraphim seep here to the
4:20
white armor to give it a warmer cream
4:21
look
4:22
[Music]
4:32
before we move on to Basin we're just
4:34
going to get some bar red and apply that
4:35
to the visors now with that gold
4:37
undercoat will give it a slightly
4:39
different finish to the tunic
4:41
[Music]
4:44
now for some cool Scorch marks what
4:46
we're now going to do is just stab onto
4:49
the shield using corvus black now it's
4:50
acting like a bit of a dry brush so we
4:52
haven't removed as much of that pigment
4:53
as you can see it's giving it a nice
4:55
scorched effect
4:57
[Music]
5:02
with our base coats now done and our
5:04
Shades applied over the models they're
5:05
almost ready for the table top we just
5:07
need to baste them now you can get
5:09
texture base if you want to but I'm just
5:10
going to use the stuff that's in the box
5:11
set and we're just going to paint them
5:12
up and give them a nice Gallow dark
5:14
effect so to start off with we're going
5:16
to get iron Warriors and we're just
5:17
going to coat that all over the base
5:18
with that base coat dry we're going to
5:20
get normal and just pull that quite
5:21
heavily over to that base as well just
5:23
be mindful not to get it on the feet now
5:25
we're going to apply some Griffin orange
5:26
when applying this trying to be as
5:28
random as you can otherwise your base
5:29
could look a little too uniformed the
5:31
reason why we're doing this is to give
5:32
it a rusty effect or at least patches of
5:34
rust and last up we're going to make
5:35
some oil spills and the same applies
5:37
When painting the oil patches we'll be
5:39
using rattling ground for this and
5:40
remember less is more
5:42
we're going to paint the rims in corvus
5:45
Black I'm going to do three thin coats
5:46
of this just to fill up a nice smooth
5:48
layer
5:49
[Music]
6:18
foreign
6:22
[Music]
6:28
all that's left to do is paint that
6:30
little floaty School guy and the little
6:32
tractor man now both these little dudes
6:34
have been undercoated with lead Belcher
6:36
however if you don't have lead belts you
6:37
just undercount with whatever undercoat
6:39
you've got and then just paint them
6:40
silver using one of the silvers that
6:41
we've used in this video starting with a
6:43
little tractor man we're just going to
6:44
coat all over with some non oil then
6:46
we're going to apply some Griffin orange
6:48
into those recesses to make it look nice
6:49
and Rusty then dry brush over using iron
6:51
hand Steel
6:55
and then finally picking out that lens
6:57
with a little bit of bar red now I'm
6:59
going to move on to the floaty School
7:00
guy also known as a guy skull and we're
7:01
going to base coat that skull using
7:03
screaming school that is a lot of skulls
7:06
in one sentence with the school picked
7:08
out what we're now going to do is pick
7:09
out those brass details using Balthazar
7:11
gold
7:13
and the yellow cables using Avalon
7:15
sunset
7:17
the red cables using Barrel red
7:19
the black cable using black Legion and
7:21
then heavily coat all over with some
7:23
normal oil and then just to rust it up
7:25
like it's fellow we're just going to get
7:26
a little bit of grip-found orange and
7:28
just drop that into some of those areas
7:29
at the bottom
7:36
[Music]
7:43
[Music]
7:49
so if you enjoyed this video don't
7:51
forget to like And subscribe by pressing
7:54
the like And subscribe button somewhere
7:57
I think it's down here somewhere press
8:00
it down here now maybe you've played a
8:02
few games or not but if you want to take
8:03
up your navis breaches to The Next Step
8:04
what we're now going to do is just do a
8:06
couple of highlights on them just to
8:07
make them pop a little bit more so I'm
8:09
going to start first by using some wild
8:11
Rider red on that tuning what we're
8:14
going to do here is highlight the folds
8:15
or raised areas of the tunic with wild
8:16
ride in red
8:18
[Music]
8:20
foreign
8:30
[Music]
8:36
what we're going to do is highlight that
8:38
or tidy back up some of those raised
8:39
areas ready for the next stage and that
8:42
next stage being using screaming school
8:44
as a highlight on the edges in most
8:46
places you can just use the edge of your
8:48
brush like I'm doing here
8:50
[Music]
8:51
foreign
8:53
[Music]
8:54
pick out any blue folds with old dwarf
8:57
guard red blue
8:58
[Laughter]
9:03
[Music]
9:08
highlight that armor using screaming
9:10
skull
9:14
when the Highlight the skin either tidy
9:16
back up with the base color or use a
9:17
lighter tone here over the bloodweaver
9:19
skin we've used nyquest or flesh just to
9:22
add some punch
9:24
over the catch and flesh tone we've
9:26
highlighted it with blood River flesh
9:31
and for the light skin tone I've just
9:32
tied to those raised areas with a little
9:34
bit of Canadian flesh tone but if you
9:35
want to you can always use screaming
9:36
school for more definition
9:41
those highlights done our Navy breaches
9:43
are finished now time this and when
9:45
painting in total it came just under
9:47
four hours to the entire kill team so
9:50
you could probably get it done over a
9:51
couple of nights also in this video you
9:54
don't have to give them red jackets if
9:55
you want to you can always give them
9:56
Blue Jackets and red trousers the
9:58
options are there it's entitled to you
9:59
this was just me painting them in a way
10:01
I really liked and I'm really proud of
10:03
them and I think they look great
10:04
everything we've used in this video can
10:06
be bought from element game so check our
10:07
affiliate Link in the description now it
10:09
doesn't cost you any extra but it really
10:11
does help support our Channel also don't
10:13
forget to like And subscribe if you're
10:15
enjoying this video and found it very
10:16
useful and also we have a patreon
10:18
account so please please please do
10:20
support us on that as well farewell
10:21
sweet folks I love you all bye bye and
10:24
I'll see you soon in the next video
10:26
[Music]
10:34
[Music]
10:46
thank you
#Visual Art & Design
#Painting