live_tv
Livestream Starting Soon
00
Hours
:
00
Minutes
:
00
Seconds
Up next in 10


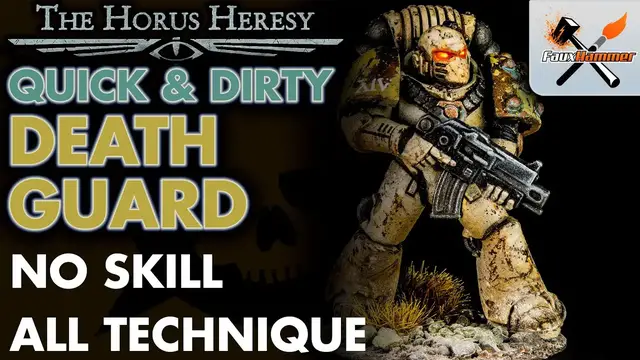
A quick and easy way to paint a ton of Death Guard for the new Horus Heresy game 2022. Painted using the Artis Opus FauxHammer Starter Set: https://store.artis-opus.com/products/fauxhammer-mixed-brush-set-5-brush-deluxe
See all 18 heresy Armours Painted: https://www.youtube.com/watch?v=8da2kKhI4zk&ab_channel=FauxHammer
FauxHammer Patreon - https://www.patreon.com/fauxhammerblog
Parts from TheCustomBit https://thecustombit.com/
FauxHammer Facebook Group - https://www.facebook.com/groups/PaintHub
FauxHammer Discord - https://discord.gg/dPexM9SeN4
Artis Opus Brush Set and texture Palette Bundle: https://store.artis-opus.com/products/fauxhammer-starter-set-bundle-mixed-5-brush-deluxe-set-texture-pallet?_pos=3&_sid=368f68ad4&_ss=r
Get Your Artis Opus+FauxHammer Brush Set Here: https://store.artis-opus.com/products/fauxhammer-mixed-brush-set-5-brush-deluxe
Matching FauxHammer Texture Palette: https://store.artis-opus.com/products/xl-texture-palette-fauxhammer-edition
Best Airbrush For Miniatures: https://www.fauxhammer.com/top-10/best-airbrushes-for-miniatures-wargames-models/
Best Beginner Airbrush: https://www.fauxhammer.com/featured/best-beginner-airbrush-for-miniatures/
Affiliate Links to support us.
Show More Show Less View Video Transcript
0:00
So, let's start painting some Horus Heresy Space Marines
0:03
First up, we're going to be covering Death Guard. I was lucky enough to get one of these models from the Horus Heresy Open Day at Warhammer World
0:10
What's interesting is this seems to be spray-painted in a Sons of Horus colour
0:14
which, well, at least at the time of recording, isn't actually a product, so this could be a sneak peek
0:22
First up, I'm going to base the entire model in Rhinox Hide, and this is going to give us a deep brown base layer
0:28
because we're going to be doing some underpainting and chipping away on this model to give it the really warm weather effect
0:34
So just cover the entire model in Rhinox Hide. Next up, I'm adding some colour modulation to this layer with Mournfang Brown
0:42
and I'm going to stipple this on, paying close attention to things like the bottoms of the legs
0:47
the knee pads, the elbow pads, anything that would be a bit more weathered and worn
0:51
and catch the edges of things is going to get a bit more stippling. Next, I'm masking off the shoulder pads because they're a different colour
0:57
Again, I use Silly Putty for this because it's much better than Blu Tack
1:01
So next, we're going to be applying some Warn FX Fluid from AK Interactive. If you don't have this, Vallejo make their own shipping medium
1:08
or you can just use hairspray, but I find this gives me a bit more working time
1:13
Just lightly spray it across the surface of the model, trying not to let it pull in any particular areas
1:18
So next, I'm using Karak Stone from Citadel Collar, and I want to get this down before the AK Warn FX Fluid has fully cured
1:24
I'd say you've got about an hour depending on local temperature before that AK-1 FX becomes
1:29
pretty much unusable. So for the highlights I'm going to use Typhon Ash. Now this is only available
1:35
in the Citadel Air Range but you can swap this out for something like Screaming Skull or you
1:40
could just get Typhon Ash and paint it on. It actually paints on pretty nicely to be honest
1:44
And when you're highlighting models try not to just do a 45 degree zenithal highlight all the
1:49
way around. Try and focus on the forms to actually pick out the individual parts of the model. So
1:53
things like the backpack where it curves it's a cylinder do a line across it anything round just
1:58
try and do a spot where the light would hit anything that sticks out really like toes or
2:03
the backs of ankles try and highlight those as well next up start applying water to begin
2:08
reactivating that ak warn effects fluid and then as you're reactivating this if you're using a brush
2:13
i'm using the citadel dry brush here the firm hairs on that will start to pick up the edges or
2:19
any raised details of paint on the model so it's easy to do things like around the ankles any
2:25
sticking out parts the knee pads but this will also pick up on areas like the texture where on
2:30
this model because of the spray paint pattern that was on underneath each one of those individual dots
2:35
it made it easy to pick up bits of paint so i went a bit heavy-handed with this but i'll show you how
2:40
to recover that in the next step and that step which is completely optional depending on how the
2:44
last stage went is just highlighting or stippling again using your highlight colour So in this case with the Typhon Ash I going over some of the raised areas and some of the bits that have weathered themselves a bit too heavily with the previous stage
2:57
And now the bit I always find really therapeutic to watch. And is it just me? Please let me know down in the comments
3:02
But I love watching the masking material get removed to show the base colours underneath
3:11
So next up, we're going to be doing the masking in the opposite way. So this time, leave the shoulder pads, but mask the rest of the model
3:17
And then once again, we're going to be using WarnFX Fluid or whatever you want to choose
3:21
And this time, just apply it to the shoulder pads. And to paint those, we're going to use the rather obvious Death Guard Green
3:27
And like with the previous armor steps, just spray the entire surface of these shoulder pads with that color
3:33
And to highlight this, we're going to use Ogryn Camo. And like with the previous step, we're going to focus on specific points
3:40
So here, it's really simple. it's the uppermost point of the shoulder pads just focus a spot in that area and then let it gently
3:47
fade out into the rest of the armor and then just like before with the warn effects fluid get it wet
3:53
and using a brush or any kind of scratching tool you can start making weathering marks across the
3:58
surface and then once again we're going to pull away the putty to do the reveal i'm just going to
4:03
let this play here because i like it but honestly if you want me to cut this part out of the video
4:08
in future videos, let me know. I think it's cool. I really get a kick out of it
4:13
Maybe that's me. Maybe I'm weird. But again, let me know down in the comments
4:18
I really want feedback about this particular part. next we're going to take a little bit of seraphim sepia and this we're going to also dab on using a
4:51
sponge and we're going to focus on lower areas so any of the shadow areas and all this has to do
4:55
is to add a bit more dirty weathered color modulation to the armor itself and now for
5:01
some actual painting so i'm going to start with coal black from pro acryl mainly because it's
5:06
super thin, it's one coat and it's not a true black which gives us the opportunity to shade it
5:11
down a touch afterwards. With this I'm painting the weapon, the soft parts of the armour, any pipes
5:17
and the eyes. For anything silver I'm using Gunmetal Grey from Vallejo's Metal Colour Range and this
5:22
is going to paint everything that's silver. So things like the metal parts on the gun, the vents
5:27
on the back of the backpack and even the chest straps are going to be painted in silver with this
5:33
color Next I using the copper color again from Vallejo metal color range and this we gonna paint the few copper areas on this armor Here for the best control because I trying to get into a model which has already been pre
5:46
I'm using my Artis Opus Series M Size Zero brush, which is part of our starter set
5:52
As you'll see here, I've got a lot more control with the brush, but it does require me to return to the palette a lot more frequently
5:57
so that I don't flood the brush and then flood the miniature. And now it's just a case of coating the entire thing in a gloss varnish
6:04
So a bit of a boring bit to watch here because it's a clear coat going down on top of the model
6:09
Basically, don't put it on too heavy, otherwise you'll end up clogging up details
6:14
Once this coat was dry, which was several hours later, I used the dark brown panel line accent color from Tamiya
6:20
Now, you could substitute this for any dark brown oil paint or even something like Agrax Earthshade
6:26
But what I like about this is you've got a lot of control and with it being enamel based, if you make any mistake, you can clean it up really easily
6:33
now we're going to apply a decal using microset and microsol first soak your decal on some tissue
6:38
paper and then using a brush that's soaked in microset just drag it and apply it to the surface
6:44
of the model and then move it around until it's in the place that you want it then just leave it
6:49
for about 10 15 20 minutes at the most then using something sharp i gently picked away at the edge
6:56
of the transfer as you can see here though it was still a bit too wet so i had to leave it to dry a
7:02
it and then go back and just pick out to match up the weathering that's already on your shoulder pad
7:06
and then just give it a light coat with micro salt and leave that to dry and this will embed
7:11
the transfer into the surface and texture of your model and then i'm going to use some nolan oil to
7:17
shade all of the black and metal parts on the model then i'm going to highlight those same
7:23
parts with celestra gray and the reason i'm doing this now and not before the gloss coat is basically
7:29
because I forgot. And I'm using the Artis Opus Series D dry brush for this because it saves so
7:36
much time when it comes to edge highlighting. Going up one step further, we're going to repeat
7:40
the process with Ulther and Gray. Using the texture palette lets us control exactly how much
7:45
paint we have on the brush. And with this, I'm going to paint within the edges and the furthest
7:50
most points that we did in our previous stage. Next up, we're using Abtalon 502's Copper Oxide
7:56
patina colour mixed with a bit of artist-grade mineral spirits. And then with this we just
8:02
randomly dab it to the undersides of any of the copper areas on the armour. I highly recommend
8:08
using synthetic brushes with any oil stages, mainly because the solvents used will have a
8:13
tendency to destroy animal hairs. And then using turquoise lights we're going to apply that lightly
8:18
to the areas where the previous colour has pulled rather heavily. Just like with rust, with oxidisation
8:24
it tends to be a much brighter richer color in areas where you got heavier buildup So this adds a touch more visual interest and a bit of color modulation to those heavier weathered areas Next we taking Abtalon 502 Light Rust
8:37
and we're just going to apply tiny little spots of this on areas of the armor where we previously
8:43
wiped it away in the stage where we removed paint using the AK Warn FX fluid. And then again for
8:49
some color modulation we're also going to use the Oxide Patina from Abtalon 502 and just like the
8:55
previous step you need to apply this pretty much next to where you've put it in the previous stage
9:00
so just mix up the colors and let them run and mix together on the surface of the model but this
9:05
just gives a lighter tone to what we previously did. Then using an old soft brush just brush
9:11
downwards and blend this into the surface of the model so this will naturally create streaks along
9:17
the edges. When you're doing this though just be conscious of which way the part of the model would
9:22
be if it were upright so obviously the model is posed in a certain position and if you were to go
9:28
horizontally down from that position it would look a bit daft with streaks going across the surface
9:33
of the model rather than a more natural down approach so things like the leg where they're
9:38
at an angle instead of going directly down try and follow the length of the leg and then to seal
9:44
it we're going to use matte varnish by Vallejo now this is a boring bit to watch so please pay
9:49
attention to the words because those are important here. Shake this stuff until your arm aches and
9:55
once it aches use the other arm and keep repeating that process until both arms are completely dead
10:00
If you've got a vortex mixer that's really going to help here and when you're applying it to the
10:05
model do it really really thin. If it starts to turn glossy on your model it'll probably dry
10:10
glossy so just dust it along the surface as best you can. And then finally just base the model
10:15
however you like and then I like to use a weathering powder to tie it into the base
10:20
Here I'm using grey ash because it's fairly neutral and pretty much works with everything
10:25
especially when you've got stone on your base. And finally we're using Vallejo's 70950 black
10:31
from their model colour range which is an absolutely fantastic black. It thins down
10:36
nice, it'll paint the rim of your base in just one coat and it dries with a lovely semi-matt sheen
10:42
And that's it, one completed Horus Heresy Death Guard model. So that's one down, 17 to go
10:48
Just need to get hold of this box set and I can start doing the others. Please let me know what you think down in the comments
10:54
And also, please thank our patrons who are on the screen right now. Without these guys, we wouldn't be able to make content like this
11:00
So if you want to get early access to things like this, along with a lot more on our website, please consider signing up
11:06
Other than that, that's all from me. Thanks for watching. Fauxhammer out
#Visual Art & Design
#Painting
#Hobbies & Leisure