Up next in 10


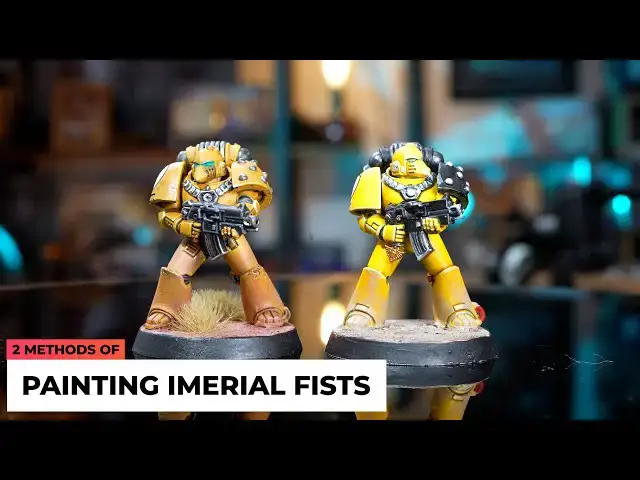
Pat & Geoff revisit a painting challenge but give themselves more time to paint them. We cover two methods to paint Horus Heresy Imperial fists, one with yellow spray and the other with the new imperial fist contrast paint.
Tamiya Brown Panel liner:
https://amzn.to/3BWgV03
Geoff’s Hobby goggles:
https://amzn.to/3QAuoi9
Yellow primer:
https://elementgames.co.uk/paints-hobby-and-scenery/colour-forge-/colour-forge-spray/colour-forge-sunset-yellow-spray-500ml-?d=10835
Help Support the channel with our affiliate links:
https://elementgames.co.uk/?d=10835
Follow us:
https://www.instagram.com/thepaintingphase/
https://www.instagram.com/pileofshamepaints/
https://www.instagram.com/geoffsavory/
If you want us take on a painting challenge let us know in the comments!
Check out Faith and Damnation Hobby Group:
Show More Show Less View Video Transcript
0:00
hello i'm patrick
0:01
and i'm jeff
0:02
and we're so surprised we have to paint
0:04
the same thing twice
0:08
very true
0:10
and that's actually what this video is
0:13
[Music]
0:17
we a couple of weeks ago did one of our
0:19
30 minute challenges and we we painted
0:21
some imperial fists
0:23
and i think it was the first time
0:24
certainly for me that um
0:27
i wish i could carry on yes
0:30
and that's what this video is about more
0:32
yours was more out of enjoyment more
0:34
mine was more out of shame
0:37
[Laughter]
0:39
see if i could correct my massive
0:43
and see if i could say them into
0:44
something better yeah so uh yeah so this
0:47
video is um
0:49
i'm we're using the same techniques as
0:51
we did last time absolutely i'm starting
0:53
from a uh trusty rattle cam from
0:55
halfords yep and you're trying the new
0:57
contrast and i tried the new contrast a
0:59
new current imperial fish contrast over
1:02
the new white spray
1:04
last time didn't go so well
1:06
bit more drying time this time yeah
1:08
that's what we want so basically in a
1:11
nutshell this time we went for still
1:13
painting the miniatures relatively
1:15
quickly still the idea of them being
1:17
more
1:18
rank and file for your uh battery your
1:21
battlefield
1:22
but with just a little bit more camera
1:24
attention a little bit more time spent
1:25
on them really wasn't it yeah
1:27
right so i started off with my trusty
1:30
halfords yellow primer
1:33
um and i did leave it quite a long time
1:35
to dry because previously i did end up
1:37
scraping some off
1:39
with the uh 30 minute challenge so i
1:41
learnt my lesson and let it dry out in
1:43
the sun for quite a long time
1:45
um and then just started basing in my
1:46
colors i went with quite a bright gray
1:50
uh in like the rubber
1:52
like joins of the suits and the pipes
1:55
which i would then go over in uh the
1:57
silicone and grey looks really good to
1:59
be fair club that well man same with the
2:01
gun um and then just go over and
2:03
highlight it afterwards trying to save a
2:05
bit of time using the contrast paint in
2:07
my
2:08
favor
2:09
with the metallics i tried the vallejo
2:13
gun metal gray it's like been one of the
2:15
bigger air pots oh yeah yeah um a couple
2:17
of mistakes in this one i made more of
2:19
them previously but
2:21
with this
2:22
it's uh just wicking away some of that
2:25
moisture that's on your brush so it
2:26
doesn't spill and flow anywhere that you
2:28
don't want it to i went in with a panel
2:30
liner i used the brown dark brown tamiya
2:33
panel liner
2:34
if you do want to buy this it is super
2:37
helpful for panel lining your miniatures
2:39
when you don't want to do it manually
2:41
with a brush um you can just see it
2:43
shoot into all the recesses and it is
2:44
super helpful uh we will put a
2:47
link in the description um you can get
2:49
it all amazon which is very handy indeed
2:52
using that same gray color i highlighted
2:54
up the gun and
2:56
some of the ridges uh in the rubber
2:58
as well using chrome model air went back
3:02
and highlighted up all of the metallics
3:05
highlighting the armor i used deep
3:07
yellow by ak i then used ice yellow on
3:10
the sort of upper motor ridges and some
3:12
of the corners on the shoulder pads and
3:14
things like that for the transfer gloss
3:16
varnish over the pauldron microset
3:19
microsol and then matte varnish
3:22
really really great super happy i had
3:24
one fold in there but i managed to sort
3:26
of paint over it with a chip and i have
3:27
to thank mavericks paint for that
3:30
tutorial which i got off of his
3:32
instagram reels athermatic blue for the
3:34
eyes tried to do a bit of glazing but it
3:36
didn't really work um but yeah that is
3:39
pretty much the overview of what i
3:41
managed to do here oh um dry brushing on
3:44
the base went up the legs quite a bit
3:46
higher just to try and uh add a bit of
3:48
variation into these big sort of
3:51
patches of uh of yellow um i also got
3:55
some more from brown on a sponge to add
3:57
a bit of chipping in places and then
3:59
sort of highlighted that up with the ice
4:01
yellow again just to add some
4:04
depth
4:05
that's what i've heard is what you're
4:07
supposed to do whether it actually
4:08
worked i don't know i'll let you be the
4:10
judge okay your turn right then so
4:13
because i became so paranoid about the
4:16
black bleeding into the yellow
4:18
i decided to go about a little bit
4:20
differently i you well you kindly
4:22
sprayed it white for me
4:24
thank you very much i'm very generous
4:25
and then i
4:27
painstakingly
4:28
painted all of the elements of the
4:30
miniature that were going to be black
4:31
yep all the rubber under suit the uh top
4:34
of the power pack i decided to have an
4:36
is a full black section
4:38
and then the shoulder pad with the studs
4:41
on it i had as black
4:42
i then painted in black for the harness
4:45
around the front of the chest and
4:46
painted in the gum as well in black and
4:49
then once that was all dry i then went
4:51
in with the yellow and put that in tried
4:54
to do my best to paint section by
4:56
section so it was not to let it get a
4:58
little bit ahead of me once that was all
5:00
dry i then went and started with the
5:02
metals i did the same thing i normally
5:04
do which is i use my good old favorite
5:06
being vallejo black metal i used that as
5:09
base as my base color and then
5:11
highlighted it up with model air chrome
5:14
so
5:15
was it mud layer chroma borrows off you
5:17
i wasn't paying attention
5:19
[Laughter]
5:20
so it was model air chrome which i then
5:22
used to highlight or in some places i
5:24
just used model like chrome as the as
5:26
the base color especially on the vents
5:28
on the backpack
5:30
so that was that put that that in and
5:32
then then i moved on and did the same as
5:34
yourself which was i applied brown panel
5:37
liner
5:38
isn't it
5:39
it's a wonder isn't it it's an absolute
5:42
wonder i'm a big fan of it already
5:44
link in the description
5:46
i'm a big fan of already i use it on my
5:48
son's uh marines who are in a uh or like
5:51
a lead belcher sort of metal colour
5:54
works really with the i have the black
5:55
one for that works really well
5:57
and
5:58
yes so did that and then after that went
6:01
in with dawn yellow and started to
6:04
highlight all of the edges as much as i
6:05
could manage and
6:07
bale tan in the eyes after giving the
6:10
eyes a base coat of
6:12
white and then yeah then then after the
6:15
the bail tanner dries i give a very very
6:16
tiny little touch with that white again
6:19
and uh
6:20
a couple of red cables which was just
6:22
done in mephiston
6:24
and
6:25
what else did we do
6:28
in the dry brush to base which was
6:30
moonfire brown followed by carrick stone
6:33
managed to screw up the transfer on the
6:35
shoulder again
6:37
don't like these round transfers on on
6:39
round shoulder pads not not a big fan at
6:41
all
6:41
but that is basically it really i think
6:45
and uh yeah generally very pleased there
6:48
we are as if by magic we are done indeed
6:50
we are
6:51
yeah who's who's who's going first who
6:53
are we looking for
6:55
yours okay so your two your
6:58
30 minute versus your
7:00
32 minute if we're going with that yeah
7:04
well i think straight away obviously the
7:05
no the most notable thing is
7:08
obviously that you've now got the
7:09
highlighting on
7:11
on the new one um which is really good i
7:14
like i think i like the um
7:17
i think i like the the more um the more
7:19
glow on the on the eyes i think looks
7:21
really cool the weathering looks good on
7:23
well the weather looks good but on both
7:25
of them
7:26
i think it's got a bit more of a
7:27
subtlety that i quite like on the new
7:29
one and i like the damage on the leg it
7:30
looks cool yeah so transfers better yeah
7:34
so
7:35
full full process with the transfers uh
7:38
gloss varnish like set microsoft and
7:40
then matte varnish yeah a little bit
7:42
weathering over the top uh the
7:44
weathering on the feet like the dry
7:45
brushing to tighten it into the base
7:47
definitely nicer on the rifle as well i
7:48
think the i think the uh the highlight
7:50
on the rifle looks really good yeah
7:52
which i still didn't manage to get that
7:53
in on mine but yeah
7:55
yeah you can definitely see where the
7:57
time went between the two
8:00
i still think your original still stands
8:02
up well and a squad of them on the back
8:04
on the table top would look great
8:06
but i think these ones i squad to them
8:08
you would go yeah that's been time well
8:10
spent i think yeah yeah it was
8:12
interesting like um i i painted this
8:15
earlier and um put them on the table
8:18
turned the light off and then when i
8:19
came back into the office to to prep for
8:21
for was filming
8:23
i was like which one's which oh oh no
8:29
oh yeah
8:31
um
8:32
obviously when you get closer
8:34
and like the shine of the metallics but
8:36
under like like when when we turn the
8:38
the uh
8:40
like the film lights off
8:41
um
8:42
but with the yellow you can't really see
8:44
the yellow highlights that much from to
8:46
too much of a distance
8:48
um so again i mean it's a big part of
8:50
what we do is yeah just putting paint on
8:51
minis and getting them on the table yeah
8:53
absolutely so i think the 30-minute one
8:56
like there's a few errors and mistakes
8:58
in there but like
9:00
it is passable i think it is okay yeah i
9:03
think it's fine
9:04
like i i obviously prefer and think that
9:07
the uh like the three-hour one is better
9:10
i think so i definitely think so
9:12
right then should we do the same here i
9:14
hate to hand that one over the 30-minute
9:16
one from last time but i uh i'll let yes
9:18
thank you
9:20
well i learned
9:26
immediately like yeah these are just so
9:28
much brighter than
9:30
than mine again i think like i think i
9:32
said this last time i really like the
9:34
black
9:34
i think like the bright yellow
9:36
contrasting with the black adds a lot of
9:39
interest i think that's really really
9:40
good so you've got none of the bleeding
9:42
issues no um
9:44
and then like the smudges and and that
9:46
kind of thing
9:47
you've got bass done which is always
9:52
[Applause]
9:54
seeing that tied into the base in the
9:55
weathering i think that's really great
9:58
slightly darker base but you've got a
10:00
brighter yellow so yeah i think that
10:02
works um
10:07
thank you very much for that yeah so
10:09
before we go
10:11
thank you very much for all of you
10:12
sticking with us thank you very much to
10:14
you for all for subscribing
10:16
it's getting really silly now it's
10:18
starting to become like a serious thing
10:19
instead of us just about time yeah
10:23
time recording we're nearly at 5000 subs
10:25
thank you very much if you are watching
10:27
this and you haven't subscribed please
10:28
do
10:29
it's super helpful so if you like and
10:32
you know if you like what we do
10:34
tell your mates and share it and if you
10:36
hate what we do tell your mates and
10:37
share it
10:38
[Music]
10:39
just say just call us out on youtube
10:42
shorts and say that our painting is
10:44
trash
10:47
[Laughter]
10:56
so thanks for tuning in guys it's really
10:58
appreciated
11:04
[Music]
#Hobbies & Leisure
#Crafts