Up next in 10


Get your free Warcraft Rumble STLs here: https://warcraftrumble.blizzard.com/en-us/collection
Download Warcraft Rumble for Andriod and IOS: https://warcraftrumble.onelink.me/7POk/5qsnyuf4
This is one of the last painting videos Peachy filmed with the painting phase. Please go and subscribe to his new channel @PeachyTips
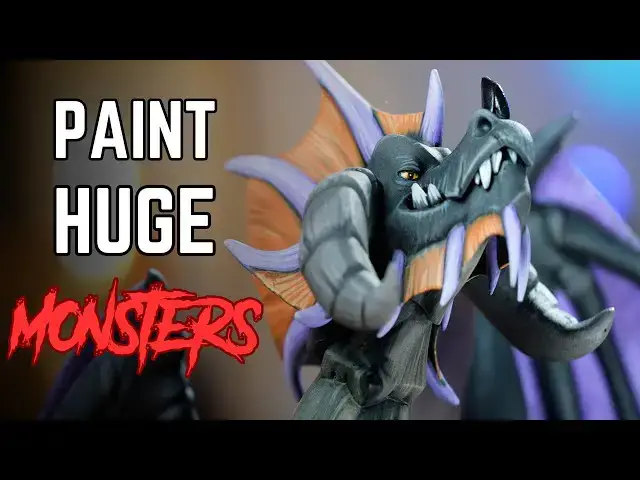
Part 3 in our Warcraft Rumble series. This time it's painting the biggest model in the series, Onyxia. The tips and tricks here are perfect for any large Dragon or Monster, enjoy!
Join our Patreon: https://patreon.com/thepaintingphase
Merch: https://thepaintingphase.creator-spring.com
Streaming: https://www.twitch.tv/thepaintingphase01
Help Support the channel with our affiliate links:
UK & EU: https://affiliates.waylandgames.co.uk/idevaffiliate.php?id=1214
UK: https://elementgames.co.uk/?d=10835
EUROPE: https://taschengelddieb.de/?affiliate=tpp
US: use code paintingphase to get 10% off at https://www.goblinshut.com/
We Print Miniatures: https://weprintminiatures.com/thepaintingphase
THEPAINTINGPHASE for 10% off
Show More Show Less View Video Transcript
0:00
this video is sponsored by blizzards
0:02
Warcraft Rumble Welcome to our third and
0:04
final part of our three-part Series in
0:06
part one we looked over things like
0:08
basics of vage painting such as base
0:09
coating Shades under coating all the
0:12
good stuff of getting you onto that
0:14
hobby train part two looked at more
0:17
advanced things or intermediate stuff
0:19
such as highlighting dry brushing
0:20
glazing so in this video we're going to
0:23
combine all those things and paint a big
0:25
old dragon from Warcraft Axia to be
0:28
precise now before we crack on paint
0:30
this Dragon let's hear a little bit more
0:31
from our sponsors Warcraft Rumble is an
0:34
action-packed strategy game that invites
0:36
players to assemble armies with their
0:37
favorite characters from the warcraft
0:39
universe and battle it out in unique
0:41
missions designed to test their tactical
0:43
wits it's easy to learn but hard to
0:46
master Warcraft rumble's frantic
0:48
strategy action is immediately gripping
0:50
with depth that rewards experimentation
0:52
build forces of minis starting with
0:54
leaders like archade Jana proudmore with
0:57
a huge single player experience with
0:59
over 7 missions as well as weekly and
1:01
monthly challenges in the form of
1:03
multi-art dungeons there's so much to
1:05
keep you busy you can also play with
1:07
your friends in competitive or
1:08
cooperative play and join guilds to link
1:11
up with fellow commanders there are over
1:13
60 Heroes villains and monsters from the
1:15
warcraft Universe to choose from and
1:17
these are lovingly sculpted digital
1:19
characters that have been rendered as
1:20
tabletop style Minis and brought to life
1:22
for you to collect Warcraft Rumble is
1:24
full of authentic Warcraft Vibes created
1:27
by the team with deep roots in the
1:28
franchise every where you look you'll
1:30
encounter many references inspired by
1:32
beloved characters locations and events
1:35
from the warcraft PC strategy games and
1:37
the World of Warcraft as you can see
1:39
we've already got a hold of our Warcraft
1:41
Rumble characters courtesy of weprint
1:43
Miniatures so what are you waiting for
1:45
click the link in the description and
1:47
get downloading right back to painting
1:49
and rambling about techniques so with
1:52
that all said and done let's crack on
1:55
painting this dragon now the first thing
1:57
I'm going to do is get this model
1:58
undercoated now I'm going to start with
2:00
a black undercoat cuz anxia is pretty
2:02
much black now initially I was going to
2:05
give a nice Dustin or zenial of some
2:07
purple I had some purple hand Purple
2:08
Heart from AK but it was just too windy
2:11
and as opposed to trying to do this nice
2:14
zenithal highlight of purple to get the
2:16
membrane of the Wings and like the
2:18
spikes and spines and stuff I just
2:19
didn't bother because I knew it would
2:20
just be a mess because of the wind so I
2:22
chose just to go with black that was
2:24
easy and then do all the rest by hand so
2:26
sometimes when you are painting effects
2:28
such as the weather can decide how you
2:30
go about the next steps and in this
2:32
particular case the thing I wanted to do
2:33
which was to speed it up a bit couldn't
2:35
do so cuz it was too windy so good old
2:37
brush time so with our undercoat now dry
2:40
I'm going to get some rubber black and
2:41
I'm just going to heavily stipple this
2:43
over the body now we're stippling it's
2:45
very much like dry brush and you're not
2:46
really removing as much paint or pigment
2:48
from the actual brush but you are doing
2:49
a stabby motion this is going to give a
2:51
bit of a texture to those flat surfaces
2:54
on its where it scale should be there
2:55
are no scale details on here but it's
2:57
just to add a bit of detail and also
2:58
looks quite nice and gives a nice
3:00
pattern as well after the rubber black
3:01
we're going to do the same with dark
3:03
gray a little bit more refined a little
3:04
bit lighter mainly touching on some of
3:06
the raised areas but just take your time
3:08
and build that up then I'm going to use
3:09
a light stipple or even a light dry
3:11
brush of reddish gray I'm going to do
3:13
this a little heavier on the horns and
3:15
also the bit down the front sort of like
3:16
that chest area again this is just to
3:18
add a slight different tone to those
3:20
details cuz they are kind of I guess
3:22
different materials or textures on the
3:24
dragon now for the wings or the purple
3:26
on the wings as well as the spines I'm
3:27
going to be using blue violet for this
3:29
I'm just going to base coat it going
3:30
have to do a couple of coats cuz this is
3:31
going over black but because I'm using
3:33
Blue Violet from AK that's got a lot of
3:34
pigment in it it's quite good but
3:36
remember thin the paint down first don't
3:37
use it straight from the pot as we
3:39
discuss in part one of our three part
3:41
series also when base coating this
3:43
whether you do this on the first one or
3:44
even the second layer try and follow The
3:46
Strokes that flow with the wings so the
3:48
membrane kind of is Flowing downwards in
3:50
kind of a vertical kind of effect so if
3:52
you do your stripes or streaks when you
3:54
are actually layering this it kind of
3:56
gives a flow to the wings and looks a
3:58
little bit more uh well realistic also
4:00
do this on some of the horns there's a
4:01
few scattered around I had a look at
4:03
lots of different Arts some of it was
4:04
contradictory but it doesn't really
4:05
matter because you're getting the vibe
4:06
of anxia here so just check some
4:08
reference we got some art here that we
4:10
used there's some purple spines down the
4:12
back on some bits of the wings so just
4:14
use what reference you want to and the
4:16
same for any dragon or any model where
4:17
you're painting have some reference at
4:19
hand I'm also going to do a soft dry
4:20
brush of purple around the feet because
4:22
there's a bit of an orange to purple
4:24
fade in the art so I'm going to try and
4:25
mimic that so first of I'm going to get
4:27
the purple on there and eventually move
4:29
to Orange later on when we get to that
4:31
color now I'm going to get light rust
4:32
for the feet so I'm going to do the same
4:34
thing but I'm going to leave a little
4:35
bit of a gradient where you can see some
4:36
of the purple so I'm going to lightly
4:37
dry this over the feet and I'm also
4:39
going to use this on some of the spine
4:41
fins as well again following the flow of
4:43
the fin now I have a whole bunch of
4:45
areas now base coated we've only got a
4:46
minimal amount of colors here we've got
4:48
black some dark Grays some purples and
4:49
some oranges but I'm now going to coat
4:51
all over with some wash I'm going to use
4:53
black knight from AK I like the Deep
4:54
shade it's got a nice mattin finish to
4:56
it as well but what you will need to do
4:57
cuz it is a large model is when you
4:59
start applying this wash you might want
5:00
to get some water dip it in and then
5:02
just put that on some of the raised
5:03
areas and that will help the flow go
5:05
into the cracks a bit more but as I've
5:07
said before in the previous videos do a
5:09
little bit of washat make sure it's not
5:10
pulling too much in the wrong places so
5:12
this is a time where you could normally
5:14
leave your model to dry in its own time
5:16
but you might want to check over because
5:17
it's quite a large model especially if
5:18
you're doing any kind of dragon or
5:19
Monster so just go on wash watch now you
5:22
can use medium when you are thinning it
5:24
down I just prefer water as it's easy
5:25
accessible and does the job but if you
5:27
want it really thin down then I would
5:28
recommend using some medium next we're
5:30
going to tide it up the purple and
5:31
orange details back up applying it in a
5:33
streaky method like we did with the base
5:34
coats this works for things like the
5:36
wings and spines and it really looks
5:37
like stretch skin as well so we're just
5:39
going to relayer those areas so both the
5:41
purple we're just going to tiey that
5:42
back up and the same for the orange as
5:44
well next I'm going to mix in some pale
5:45
sand for the Highlight on the purple I
5:47
was actually struggling to find a decent
5:49
purple tone so in the end I just went
5:51
I'm just going to get a bone mix it in
5:53
because it is a bony kind of texture for
5:54
the horns anyway and also looks quite
5:56
nice on the wings then for the orange
5:58
fins we're just going to highlight up
5:59
with light orange again very similar to
6:01
the purple stage we just done for the
6:03
carpes around the breast and also the
6:05
horns I'm just going to use some reddish
6:07
gray again again we use that as a dry
6:08
brush but now I'm going to start doing
6:09
like some streaky motions just on the
6:11
front and around the horns this is kind
6:13
of like an edge highlight but it's also
6:14
to add some texture there as well so it
6:16
looks like a carpas or like a bone or a
6:18
horn again take your time if you making
6:20
mistakes just use some of the previous
6:22
colors from before so those dark Grays
6:24
and blacks to add some texture to the
6:26
skin I'm going to get some neutral gray
6:28
and then start adding some NX and
6:29
scratches in there as well as well as
6:30
picking out some highlights like on the
6:31
knees and stuff again this is to add
6:33
some more texture cuz it is quite soft
6:36
is quite flat but that's fine because I
6:38
love this kind of stuff cuz you can make
6:40
it your own you can add some extra
6:41
details in there make it look a bit more
6:42
scarred or battered then I'm just going
6:44
to get some black Legion for the claws
6:46
there's a few select ones on like the
6:47
chest and elbows and stuff like that so
6:49
just check over which ones feel right to
6:50
paint and just paint them straight over
6:52
with black Legion from the part I'm not
6:53
even going to thin it down I just want a
6:55
nice solid black and also when using a
6:57
black cuz we've got lots of dark grays
6:59
charcoal kind of colors so having a nice
7:02
jet black here with the black Legion
7:04
will help those things feel like
7:06
different textures as well cuz there is
7:07
a danger things can look like they're
7:08
made from the same stuff we'll come to
7:10
that with the purple wings and the horns
7:11
in a bit as well cuz they are
7:12
highlighted the same they're both two
7:14
different ones like a leathery skin and
7:16
one's like a horn so we need to try and
7:17
find a way to differentiate those two
7:20
together as well but yeah just going to
7:22
slap black over those claws now I was
7:24
just talking about the purple wings and
7:25
the horns looking very similar so what
7:26
we're going to do is we're going to
7:27
glaze over the purple membrane on the
7:29
wings and for this I'm going to use some
7:31
amethyst blue and a little bit of blue
7:33
violet so the blue violet was our base
7:34
coat just going to add a little bit of a
7:35
darker tone in there which is the
7:37
amethis blue mix them together and
7:38
really thin them down to a glazed
7:40
consistency it's a bit like a wash all
7:42
you're doing is loan up your brush but
7:43
not too heavily cuz we're not trying to
7:44
do a shade or a contrast here and then
7:46
just neatly layer over that area just to
7:48
knock back those highlights and maybe
7:50
dark or lighten up or darken up
7:52
depending on how you want to do it some
7:53
of the deeper recesses as well and what
7:55
this is going to do is give a slight
7:56
different finish to the wing membrane in
7:58
comparison to to the horns so they will
8:00
look like two different textures I'm
8:02
also going to knock back the orange a
8:03
little bit as well with a glaze cuz
8:04
those highlights are a bit light so I'm
8:06
just going to thin down some light rust
8:08
and then apply that over the fins as
8:09
well I'm also going to add this to the
8:11
frontal car paste now in a lot of the
8:12
art it's a bit more orangey but I just
8:14
wanted to have it a bit more bone with a
8:16
Nuance of orange uh so it's up to you
8:19
how you want to do that but that's what
8:20
I'm going for just a little glaze now
8:22
I'm going to pick out the eyes with some
8:24
volcanic yellow normally if you're using
8:26
yellow straight of black you probably
8:27
want to start with like a like darker
8:29
more pigment heavy yellow but actually
8:31
it's only a small area and I'm only
8:33
doing a little dot here and there so you
8:35
don't really need to do lots and lots of
8:36
layers I'll probably do two coats on the
8:38
eyes of volcanic yellow it's a good
8:40
yellow it will cover well then just get
8:42
some black for the pupils just drop that
8:44
in there try not to make them look too
8:46
like comical so trying to have the eyes
8:49
facing the right way it's up to you if
8:50
you want a comical Dragon it's your
8:51
choice and then you can use white hair
8:54
to add like a little bit of like light
8:55
to the people I've got some pale sand at
8:57
hands so I'm just going to use that
8:58
instead it looks light it works now in
9:01
this video I've talked a little bit
9:02
about separating textures making look
9:04
different from each other some ways of
9:06
doing that is glazing like I've done
9:08
with the wings uh another weight and
9:10
also dry brushing as well adds the
9:11
texture so for like the horns or like
9:13
the body you have you stippling on the
9:14
body have use dry brushes on the horns
9:16
for the claws I could highlight them all
9:18
up with like dark Grays but then that
9:19
will start to look a little bit like the
9:21
Skin So a really quick and simple way of
9:23
trying to get a whole different texture
9:25
is just to gloss them and that's what
9:26
I'm going to do with all the claws is
9:28
just gloss them they are just like
9:29
really super shiny black claws cuz like
9:32
a lot of bone and claws are quite shiny
9:34
anyway cuz of the kiteen chitin kiteen
9:38
kiteen drop it in the comments the
9:39
correct terminology whatever it's made
9:40
of is quite shiny and it's a really
9:42
quick simple way so flat black gloss
9:44
varnish done you don't have to put any
9:46
more effort in than that and light does
9:48
all the work for you oh and don't forget
9:49
to drop a little into the eyes too cuz
9:51
we want those eyeballs looking nice and
9:52
shiny and then all we're going to do now
9:54
is base the mini now if you want to know
9:56
how to basee the miniature we did cover
9:57
that in part two so so check that video
9:59
out if you want to know how to base it
10:01
using the same colors that we've done
10:03
well there we are we've had quite the
10:04
ride with these series of videos I've
10:06
really enjoyed doing it going over some
10:08
Basics intermediate stuff and then
10:09
putting it all together in this video so
10:10
hopefully you found some good tidbits in
10:12
here as well to to help you with your
10:14
painting Journey initially when I first
10:16
saw these models I thought they were
10:17
quite simple and that's not a negative
10:20
there's they're quite large models and
10:21
they're quite simplistic in their design
10:23
but actually I really enjoyed that side
10:25
of it because you can add details you
10:26
can add the Chip And you can add
10:28
sometimes models can be over complicated
10:30
and I really like these because I can
10:32
add what I want to I've got more surface
10:33
area to play around with so if you don't
10:35
have any of these do check out getting
10:37
some now if you do know someone with a
10:38
3D printer you can probably ask them to
10:39
print some stuff out they are great fun
10:41
to paint and thank you to Blizzard
10:43
obviously for uh giving us the
10:45
opportunity to do these three videos The
10:46
Game's great so check out the game as
10:48
well I know we obviously talked about
10:49
that near the start but it is a cool
10:51
game um and it's Warcraft who doesn't
10:53
like Warcraft thank you very much for
10:55
watching this video uh do check out uh
10:57
like I said our other painting videos
10:59
the beginner steps if you're new to the
11:00
Hobby and also our intermediate level
11:02
stuff if you want to add some extra
11:03
details to your models and if you know
11:05
all that stuff anyway hope you enjoyed
11:07
the video just painting a dragon till
11:09
our next time we shall see you soon
11:11
farewell I can't think of anything
11:13
dragony to say to sign out so I'm just
11:15
going to go
11:16
Kaa
11:18
Kaa
#Visual Art & Design
#Painting