Up next in 10


Get your free Warcraft Rumble STLs here: https://warcraftrumble.blizzard.com/en-us/collection
Download Warcraft RUmble for Andriod and IOS:
Android: https://play.google.com/store/apps/details?id=com.blizzard.arc
iOS: https://apps.apple.com/us/app/warcraft-rumble/id1600575058
Where do you start when it comes to painting miniatures? What paints should you use, how much should you thin them? What's the difference between basecoating and undercoating? In Part 1 of a 3 part series we aim to cover all the basic steps to get you started painting miniatures and then take them to the next steps!
Join our Patreon: https://patreon.com/thepaintingphase
Merch: https://thepaintingphase.creator-spring.com
Streaming: https://www.twitch.tv/thepaintingphase01
Help Support the channel with our affiliate links:
UK & EU: https://affiliates.waylandgames.co.uk/idevaffiliate.php?id=1214
UK: https://elementgames.co.uk/?d=10835
EUROPE: https://taschengelddieb.de/?affiliate=tpp
US: use code paintingphase to get 10% off at https://www.goblinshut.com/
We Print Miniatures: https://weprintminiatures.com/thepaintingphase
THEPAINTINGPHASE for 10% off
Show More Show Less View Video Transcript
0:00
this video is sponsored by Warcraft
0:02
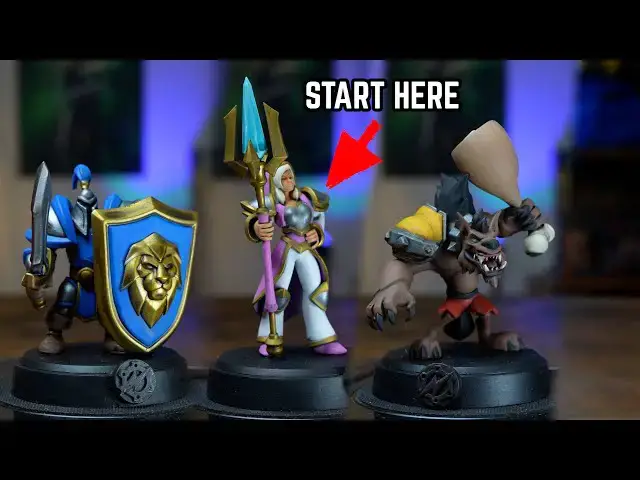
Rumble painting miniatures is one of the
0:04
most relaxing and chilled parts of my
0:06
day where I can just unwind settle down
0:08
and paint some badass from a far off
0:10
realm however for a lot of beginners
0:12
getting toing and even people that have
0:13
been doing it for a long long time it
0:14
can be quite daunting offputting and
0:16
stressful which is not great you don't
0:18
want stressful When painting now there's
0:20
plenty of talented painters out there
0:22
that are awesome and make us all look
0:24
bad you know where you are if you're
0:25
watching this if you're watching this
0:26
why don't know why um and there's a lot
0:28
of people out there as well that will
0:30
give you lots of feedback which is good
0:32
sometimes contradictory hopefully I'm
0:33
not going to do that today and I give
0:35
you some important tips in the process
0:38
and beginning steps of painting
0:40
miniatures uh this is not a list of you
0:43
must do this more of a guideline because
0:45
this is coming from a man who's been
0:46
painting for years and has made every
0:48
mistake known to painting now to
0:50
Showcase these points and topics we are
0:52
going to be painting up a bunch of
0:53
figures sent To Us by blizzard based on
0:55
the warcraft Rumble figures they're
0:56
super cute but they're really good for
0:58
teaching all these basic techniques
1:00
so settle in watch me paint some figures
1:02
but before we do that let's hear a
1:04
little more from our
1:06
sponsors Warcraft Rumble is an
1:08
action-packed strategy game that invites
1:10
players to assemble armies with their
1:12
favorite characters from the warcraft
1:13
universe and battle it out in unique
1:15
missions designed to test their tactical
1:17
widths it's easy to learn but hard to
1:20
master Warcraft rumble's frantic
1:22
strategy action is immediately gripping
1:24
with depth that rewards experimentation
1:27
build forces of minis starting with
1:28
leaders like Arch Jana proudmore with a
1:31
huge single player experience with over
1:33
70 missions as well as weekly and
1:35
monthly challenges in the form of
1:37
multiart dungeons there's so much to
1:39
keep you busy you can also play with
1:41
your friends in competitive or
1:42
cooperative play and join guilds to link
1:45
up with fellow commanders there are over
1:47
60 Heroes villains and monsters from the
1:49
warcraft Universe to choose from and
1:51
these are lovingly sculpted digital
1:53
characters that have been rendered as
1:54
tabletop style Min and brought to life
1:56
for you to collect Warcraft Rumble is
1:58
full of authentic Warcraft Vibes created
2:01
by the team with deep roots in the
2:02
franchise everywhere you look you'll
2:04
encounter many references inspired by
2:06
beloved characters locations and events
2:09
from the warcraft PC strategy games and
2:11
the World of Warcraft as you can see
2:13
we've already got a hold of our Warcraft
2:15
Rumble characters courtesy of weprint
2:17
Miniatures so what are you waiting for
2:19
click the link in the description and
2:21
get downloaded right back to painting
2:24
and talking about painting techniques
2:27
now let's look at our first part of the
2:28
miniature painting process which is I
2:30
would probably argue quite important
2:32
which is under coating it's also known
2:33
as priming and spray coating it's the
2:37
same thing you might hear lots of
2:38
different terminologies but this is I
2:40
would say quite key because it means you
2:41
get some color onto your Miniatures um
2:44
usually a solvent spray and that then
2:46
gives the rest of the paint something to
2:47
stick to without it it could rub off or
2:50
flake off so it is key for most
2:53
Miniatures to get an undercoat on there
2:56
now the great thing about undercoating
2:57
figures is if you pick a color this can
2:59
speed up your painting process so if
3:01
you've got a figure that's in armor um
3:03
you can spray silver or gold if you've
3:06
got a figure that's mainly red you can
3:07
spray it red there's plenty of painting
3:09
companies out there that Supply a vast
3:12
array of colors whether that's AK color
3:15
Forge Army painter Citadel uh they have
3:17
a good selection um and you can pick
3:19
from that and that will speed along the
3:21
process like I said it's it's about
3:23
picking the majority of the color on
3:24
your model and then getting that on and
3:26
then you can just pick out the other
3:28
details as time goes on now sometimes
3:30
you might not be flush with cash or you
3:32
might only have one spray space for one
3:35
spray paint or let alone the cost for
3:36
one spray paint now I used to only have
3:39
black and white when I first started in
3:41
the Hobby and that was fine cuz if I was
3:43
doing bright colors I'd spray them white
3:44
if I was doing dark colors I'd spray
3:45
them black if you can only get one I
3:47
would suggest getting gray a nice
3:49
standard sort of mid gray um there's
3:52
plenty of companies that do different
3:54
tones of gray but mechanic standard Gray
3:56
from a citadel is the go-to so anything
3:57
that looks similar to that because you
4:00
can go dark quite quickly with it you
4:02
can go light quite quickly with it if
4:03
you have to paint yellow on a model and
4:06
you're a black spray it's a bit harder
4:07
if you want to paint black on a white
4:09
and the co model it's a bit harder but
4:11
as you can see we've we sprayed a
4:13
multitude of figures here we got some
4:14
that sprayed gray silver black you know
4:17
there's a whole multitude of colors if
4:19
you can get hold of other colors it just
4:21
helps cuz it's about speed sometimes CU
4:23
we don't have millions of hours in the
4:25
day to sit there undercoating by hand
4:27
speaking of which undercoating by hand
4:29
that can be done uh it's a little bit
4:31
more dubious and we're going to go into
4:33
the base coating bit a bit more later on
4:36
but if you don't have an undercoat or
4:38
you don't have access to any kind of
4:39
sprays whether you're too young for it
4:41
or you just can't afford it getting a
4:43
base paint and applying that over in a
4:45
couple of thing coats will get you there
4:47
as well it's probably not as good it
4:49
will rub off as time goes on but it
4:52
definitely gets the paint on the model
4:53
also a word of warning when it comes to
4:54
spraying Miniatures if it's too cold or
4:57
too hot it can affect the end result so
4:59
try and find a Tim of day that's like a
5:01
nice warmth it's not too hot not too
5:04
cold um unfortunately there'll be a few
5:06
of you maybe watching this video now in
5:09
really hot environments or really
5:10
freezing cold environments that don't
5:11
have that so in that case maybe base K
5:14
by hand or even getting hold of an
5:16
airbrush um airbrushing is something
5:18
we're going to talk about in another
5:19
video but airbrushing is quite useful
5:22
cuz you can do it inside so now we look
5:23
to undercoating priming spraying
5:26
whatever you want to call it we're now
5:27
going to move on to I would say a really
5:29
good foundation of any painting and
5:30
that's base coating base coating is this
5:33
part of the painting where you get to
5:34
block out all those colors get an idea
5:36
of if the colors are going to work
5:37
together um and then you're ready to
5:39
move on to the next steps without base
5:41
coating it just makes it very hard to do
5:43
the next steps like shading and
5:44
highlighting now there are paints that
5:46
are specifically designed for base
5:48
coating AK have an intense range which
5:50
got a lot of pigment in it uh Citadel
5:52
also have their base range as well and
5:54
there's plenty of other companies out
5:55
there that have similar variants of Bas
5:57
paints uh Bas paints just have more
5:59
pigment in so they cover better they're
6:01
more opaque in their coverage um however
6:04
I would recommend regardless of how
6:06
designed the paint pot is or the style
6:09
of paint you still need to thin it down
6:11
you still need to do multiple thin coats
6:12
and the reason for doing that is if you
6:14
just use it straight from the part it'll
6:16
be really thick it'll be really goopy it
6:17
clug up your detail and you get loads of
6:19
brush strokes and often brush hairs in
6:22
the miniature and it just looks really
6:24
unsightly when you come to doing any
6:26
kind of Base coating layering Etc doing
6:28
multiple thing coat
6:29
is better because you get smoother
6:32
coverage it doesn't clo up the detail as
6:34
much it might seem like a bit longwinded
6:35
like when I'm doing several coats but
6:37
actually it just has a better finish so
6:39
that's something to bear in mind when
6:40
you're doing base coating now when it
6:42
comes to thinning the paints down
6:43
themselves uh there is a bit of a trick
6:46
um there is no sort of like hard and
6:48
fast rule when it comes to thinning
6:50
paints down cuz sometimes you might use
6:51
a layer paint to base coat CU it's the
6:53
right tone sometimes you might use a
6:55
base coat to highlight because it's the
6:57
right kind of tone for the most part
6:59
there's plenty of Base coats that cover
7:01
most the colors you need but like I said
7:03
they are thick so when you're thinning
7:04
them onto the palette sometimes you have
7:06
to judge it by feel um some like I say
7:09
some Bas paints are just thinner than
7:11
others that is just the way every paint
7:12
every color is different and you will as
7:15
time goes on as a painter you will get
7:17
used to this um I could sit forever
7:20
showing you a palette of every color
7:22
possible but then there's new colors
7:23
coming out the time and formulations get
7:26
reformulated so the best hard and fast
7:28
rule is just judge it by feel if it's if
7:31
you start to see usually if you got like
7:32
a white pette pad or like white palette
7:34
paper if you start to see more of that
7:36
white shown through it's probably too
7:37
thin but that's not necessarily a bad
7:40
thing it's better to have too thin a
7:42
coat than too thick a coat cuz you can
7:44
always add a second or a third um and I
7:46
found like with undercoating like bright
7:48
colors like pink over black um that
7:52
needs more coats um painting yellow over
7:55
black these are hell of a lot more coats
7:57
and often goes green if you're not
7:58
careful which is why we referred to in
8:01
the spray coat section maybe using gray
8:03
and there's less coats needed so
8:05
sometimes getting that tone can help so
8:07
the undercoat will help influence the
8:10
base paint inside of things as well um
8:12
but yeah thinning down takes a bit of
8:14
time rule of thumb that I use two parts
8:17
water one part paint uh that's nice and
8:19
thin and sometimes you can always add a
8:21
little bit more paint if it seems too
8:22
thin but just take your time and maybe
8:25
try on the base first before you apply
8:27
on the actual model that's always a top
8:28
tip as well just try it on your base
8:30
wipe a little bit off on your thumb as
8:32
long as you're not allergic to it and
8:33
then start applying onto the model now
8:35
one thing to remember about base coating
8:36
is it's the initial step so if you're
8:38
finding it's quite messy you've got like
8:40
some red on a black belt or you've got
8:43
like some armor color on the skin don't
8:46
worry cuz you can tidy up this is the
8:48
part where you can afford to be messy
8:50
it's what we call the Ugly stage um and
8:52
there are always sometimes later on that
8:54
you you might find the ugly stage you
8:55
might get multiple ugly stages it's got
8:57
to get worse before it gets better
8:59
accept that don't worry about it don't
9:02
look at whatever someone else has put on
9:04
the internet and gone look at this
9:05
amazing model at base coating chances
9:06
are they probably spent 14 hours base
9:08
cutting that make it look super neat
9:10
don't worry about it just take your time
9:12
if you make mistakes you can tidy up at
9:14
a later Point um and except like I said
9:18
it's going to look ugly for a time it's
9:20
fine as alluded to in the spray coat
9:22
section um you can base coat by
9:25
undercoat or prime by hand um again that
9:27
is just following the same principles as
9:29
we just talked about with the base
9:30
coating still apply as a thin coat some
9:33
paints like the AK ones I did find that
9:35
I could use them straight from the part
9:36
and they weren't too thick and goopy
9:37
other times I did have to thin them
9:39
again that's through experience um and
9:41
getting to getting familiar with the
9:43
range of paints that you got at hand so
9:45
I think that's just the key thing get
9:47
used to what you've got and then slowly
9:49
add paint in as time goes on another
9:51
thing you'll see when I'm painting as
9:53
well with the footage that's going on
9:55
the screen now is sometimes you might
9:57
want to start with the lowest color and
9:59
then build up so if we take the huntress
10:02
uh who's riding her amazing looking
10:04
Panther um I'll start with the skin
10:05
first cuz that's the lowest texture then
10:07
I'll move up to the purple armor get
10:09
that old base coat to do a couple of
10:10
coats of that then I'll pick the actual
10:12
silver trim so a good tip and trick is
10:17
to start the lower sections be messy and
10:19
then you can neaten up as you pick up
10:21
those race sections and just take your
10:23
time and inevitably you'll probably find
10:25
you get some purple on the skin again
10:26
you have to tighten the back up that is
10:27
just the war painting sometimes if
10:29
you're going fast or you're a bit messy
10:31
that will happen don't worry about it so
10:33
you got your Miniatures undercoated
10:35
they've now got some base coats on we
10:37
want to get some definition on those and
10:38
for that there are Shades there are
10:40
plenty of companies that do a variety of
10:42
different shades Citadel have Shades AK
10:45
have deep Shades there's so many things
10:47
you can even thin down paint so much
10:49
that you can just run them into recesses
10:51
what do Shades do well what they do is
10:52
they go into the recesses they kind of
10:55
add shadows and darkness to your
10:57
Miniatures um which helps Punch Out
11:00
definitions so then you're seeing the
11:01
raised areas of the model you're seeing
11:02
like all the details uh in those nooks
11:05
and crannies and shades are just a
11:07
really quick way and a cheaty way of
11:09
getting all those things picked out with
11:11
very minimal effort now there's plenty
11:13
of people out there that want to sit and
11:15
get like a bit of black really thin it
11:17
down and then run into the cracks of
11:19
space marine armor or a footman from the
11:23
alliance you know you can run around all
11:24
the recesses of that if you want to and
11:26
get all those recesses defined by hand
11:29
or you can just apply a shade all over
11:31
there's multiple ways of doing Shades
11:32
there's an all over shade there's
11:34
picking out just sections so that is
11:36
like an all over on the armor but just
11:38
picking out the skin after or whatever
11:41
now they are quite watery it is quite
11:43
misleading uh when you first looking
11:45
like what are these These are really
11:46
watered down paints don't worry because
11:48
that's the that's what they're designed
11:49
for they're designed to just run across
11:51
the model and then settle in the
11:52
recesses now word of warning when this
11:55
happens two things can happen they can
11:57
just run straight in the recesses but
11:59
then start to pull so you got to be
12:01
mindful when they start to pull you
12:02
might want to get a brush that's dry and
12:04
just soak off some of that recess it's
12:05
what I call washat just got to keep an
12:07
eye on the model and make sure you're
12:08
not getting some horrible puddles as you
12:10
can potentially see on the shield here
12:12
for the footman there's a bit of a
12:14
dribble underneath the Line Design on
12:16
the shield I've accepted that I'll tid
12:17
it up later when I come to like layering
12:19
and doing some tidying up that's fine
12:21
that will happen again ugly stage we
12:24
mentioned this another thing to bear in
12:25
mind as well is Shades can sometimes dry
12:27
blotchy on surface areas away if they're
12:29
not thin enough or you want to thin them
12:32
down they'll go in the cracks more but
12:34
sometimes if they're a little bit
12:35
thicker they will get a bit blotchy on
12:37
surface areas like large surface areas
12:39
so not great for tanks um great for
12:41
things with lots of detail the other
12:43
thing you'll find with Shades uh certain
12:45
companies have shiny ones and certain
12:47
companies have super matte ones
12:49
sometimes if you're really lucky you get
12:51
somewhere in the middle like a satin
12:53
tone Citadel uh their current range of
12:56
Shades dry quite shiny um which is great
12:59
for armor it's great for leather if you
13:01
want shiny leather and great for like
13:03
oily skin or sweaty skin and stuff like
13:05
that not so good for cloth and Bone if
13:09
you want the bone to be quite dry um so
13:12
sometimes you have to pick the shade for
13:14
the task you wanted to do AK have deep
13:16
Shades I really like deep Shades they
13:18
kind of give a nice blend as well as
13:20
they dry they're a little bit more
13:21
viscous in their uh their in their
13:23
makeup so they take a bit longer to dry
13:25
but they they give a nice blend but they
13:27
dry super matte perfect for cloth and
13:31
hair and bone not so great if you want
13:33
shiny armor so you might want to pick
13:35
and choose what shade you use for
13:37
certain elements uh and that's fine you
13:39
know that's why you have so many
13:41
different companies with so many
13:41
different ranges of paint um and with
13:43
the blotchy thing you can avoid that um
13:46
by thinning the paint down more you can
13:48
use water to thin down shades if you use
13:50
too much water then it breaks the shade
13:52
and you'll find you get weird sort of
13:54
like white crust in the recesses so some
13:56
companies Supply you with medium AK
13:58
apply their deep shades with a deep
14:00
shade medium if you thin it down with
14:01
that it's just paint without pigment so
14:04
it won't break the paint you won't get
14:05
the cross but you can still thin it down
14:07
if you use water 50/50 you're fine 6040
14:11
water versus paint you're fine any more
14:13
on that then there's a danger of it's
14:14
starting to get a bit crusty in the
14:16
cracks so that's when you want to start
14:17
using the medium for that and that's the
14:19
same for contrasts which we're going to
14:20
move on to in a moment so contrasts this
14:23
step uh has often been seen as its own
14:26
way of painting miniatures um I see it
14:29
as a extra tool for the toolbox your
14:31
painting toolbox um you can paint
14:33
Miniatures from scratch just using
14:35
nothing but contrasts or Express paints
14:38
or speed paints there's a few companies
14:40
out there that do their own versions of
14:41
them each with their own pros and cons
14:45
the concept of these these these paints
14:47
these contrast speed paints Express
14:48
paints is they do multitude of things um
14:51
when you apply over the model it's going
14:53
to base coat the area it's going to
14:56
shade the area and as it dries it pulls
14:59
away from the edges and kind of
15:00
highlights the area great he you know
15:03
you just apply a color all over model
15:05
and your figure's finished yes and no
15:08
you will need to thin them down you will
15:09
need to be mindful about pooling um
15:12
blotchy areas and stuff like that so
15:14
heavy textured models that are like fur
15:17
or chain mail or dragon scales they're
15:21
perfect for contrast cuz they got lots
15:22
of texture for it to do its effects
15:25
large flat areas struggle a little bit
15:27
more you need to really work on to
15:29
applying those contrasts um there's lots
15:31
of tones and colors this is why I say
15:32
it's good to add to your toolbox of
15:34
painting it's not necessarily a whole
15:36
painting process in its own right um so
15:39
when you're using contrasts um maybe do
15:42
it for the skin all over on a Model now
15:44
if you take for example the model I'm
15:45
painting here I'm going to use all
15:46
contrast on this particular model um I'm
15:48
going to paint all over the skin first
15:50
of all with uh a brown tone gorun to fur
15:53
here from Citadel um it is quite blotchy
15:56
on the first coat then I'm going to add
15:57
other colors like the red for the robes
15:59
some blue for the
16:01
trim looks great when you start getting
16:04
highlights on it and you start adding
16:05
other colors to it on its own it can
16:07
certainly because it's large flat areas
16:08
it can look a little bit bitty a little
16:10
bit wishy-washy and a bit blotchy if you
16:13
start adding more of the contrast to the
16:15
surface area it can get quite streaky as
16:17
well but in places if you're quite
16:19
tactical about it you can run into the
16:21
cracks a bit more and then start to get
16:22
a bit of definition um so sometimes once
16:25
I've applied a couple of contrasts like
16:26
on the red robes I might run some more
16:28
into the recesses of the ropes which
16:30
adds a bit more punch and a bit more
16:32
contrast uh that's the other thing to
16:34
bear in mind is you hear a lot of
16:35
terminologies in painting like punch the
16:37
contrast out and use contrast paint so
16:40
there's two terms there's a type of
16:41
paint and also an effect which is like
16:43
getting more punch at your color as well
16:46
as using a weird thin down paint that
16:48
does everything for you apparently Now
16:49
when using contrast it's good to start
16:51
of a light undercoat this really helps
16:53
with like punching out those raised
16:54
areas when it starts to dry and gives
16:56
you a highlight um and also the colors
16:59
work better with bright undercoats cuz
17:01
they're more Punchy you can use them on
17:02
other ones but they work better with
17:05
bright undercoats you will see um it
17:08
looks quite nice over Silvers as well if
17:10
you want to like a nice cheeky metallic
17:12
effect you can just get a contrast of
17:14
your choice and apply it over a silver
17:15
undercoat or even a gold undercoat and
17:18
it will look like a metallic because the
17:19
metallic elements will show through CU
17:21
it is quite
17:22
translucent so you will get a lot of
17:24
metallic element shown through so on the
17:26
plane of this safe pilot um you will see
17:29
it just gives it a nice copper effect uh
17:32
which is really really good uh and that
17:33
is very minimal effort maximum effect
17:36
now when doing any kind of contrasts
17:39
expect you're going to get one contrast
17:42
paint onto another section by accident
17:45
you know when we do Bas coating we're
17:46
talking about base coating you apply
17:48
Color on it's going to be a bit messy
17:49
it's got the ugly stage it's great you
17:51
can always tie it back up with those Bas
17:53
paints they're designed to be painted
17:54
over they're pigment heavy contrast are
17:56
quite translucent so if you make stage
17:58
you have to repaint that section with
18:01
your undercoat uh and usually there's a
18:03
color that matches that so we use
18:05
wraithbone as the undercoat spray
18:06
there's a pot of wraithbone paint which
18:08
you can then paint over that area but
18:11
then it gets a bit weird because it gets
18:12
streaky it's different to the undercoat
18:14
it's not the same so once you start
18:16
making mistakes with contrasts it gets a
18:18
bit harder to recover it and to fix it
18:21
which is why I don't think contrasts are
18:25
super beginner friendly they're great is
18:26
an extra tool for like skin or an effect
18:28
like bone but relying on its paint and
18:31
tie model it makes it hard especially
18:33
when you got multiple colors as you can
18:35
see on the model here where it's got
18:37
Reds and blues and Browns and blacks
18:39
once you start getting one of those
18:40
colors on L area it's so hard to recover
18:43
so bear that in mind when using
18:45
contrasts so the last section of our
18:47
beginner guide is going to be touching
18:48
on layering now layering can sometimes
18:51
be seen as an advanced technique I don't
18:52
necessarily think so I mean if you're
18:54
going for Blends and like effects then
18:56
maybe you could argue it is for the for
18:59
some of the basics it's actually just a
19:00
basic technique of like making a color a
19:02
bit lighter I have multiple ways of
19:05
using layering sometimes after I've base
19:07
coat the model and I've shaded the model
19:09
I then get that base coat and layer back
19:11
over the top only the raised areas so
19:13
you still got some definition those
19:14
recesses of the shade so you're still
19:16
seeing the shade in the cracks another
19:18
way if you're starting from a black
19:19
undercoat for instance and you want
19:21
yellow you might start off with a dark
19:23
yellow and then go to a midtone yellow
19:25
and then go to a really light yellow but
19:26
you're painting those coats entirely
19:29
over the model in all the cracks in all
19:31
the raised areas everything you just
19:32
completely tin in the entire model with
19:35
these different steps of yellows to
19:37
eventually build up to a bright yellow
19:39
that is a nice way of layering a model
19:42
because you could go with a light yellow
19:44
and spend 14 days base coating 140 coats
19:48
over that to try and get that bright
19:49
yellow which won't work because it would
19:51
just go green and look really weird and
19:53
blotchy so layering is designed really
19:56
as a tide up stage um and also the first
19:59
step before you start doing any
20:00
highlighting so if you've so with
20:02
layering if you want to punch out the
20:04
colors a little bit more H let's take uh
20:07
Jana here for instance we've got some
20:08
white on her and we've got some pink on
20:10
her but we've coated all over those
20:12
sections with a dark shade so I'm going
20:14
to do is just get some white and I'm
20:16
just going to tied up the white areas
20:18
and I get some pink and tied up the pink
20:20
areas and that is just using the same
20:22
col ey base coat with it's just again a
20:24
thing coat and then just picking out
20:25
those raised areas but I'm not going
20:27
into the cracks I'm leaving that
20:28
slightly darker color in the cracks to
20:30
give some definition so it's not
20:31
highlighting as such it's just building
20:34
up another layer that's all you're doing
20:36
you don't have to be super skilled to do
20:37
this uh there's no like fine tips on a
20:40
brush and like steadying the hands and
20:41
holding your breath and years of muscle
20:43
memory required for this is just tidying
20:46
back up and weirdly when you are
20:49
layering and doing the ti up stage you
20:50
can get a nice sort of gradient from
20:54
just two colors which is a base coat and
20:56
a shade and then reapply the base Co
20:58
coat you get three tones from two colors
21:00
which is quite good now you'll find and
21:02
see that a lot of expert painters will
21:04
start with a dark tone and build up
21:06
multiple layers up to a really light
21:08
tone so let's take pink for example they
21:10
might start with a really really dark
21:11
magenta and build their way up to a
21:13
mid-tone pink all the way to a really
21:14
really bright fuchsia pink we're not
21:17
going to do that uh that that that is
21:19
definitely high-end painting and that's
21:21
something we can look at in another
21:23
video but with this one back to the ti
21:25
up stage you paint the pink your wash
21:28
the pink you tidy back up the pink nice
21:30
and easy and then if you do fancy it you
21:33
can then move on to the highlighting
21:35
after to pick out folds in the cloth but
21:37
yeah keep it simple uh don't over
21:39
complicate it just use that one color to
21:41
reti it back up that is the point and
21:43
it's the same with the skin as you can
21:44
see on Jana you know we we base coated
21:47
the skin we shaded the skin we're just
21:48
using the same color just to pick out
21:50
the the key parts of a face like the
21:52
cheeks the nose the brow the fingers the
21:54
knuckles Etc it just adds a bit more
21:57
punch now when I refer to layer paints
21:59
as a technique there's also a range of
22:01
paints again Citadel have their range of
22:03
paints AK have a range of paints as well
22:06
their third gen stuff is really really
22:07
good for layering you don't always have
22:09
to use layer paints to layer you can use
22:12
them to shade you can use them to base
22:14
coat it's the same with base coats you
22:16
can use them to highlight I often pick
22:18
the color that works for me so sometimes
22:22
when I'm highlighting things or I'm
22:23
picking a tone I really like that color
22:26
and I will use that color as a base coat
22:29
or I I just need more coats of it that's
22:30
all um or slightly darker color
22:33
underneath before I use that um which
22:35
then goes in the AR but that's laring
22:37
peachy yes and no um so don't always
22:40
feel that I have to use this color
22:42
because it says bass or Intense or
22:44
whatever on the tub use a color that is
22:46
what you want to use for your skin or
22:49
your armor or your sword or whatever um
22:53
it just means youd need to do a couple
22:54
more layers or less depending on the
22:56
type of paint you're using there we are
22:58
with the layering discust we're now at
22:59
the end of our painting Journey for
23:02
beginners so hopefully there's been a
23:04
few things in here that's helped you out
23:05
whether you're a beginner getting back
23:06
into painting or just top tips for
23:08
anyone that's just you know unsure
23:10
sometimes about what all these things
23:11
mean because sometimes it can be quite
23:13
bewildering with all these different
23:14
terminologies and jargon that gets
23:16
thrown around um this is part one of a
23:18
three-part series part two will be in
23:20
coming soon and that is going to focus
23:22
on more intermediate to Advanced
23:23
Techniques such as highlighting dry
23:25
brushing using an airbrush Etc so do get
23:27
ready to check that out I hope you've
23:29
enjoyed this video as always thank you
23:31
for watching don't forget to hit the
23:32
like And subscribe and of course a
23:34
massive thank you to our patrons without
23:36
this we won't be able to do these videos
23:37
and be in this beautiful backdrop that
23:39
we're in now as well so thank you very
23:40
much and of course thank you to Blizzard
23:43
for sponsoring this video and of course
23:45
don't forget if you want to do some
23:47
joyful chaos check out Warcraft Rumble
23:51
till the next time see you later bye-bye
23:53
farewell and you
#Online Media