Up next in 10


Get your free Warcraft Rumble STLs here: https://warcraftrumble.blizzard.com/en-us/collection
Download Warcraft Rumble for Andriod and IOS: https://warcraftrumble.onelink.me/7POk/5qsnyuf4
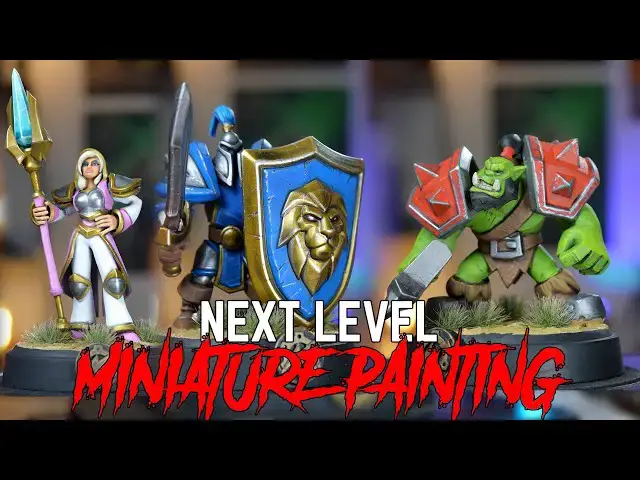
You've applied your basecoats, added a wash, maybe tidied up, but how do you take your miniature to the next level?! Look no further, Peachy takes you through loads of tips and tricks to improve your miniature painting. Highlighting, reverse highlighting, we've got it all covered!
Join our Patreon: https://patreon.com/thepaintingphase
Merch: https://thepaintingphase.creator-spring.com
Streaming: https://www.twitch.tv/thepaintingphase01
Help Support the channel with our affiliate links:
UK & EU: https://affiliates.waylandgames.co.uk/idevaffiliate.php?id=1214
UK: https://elementgames.co.uk/?d=10835
EUROPE: https://taschengelddieb.de/?affiliate=tpp
US: use code paintingphase to get 10% off at https://www.goblinshut.com/
We Print Miniatures: https://weprintminiatures.com/thepaintingphase
THEPAINTINGPHASE for 10% off
Follow us:
https://www.instagram.com/thepaintingphase/
Show More Show Less View Video Transcript
0:00
this video is sponsored by Warcraft
0:02
Rumble so you've nailed the basics you
0:05
get into grips of miniature painting but
0:07
what's next how do you take your
0:09
lovingly painted models to the next
0:10
level well luckily here at the painting
0:13
phase we've got you covered we are now
0:15
going to take you on a journey to teach
0:17
those mystical Arts of the experts
0:20
however before we reveal our secrets
0:22
let's hear a little more from our
0:24
sponsors hit it
0:27
P Warcraft Rumble is an action-packed
0:30
strategy game that invites players to
0:31
assemble armies with their favorite
0:33
characters from the warcraft universe
0:35
and battle it out in unique missions
0:37
designed to test their tactical wits
0:39
it's easy to learn but hard to master
0:41
Warcraft rumble's frantic strategy
0:43
action is immediately gripping with
0:45
depth that rewards experimentation build
0:48
forces of minis starting with leaders
0:50
like archade Jana proudmore with a huge
0:53
single player experience with over 70
0:54
missions as well as weekly and monthly
0:57
challenges in the form of multi-art
0:59
dungeons there's so much to keep you
1:00
busy you can also play with your friends
1:02
in competitive or cooperative play and
1:05
join guilds to link up with fellow
1:06
commanders there are over 60 Heroes
1:08
villains and monsters from the warcraft
1:10
Universe to choose from and these are
1:12
lovingly sculpted digital characters
1:14
that have been rendered as tabletop
1:16
style Minis and brought to life for you
1:17
to collect Warcraft Rumble is full of
1:19
authentic Warcraft Vibes created by the
1:22
team with deep roots in the franchise
1:24
everywhere you look you'll encounter
1:25
many references inspired by beloved
1:27
characters locations and events from the
1:30
warcraft PC strategy games and the World
1:32
of Warcraft as you can see we've already
1:34
got a hold of our Warcraft Rumble
1:36
characters courtesy of we print
1:38
Miniatures so what are you waiting for
1:40
click the link in the description and
1:42
get downloading right back to painting
1:44
and rambling about
1:46
techniques so in our first video check
1:48
the link in the description we covered
1:50
the basics of miniature painting however
1:52
in this video we're now going to move on
1:54
to the more technical side of painting
1:57
the Artistry that is highlighting among
2:00
other things highlighting your models is
2:02
one of the best ways to emphasize and
2:04
Define those details and really helps to
2:06
make it stand out on the table top there
2:08
are a few methods of highlighting your
2:10
minis the traditional and most often
2:12
seen method is Edge highlighting it
2:14
pretty much does what it says you spend
2:16
your time neatly painting the edges of
2:18
those details as you get more experience
2:20
you'll find that your highlights will
2:21
become neater and crisper as well as
2:23
thinner meaning you can build up
2:25
multiple Edge highlights to add some
2:26
lovely transitions in tone another way
2:29
of high item which is my personal
2:31
favorite is dry brushing again this is a
2:33
technique that's quite quick and
2:35
effective it removes some of the
2:36
barriers of entry level so you don't
2:38
have to be an expert painter to use this
2:40
technique but it does require a little
2:41
bit of practice so you will need to get
2:43
used to the technique before applying it
2:45
to your models another popular form of
2:47
highlighting is zenial highlighting now
2:49
what this is aiming to do is to give you
2:52
a light source that's coming from a
2:54
Direction so it's a directional light
2:55
source so mostly this is like from the
2:57
top and then when you start tinting it
2:59
adding colors on top of it it kind of
3:01
gives you a bit of a a lighter tone
3:03
where the sun would be or the light
3:04
would be or whatever light source you're
3:06
using so as opposed to like picking out
3:08
the edges of a model whether that with a
3:10
dry brush or an edge or a brush you're
3:11
just using an airbrush or a rattle can
3:14
to kind of do that for you now the only
3:16
real difference between an airbrush and
3:17
a rattle can is airbrushes give you more
3:19
control and I suppose color as well cuz
3:21
you can use any paint whereas spray cans
3:24
you're limited to what colors are
3:25
available you'll often see a lot of
3:27
airbrush adjacent painters use this
3:28
method as it's very very quick and
3:30
effective and because they do it all the
3:31
time they get very comfortable with it
3:32
and with an airbrush you can adjust the
3:34
amount of pressure you use and have
3:35
better control of the flow coming from
3:37
the airbrush now if you're more
3:38
interested in using colors to do
3:39
zenithal then color Forge also provide a
3:42
range of colors to do this here we're
3:44
using the red zenial and working our
3:45
away from dark red to a mid red with a
3:48
light dusting of orange now depending on
3:50
your intention of tone of color you
3:52
might not use the first or last rattle
3:54
can in some cases what I mean by this is
3:56
if you want a bright red you might just
3:58
use the midtone red and then the orange
3:59
or if you want a darker red you might
4:00
just start with a dark one and then just
4:02
use the midtone and not even use the
4:04
orange and that works with any color so
4:06
next up from a highlighting point of
4:08
view is Slap Chop but what is Slap Chop
4:10
what does it do it is a pre highlight to
4:12
a model so often you start off with a
4:14
black undercoat and you dry brush up
4:16
with some Grays and some whites and then
4:18
you tint it usually with contrast paints
4:21
but the idea is you're doing the dry
4:22
brushing so you're mixing a couple of
4:24
things here using contrast paints and
4:25
dry brushing to give you a highlight
4:28
with minimal effort if makes sense as
4:30
you can see on our character here you
4:31
know we've got Coda Grays to whites on
4:33
the black looks very monochrome but then
4:36
when you start adding like bones and
4:37
pinks purples Reds you get the Highlight
4:40
pushing through so you can actually get
4:42
nice highlights with a contrast on the
4:44
black undercoat with a white dry brush
4:46
which in our previous video you want
4:48
light undercoats to demonstrate the
4:50
contrasts in its best format but this is
4:52
a really good way of doing that and it's
4:53
a really cheeky quick way of getting
4:55
highlights especially if you're got
4:57
shaky hands now glazing is one of those
4:59
methods that can be used for a few
5:01
reasons more often than not if your
5:03
highlights are just way too bright it's
5:04
really good for knocking them back all
5:07
you really doing is getting a paint
5:09
usually the color you've been using is
5:10
like your midtone and then you're
5:12
thinning it down and you're just tinting
5:14
over that highlight to knock it back a
5:16
bit the same can be said for Shadows if
5:18
your recess shades are too dark you can
5:20
try and light them up with that same
5:21
thin down coat when I've done any kind
5:23
of glaze in the past I tend to have like
5:25
a dark tone I tend to have a mid tone
5:27
and then a highlight and usually I tend
5:29
to use the midtone mostly as my glaze so
5:32
I thin that down so if my highlights
5:34
become too light I can knock them back
5:35
if my recesses become too dark I can
5:37
light them up as Richard Gray would say
5:39
it's just lots of thin paint lots of
5:41
layers of thin paint that's all it is
5:43
that's all you're doing now another
5:45
reason for using glazing is to change
5:47
the warmth of a model so move it to a
5:49
bit more of a warmer Spectrum or a
5:51
colder Spectrum so if for instance you
5:54
like have a green that's too cold you
5:57
want to warm it up you just put a yellow
5:59
glaze over the top of it again really
6:01
thin paint that just tints it and turns
6:03
that green from a colder tone to a
6:04
warmer tone sometimes you might have a
6:06
color that looks a bit too warm so you
6:08
want to darken it down so then use a
6:09
cold color and why would you do that why
6:11
would you change the warmth of a color
6:12
on a Model well that's a thing that
6:14
you'll notice as you become more
6:15
familiar with painting that sometimes
6:17
you have a lot of warm colors on a Model
6:19
it needs balancing out with a few colder
6:20
colors and colder colors just tend to be
6:23
like darker Bluer looking Blues whereas
6:27
warmer colors tend to be like really
6:29
light looking greens it's that kind of
6:31
thing so you're not like heating them up
6:32
on a microwave or sticking them on the
6:34
radiator I mean you can do but that
6:35
ain't going to help now glazes do
6:37
require some practice and can be a bit
6:39
tricky to get the hang off initially but
6:41
by thinning your paint down so it's more
6:42
of a watery consistency the term often
6:45
thrin around is the consistency of thick
6:47
milk and neatly applying this thin paint
6:49
to the desired area will tint your
6:50
chosen tone now something to bear in
6:52
mind is this is not a wash what you are
6:55
doing is neatly layering the glaze onto
6:58
the area so it tin P if you start
7:00
treating like a wash or a contrast it's
7:02
going to swamp in those recesses and
7:03
it's not going to do what you needed to
7:04
do so you are just taking your time and
7:07
neatly layering over those areas so the
7:09
color the amount of paint that you're
7:11
putting onto the model is evenly
7:13
distributed across the high points the
7:15
midp points and the low points you're
7:17
not swamping it like a shade next up is
7:20
basing now this is my favorite part of
7:22
the painting process usually when you
7:23
got to this point it probably means your
7:25
model's finished and you're just giving
7:27
it a nice patch of land that it can call
7:30
home because it's going to be glued on
7:32
that forever so you might want to make
7:34
it nice give me some flowers to pick
7:36
maybe some turnips I don't know but this
7:38
is the part that makes the model stand
7:40
out from the rest of the crowd and adds
7:42
a sense of realism to the finished
7:44
article as well obviously it goes about
7:46
saying you can base your models however
7:48
you want it's entirely up to you what
7:50
you do for your models they're yours but
7:52
there are a few things to consider that
7:53
might help you along the way this is not
7:55
like you must do this it's just a couple
7:57
of things to bear in mind when you are
7:58
basing your figure is now a top tip is
8:01
think of the narrative what is the model
8:03
doing what's it dressed like I mean if
8:05
you've got like a barbaric warrior in
8:07
firsts then sticking it in a desert
8:09
environment probably looks a bit
8:11
narratively weird so you might want a
8:13
snowy environment that might add to the
8:15
narrative and the theme another thing to
8:17
bear in mind is color as well so one of
8:18
the things that I've learned through
8:20
years of painting is if you have a
8:22
really dark toned model so the model's
8:24
like black with really Grim looking
8:27
colors on it then you probably want a
8:28
really light base and that that light
8:29
base doesn't have to be desert or snow
8:31
it could be just like stone or like
8:33
pebbles but lighter the other option is
8:36
if your model's really light then
8:37
chances are you want a darker base so
8:40
you know if you've got like someone in
8:41
white armor or bright Silvers then you
8:43
might want a slightly darker gray or
8:45
like a dingy kind of dirt or something
8:47
like that just again it helps the model
8:48
pop something to bear in mind when you
8:50
are basing is the bass is like a picture
8:52
frame of a painting it's there to
8:54
support it but not overwhelm it you
8:56
don't want your base to be like Stark BL
8:59
latly the only thing you look at is the
9:00
model that you want to be looking at not
9:02
the base and if you're not certain then
9:03
a nice mid-tone brown or arid scheme
9:06
works really well again years of
9:07
painting armors and more often than not
9:09
varied schemes in one collection using
9:11
the same midtone Earth base not only
9:13
helps every paint job stand out it looks
9:15
consistent as a collection two as you
9:17
can see like what we're doing on this
9:19
model here it can be a bit light in some
9:21
places but actually it's a nice midtone
9:23
and any color scheme will work on that
9:24
really well with the texture of your
9:25
base done the next thing you want to be
9:27
looking at is painting the side or
9:29
what's known as the rim of the base now
9:32
if you're new to painting and this might
9:34
seem very odd to you and it's probably
9:36
true there's a bit of a war raging as to
9:39
what is the correct Rim color for a Bas
9:42
Brown is the right choice because I like
9:44
painting my rims brown but actually
9:46
there's there is a bit of a science to
9:47
some of this you can paint them whatever
9:48
color you want to by the way you don't
9:50
have to like follow the information here
9:52
there's just a reason for having
9:54
different tone edges to your bases the
9:56
reason why I use Brown is it's nice and
9:58
natural and if you're doing lots of
10:00
wargaming with it and you've got like
10:02
many different boards to play on it's a
10:04
nice natural jump from miniature to base
10:07
to board so even if you like say you've
10:09
got like a desert base or a brown Rim
10:11
but you're on like an arid sort of
10:12
landscape with like grass and stuff on
10:14
it it works fine the other option is
10:16
gray gray you tend to see M mainly for
10:19
sci-fi stuff because most of it's going
10:21
to be like really blown up worlds with
10:22
lots of Ash and concrete and just debris
10:24
and gray bases look quite cool for that
10:26
and dungeons as well if you got like
10:28
things in dungeons looks cool with gray
10:30
bases but the last one that tends to be
10:32
the quite contentious color is like
10:34
black is best black rims are best black
10:37
rims are great if you are doing board
10:39
games and display pieces like the ones
10:42
we're doing here now normally like I say
10:44
I'm a brown Rim guy but for this video
10:46
and the models in this video black looks
10:48
better because they're display pieces or
10:50
gaming pieces if you're doing like a
10:52
board game for D and D it's up to you
10:54
you can paint them red I don't care you
10:55
do what you want but that's a bit of a
10:57
theory as to why you paint different
10:59
bases just for different reasons that
11:01
might decide what kind of game system
11:03
you're playing or what sort of hobby
11:05
you're using it for the last thing I'd
11:06
like to cover in this video is about
11:08
brush control practice and muscle memory
11:10
now these things to me all work in
11:12
conjunction with each other because well
11:14
you kind of require all those skills
11:16
anyway to be able to do one or the other
11:18
and a lot of the things we discussed in
11:19
this video will benefit from making use
11:22
of these things and practicing these
11:24
things and getting better at these
11:25
things a lot of it is just time and
11:28
practice hence why practice is here so
11:30
don't don't be too stressed don't be
11:32
like oh no you know my brush control is
11:34
rubbish it's fine it just comes with
11:35
time a lot of this comes with time and
11:37
just holding things the right way
11:38
something I would bear in mind as well
11:40
with brush control is hold your brush
11:43
like you would hold a pen because you've
11:45
got the muscle memory there already of
11:46
holding a pen so why would you hold your
11:48
brush any different I used to see a lot
11:49
of people hold their brush so different
11:51
to how they'd write a pen and you've
11:53
been writing like at schools colleges
11:55
uni or whatever for decades so why would
11:58
you hold your paint brush any any
11:59
different so that's something to bear in
12:00
mind CU you might not realize that you
12:01
might just think well it's different
12:03
it's paint and I have to hold it
12:04
differently I have to be like oh little
12:05
tweedly mustache and the canvas and like
12:07
use the my little pinky here and just do
12:10
little sweeping motions down and forth
12:12
on the canvas you not some pretentious
12:14
artists that's putting some of into take
12:17
Gallery you are painting Toy Soldiers so
12:19
don't worry about it it's fine brush
12:21
control really is about handling the
12:23
brushes getting used the amounts of
12:25
pressure to apply and when to apply them
12:27
you can use models or Petes to practice
12:29
Different Strokes and pressures but
12:31
really it just boils down to practice
12:33
and we all know the more you do
12:34
something the better you get it putting
12:36
the hours in the chair or your painting
12:39
set up is indeed a thing the more you do
12:41
something like I said the better you can
12:42
get at it and the prime example of this
12:44
is when I worked in retail I painted
12:46
stuff for the cabinets I thought I was
12:48
okay I thought I was pretty good I
12:49
applied for a job to be an army painter
12:52
and I went there thinking I'm good at
12:53
painting I was okay but the more I was
12:56
in there the better I got my first week
12:58
literally eight hours a day for S days
13:01
there was a vast difference in my
13:03
painting that I'd been doing higgledy
13:05
piggledy here for the cabinets when I
13:07
was in retail so just hours in the chair
13:10
getting used to it and I know not all of
13:12
you watching this video have millions of
13:14
hours a week to to spend painting but
13:16
the more you do something you better get
13:17
it so if you have a regular time just
13:20
keep to that if it's like an hour in the
13:22
evening or a couple of hours a week just
13:24
maintain those couple of hours if you
13:25
can and you'll find keep to it you'll
13:28
get back better at it the more you do
13:30
some it the better you get and I've said
13:31
that multiple times in this video I'm
13:32
going to keep hammering it home but it
13:34
is true you just repeat rinse and repeat
13:37
and muscle memory will come in time now
13:38
there is a thing where some of our
13:40
viewers and some of our patrons have
13:43
shaky hands and again you will find
13:46
mechanisms and strategies to hold your
13:48
brush slightly different or how to
13:50
support your hands obviously in the
13:51
video I support my hands on the table
13:53
like this I I use that I hold my breath
13:56
I take my time with my breathing slow
13:58
slow it down all those things in time
14:01
will help you improve the handleing the
14:03
brush and the obviously the edge
14:04
highlights you do even with Shak your
14:06
hands you can find ways of doing it and
14:07
slowly but surely steady those and if
14:09
you can't that's what slap Chop's for
14:11
it's fine You' be good freehanding is
14:14
one of those elements and skills that
14:17
scares some people because they're like
14:19
I'm not an artist I can't do this I
14:21
didn't go to college and learn how to
14:22
draw I'm not a master it's fine
14:25
freehanding is about breaking things
14:27
down into shapes and taking your time
14:29
the model we've got up on screen is very
14:32
simple freehanding um you might not seem
14:34
it but it is what I've done here is
14:35
literally done a diamond shape to start
14:37
off with so a cross with a diamond and
14:40
then all I'm I'm doing is filling that
14:42
in I do this all in the base coating
14:44
stage so if I make mistakes it's easy to
14:46
correct I'll come back to that in a
14:47
moment so painted it blue to start off
14:48
with the body then getting some white on
14:50
there doing that diamond shape and then
14:52
start adding a little bit more Essence
14:54
to that diamond shape because the actual
14:56
physical figure on the website has has
14:58
lots of cool little I think it's F I
15:01
think it's a tattoo I'm not sure but it
15:03
looks cool so I mimicked it and in the
15:05
center there's like a bit of a void like
15:07
a another blue diamond which is
15:09
obviously a bit of it belly shown
15:10
through again because I've done this in
15:11
the base C stage I can do that bit after
15:14
with the blue that I use for the skin
15:15
and then tidy up anything around the
15:17
edges they may look a bit wibbly wobbly
15:19
or not quite right if you do this later
15:20
on after you've done some shade and some
15:22
highlighting it's a lot harder to
15:24
correct so if you've decided on your
15:25
shield for your footmen you're going to
15:28
like do some Coats of Arms at the back
15:30
and then you make a bit of a mistake on
15:31
it you're going to have to redo the blue
15:34
reshade that section of blue reh
15:35
Highlight that section of blue chances
15:37
are you're going to get some of that on
15:38
the other color you've just done as well
15:40
so if you do all your freehanding in the
15:41
base coat stage it's easy to correct and
15:44
then you can do all your shading after
15:45
and all your all your highlighting when
15:47
that's all done the big key thing here
15:49
for any freehanding is break it into
15:51
simple shapes start off with a cross
15:53
then turn it into a diamond and then
15:56
fill it in and if you're not sure squint
15:58
your eye see what the shape looks like
16:00
there's been many many designs I've done
16:01
over the years which is just like oh
16:03
it's a circle oh it's got a triangle on
16:04
the top of it and then just do that and
16:06
if you're not sure get a Post-It note or
16:08
a piece of paper and do a few sketches
16:10
and this is another thing you can do is
16:12
once you've got a design and you happy
16:14
with it you've sketched it is paint that
16:16
large on a piece of paper or on a pallet
16:18
pwder something like that start large
16:20
then move to the side do it a bit
16:21
smaller then move to the side get a bit
16:23
more smaller and then keep doing that
16:25
until you're happy with the desired size
16:27
and shape now moving on from the
16:29
freehanding sometimes you can use your
16:31
brush control and the pressures of your
16:33
brush to get effects of a 3D sort of
16:38
texture just by doing some 2D Strokes so
16:42
if we look at hogo here who is a bit of
16:45
a a wolfy looking guy he's got loads of
16:46
fur but there's no texture of fur how do
16:48
we give that fur a sort of texture and
16:51
it's all about just little flicks and
16:53
brush strokes and again talking about
16:54
brush control you know making sure
16:56
you're getting that pressure right and
16:58
then just just slowly but surely just
16:59
moving that brush across to get like
17:01
consistent flicks and again because hair
17:04
on dogs and animals can move around a
17:06
bit just follow the flow of where it
17:08
looks like it's going to go so if it's
17:09
going up an arm you might want it a bit
17:10
more vertical and then like across the
17:13
PEC or something like you might want a
17:14
bit more horizontal but just go over a
17:16
bit of a flow and take your time and
17:17
once you've done that you can then
17:18
highlight up but if it doesn't work out
17:20
get a thin bit of brown cover over start
17:23
again but it is just about the pressure
17:24
of your brush starting off very lightly
17:27
and then just doing little flicks a tip
17:29
here as well is I kind of go in doing
17:32
that movement before I make contact with
17:33
the model as well and then eventually
17:35
hit it and then keep doing that and it's
17:37
repetitive just keep adding and as
17:39
you'll find with the practice section
17:41
get better at it a really easy thing to
17:43
do for patterns if you don't want to do
17:45
like free hand in or you don't want to
17:46
do fur is just make some little dollops
17:50
and shapes to add a pattern whether
17:52
that's tiger stripes or here on the
17:54
panther doing like a bit of a leopard
17:55
stripe I'm being a bit cheater here as
17:56
well cuz I'm using a contrast paint
17:58
which is black and then I'm just finding
18:00
little dots little shapes that look like
18:02
dots and like leopard pattern dropping
18:04
them on leaving it to dry for a moment
18:06
or two i' say about 30 seconds 40
18:09
seconds when paint dyes especially when
18:11
it's water down paint it starts to have
18:13
what we call a tide line if you leave it
18:15
to dry it will be flat and solid but if
18:16
you like soak it away you would leave a
18:18
little TI line like a a t-ring on a
18:20
table you'd get like a little effect
18:22
around the sides which is perfect for
18:24
leopard pan so what you do is just get a
18:26
brush that's dry and then just soak off
18:28
some that paint from the middle and
18:29
you'll find you get a bit of a tide line
18:31
going around the side and then a
18:32
slightly lighter bit in the middle which
18:34
is perfect for leopard patterns do the
18:37
same for tiger stripes or whatever kind
18:39
of stripes or whatever kind of patterns
18:40
so if you're not in the mood for
18:41
freehanding or first Stripes then this
18:44
is a good way of doing it now Edge
18:46
highlighting doesn't always have to be
18:48
with a brush or highlighting in general
18:50
a nice quick way of doing that is
18:52
getting the sponge so this is where we
18:54
get a little bit of packing sponge
18:56
whether that's from a figure case or
18:57
whatever and we use the little sleeves
19:00
that you get for your paint brushes
19:01
courtesy of a nice painter from the
19:03
internet stole this idea from him so all
19:05
you do is you just twist some of that
19:07
sponge and then you put it down the tube
19:09
and you got yourself a little sponge
19:11
brush if you like and what you're doing
19:13
is a bit like dry brushing you're just
19:14
dabbing this off removing some excess
19:17
and then you start attacking those
19:19
raised areas of the model like on the or
19:20
we've got here we're just giving a bit
19:21
of a texture to its skin you don't have
19:24
to do this I just thought it looked
19:25
quite cool cuz Orcs have quite thick
19:26
leathery skin so they're going to be a
19:28
bit more mtled a bit more textural so
19:29
just adding this and then again you can
19:31
use smaller sleeves to do more accurate
19:33
sponge effects F around it's also really
19:36
good for doing chipping as well so if
19:38
you want to chip up armor on edges again
19:40
using the sponge to do that is a really
19:42
good way of doing that it's kind of like
19:43
highlighting it's a nice cheeky way of
19:45
doing it with minimal effort so I'm now
19:48
going to talk about my secret weapon a
19:51
weapon that I use a lot for metal things
19:55
not like actual physical made of metal
19:57
But Metal metal paint jobs and it's what
19:59
I call reverse highlighting it is a new
20:02
technique I'm going to come up with a
20:03
name for it at some point so what we're
20:04
going to do if you look at the orc here
20:06
is we've got a lot of metal work he's
20:08
got some red shoulder pads and he's got
20:09
some sort of metal spikes coming out of
20:11
it all I'm going to do is get the same
20:13
red and I'm going to paint in the middle
20:15
of those spiky bits but I'm not going to
20:17
go to the edges no no that's silly
20:19
because I'm doing two things here I'm
20:21
reverse highlighting so I've got an edge
20:23
highlight already but it's not an edge
20:24
highlight it's a battered piece of armor
20:27
that the paint's worn away from so it
20:28
kind of highlights it but it also looks
20:30
like chipping and again doing on the
20:32
little bits around the side a little
20:33
banding on his armor just do the same
20:35
thing and it works for anything I mean
20:36
you can do it on the uh the human the
20:39
footman I've done it on that as well on
20:40
some of the shoulder pad bits on like
20:43
the blue bit that before it gets to the
20:44
puldon you got the poldon you got the
20:46
blue trim on it you can also do it on
20:47
there as well so it's a really really
20:49
simple way of highlighting is just using
20:52
a darker color in the middle and then
20:54
not going all the way to the edge but
20:56
yeah reverse height line top secret
20:58
don't tell anyone well I hope you've
21:00
enjoyed this video and I found many a
21:02
thing useful to take away onto your next
21:04
project now do keep an eye out for part
21:07
three where we're going to use a
21:08
multitude of the techniques we've been
21:11
discussing and of course don't forget to
21:12
hit the like And subscribe button that's
21:14
super helpful and helps to support the
21:16
channel and a massive thank you to
21:18
Blizzard and Warcraft Rumble for
21:20
sponsoring this video and of course John
21:21
from weint minis for printing the
21:23
Miniatures out for it as well now as you
21:25
can see there's a load of patrons coming
21:26
to the side you twoo could be one of
21:27
these so do consider joining our patreon
21:29
may you get early access to the videos
21:31
as well as many of benefits but until
21:34
our next video take care I love you and
21:38
enjoy painting and just just enjoy it
21:41
remember patience patience but don't
21:44
tell anyone the
21:48
secrets
21:50
oh
#Hobbies & Leisure
#Crafts