Up next in 10


Check out the Dragonbond: Battles of Valerna campaign on Kickstarter for this and more than 250 other high-quality minis from Draco Studios: https://www.kickstarter.com/projects/lair3d/battles-of-valerna-a-3d-printable-fantasy-wargame?ref=59g19v
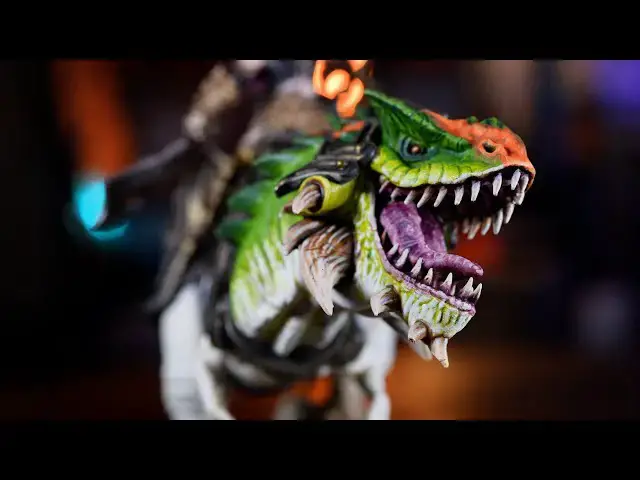
The model used in the video is the War-mother on Maw Tyrant, part of the army of The Scourge Triumvirate. In this painting guide, Peachy shows you some quick and simple methods for painting Monsters! Perfect for dinosaurs, dragons, or all your Tyranids and Seraphon from Warhammer.
Join our Patreon: https://patreon.com/thepaintingphase
Merch: https://thepaintingphase.creator-spring.com
Help Support the channel with our affiliate links:
UK & EU: https://affiliates.waylandgames.co.uk/idevaffiliate.php?id=1214
UK: https://elementgames.co.uk/?d=10835
EUROPE: https://taschengelddieb.de/?affiliate=tpp
US: use code paintingphase to get 10% off at https://www.goblinshut.com/
We Print Miniatures: https://weprintminiatures.com/thepaintingphase
THEPAINTINGPHASE for 10% off
Follow us:
https://www.instagram.com/thepaintingphase/
https://www.instagram.com/__peachy_tips__/
https://www.instagram.com/geoffsavory/
https://www.instagram.com/pileofshamepaints/
Show More Show Less View Video Transcript
0:00
painting monsters and beasts can seem
0:01
quite daunting at first difficult even
0:03
but when you scale it down to its
0:04
composite Parts it's actually pretty
0:06
straightforward every monster I've ever
0:07
painted I've really thoroughly enjoyed
0:10
the journey and you don't have to be an
0:11
exhibition level painter to get great
0:13
results so in this video I'm going to be
0:15
painting a rather delightful dinosaur
0:17
Beastie that Draco Studios of centers is
0:19
also known as a warm weather on more
0:21
Tyrant and we're picking out a variety
0:23
of different organic textures some that
0:25
are going to be used with minimal effort
0:26
for maximum effect and others if you
0:28
want to flex some extra details too
0:30
though we're going to be painting up a
0:31
dinosaur in this video you can use the
0:33
methods and techniques in this video to
0:34
apply to anything in your own
0:35
collections whether that's your own
0:37
seraphon your own demon beats all the
0:39
way to the tyrionids in your new
0:41
Leviathan box set it's massively
0:43
translatable so starting from a white
0:45
undercoat what I'm going to do is get
0:46
some more Tyrion Grime and apply that
0:47
all over now what I'm going to do here
0:48
is thin it down 50 50. so I'm just going
0:51
to pour a decent amount inside this
0:53
spray lid and then get the same amount
0:55
of water just I've got loads there
0:56
because it's a big beast and I can just
0:58
apply that over and I might want to
1:00
second time as well once it's dry for
1:01
those deeper recesses
1:03
[Music]
1:10
then it's a light dry brush of ivory
1:13
again just working your way around
1:14
picking out those textures don't matter
1:17
if you get on other areas that you're
1:18
not going to paint as an actual part of
1:20
the dinosaur body it's just there to get
1:22
those highlights picked out
1:24
next up is G's Mantis Warriors green and
1:26
I'm going to be thinning this down with
1:27
water 50 50. now when you start applying
1:30
this you want this on the top part of
1:31
the actual body saving that white creamy
1:34
undercoat for its underbelly don't worry
1:36
if it looks like there's a hard line
1:37
between the underbelly and the actual
1:38
green because we'll sort that out later
1:40
with a dry brush
1:41
[Music]
1:47
then I'll add some Ivory again to add
1:49
some texture to the skin and again just
1:51
work a little bit harder where the
1:53
Mantis Warrior green meets the
1:54
underbelly and that will help just blend
1:55
it in
1:56
[Music]
2:03
now next up we're going to get some
2:05
Ivory I'm going to use this to add some
2:06
texture to the skin we've got two
2:08
options here the first one which is
2:09
pretty easy and straightforward is to
2:11
get some Sponge to get some of that
2:13
Ivory on it and then dab it off then all
2:14
we're going to do is just then dapple
2:16
that onto the skin effect should be
2:18
slightly cautious when doing this you
2:20
know don't be too heavy-handed and what
2:22
that's going to do is give it a bit of a
2:23
dappled leathery skin effect
2:25
and it might seem quite bright at this
2:27
point but don't worry we'll sort that
2:28
out later with a bit of a glaze
2:30
the other option and this is one that
2:32
takes a bit more time but looks far more
2:34
effective is to get some Ivory again and
2:36
then just start adding little strokes
2:39
almost give it like a rough leathery
2:40
skin effect as well so you're just
2:42
working in like a direction just doing
2:44
little strokes sometimes it's better to
2:46
start off first just doing a couple of
2:47
ghost Strokes is what I call and then
2:49
just move your brush further into the
2:51
model and then just do a couple of
2:52
little flicks here and there you just do
2:54
some dots as well and that just gives it
2:55
a bit of a texture
2:57
then we're going to get some grass green
2:58
we're going to add this to the upper
3:00
parts of the body where you'd want a
3:02
brighter skin tone it can be thinned
3:04
down as well so don't worry about that
3:05
if it is a bit thin if you don't need to
3:06
do multiple coats because some of that
3:08
other colors come underneath like the
3:09
shade Etc is actually going to add to
3:11
this
3:13
then we're going to sponge on some black
3:15
green we're going to do this on the
3:17
uppermost parts of the actual body so
3:19
this is going to be onto the fins and
3:20
the spikes around the face and again it
3:22
will just give it a bit of a roughness
3:23
to it as well nice bit of blotchy
3:25
patterning here and there and if you do
3:27
find that it looks a bit too much in
3:29
some places just gets some of that grass
3:30
green and tidy back up and also in some
3:33
places you might want to stip it on with
3:34
a brush instead of using a sponge
3:36
because it'd be quite hard to reach next
3:38
up is to get some thinned Mantis
3:39
Warriors green pretty much the same mix
3:41
we used before I'm going to glaze over
3:42
the skin this is going to do two things
3:43
firstly the texture we use where we add
3:46
Ivory where it's too bright it's going
3:48
to knot that back slightly so it's going
3:49
to make it not so white and pale and
3:51
also those black green sections where
3:54
I've stippled it on that's just gonna
3:56
add a bit more warmth to those as well
3:57
so it's not too Stark and dark
4:00
foreign
4:02
[Music]
4:06
sections I'm going to get some grass
4:08
green and dry brush that on so just take
4:10
your time and just build up those areas
4:11
on the edges alternatively you could
4:13
step it on as well and do some dabbled
4:15
Strokes on the edges with a brush just
4:17
to give it some extra texture again it's
4:18
entirely to you which of these methods
4:20
you use all of them work you could mix
4:22
them all together if you wanted to
4:25
do you like fantasy
4:27
monsters and magical creatures then
4:30
Draco Studios is the company that you
4:33
Draco Studios create high quality models
4:35
that can be used for any game system
4:36
whether that be GW alternatives for the
4:39
non-purist or to throw into any DND game
4:41
to add even more Flair to your
4:43
adventures there are well over 250 high
4:46
quality fantasy stls for the battle of
4:48
the learner Kickstarter which runs until
4:50
the 22nd of June oh and they have some
4:53
amazing dragons too you can also
4:54
purchase these Miniatures from my mini
4:56
Factory and there are plenty of print
4:58
shop options if you don't own a 3D
4:59
printer
5:00
Draco Studio has a well-developed dragon
5:02
Bond Universe with several games out
5:04
already and lots in the pipeline with
5:06
industry-renowned rules developers such
5:08
as the mighty Alessio cavatore and Jack
5:11
Caesar so go check out the kickstarter
5:13
to see for yourself and check out the
5:15
link in the description
5:17
right back onto painting some more
5:19
dinosaurs
5:20
dinosaur
5:24
Dino the light underbelly what we're
5:26
going to do is just relayer almost if
5:29
not highlight with Ivory so the
5:31
intention here is where it might be a
5:33
bit blotchy from that wash it's just
5:34
going to relay that up and also where
5:36
we've got the Mantis Warrior green
5:37
joining the edge of the belly it's going
5:39
to help blend that in as well
5:41
to help remove quite a solid line from
5:43
the Mantis Warrior green
5:44
now for the highlights I'm going to be
5:46
using white now I'm going to be applying
5:49
a couple of Strokes here using a nice
5:50
fine brush just to add some texture you
5:52
do some dots as well or for an easier
5:54
version just get some Sponge get some of
5:56
that white on it dab it off and then
5:57
just sponge it on giving you some
5:59
texture with minimal effort
6:03
now we're going to add some patterning
6:04
to our more Tyrant or dinosaur Beastie
6:07
and there's multiple ways of doing that
6:09
you can use any sort of reference from
6:11
the Internet or whatever to get some
6:12
cool patterns I'm just going to do a
6:13
nice sort of dappled effect going down
6:15
its spine on its head as well and I'm
6:18
using deep orange for this now less is
6:20
more to start off you can always add
6:21
more to the pattern if you need to
6:23
um start with one coat then add a second
6:25
coat if you need to as well one side I'm
6:27
going to use an old brush that can still
6:28
maintain a decent point but if you want
6:30
a quick method we're going to do the
6:32
sponge effect again and you can just get
6:33
some Sponge dap it off and then just
6:36
start attacking the side of it in some
6:38
place you want to get that stipple brush
6:39
that you used previously to stip it on
6:41
as well be mindful that you have to give
6:43
it a good wash otherwise you might end
6:44
up mixing some of that green in there as
6:47
well once the Deep orange is done we're
6:49
going to do the same thing we apply some
6:50
more splurges but using light orange we
6:53
can add it to the same pattern but we'll
6:54
be mindful to make a little bit smaller
6:56
so you can still see some of that deeper
6:57
orange on the outskirts of it and again
6:59
just work a bit smaller and you might
7:01
need to do a second coat now as final
7:03
stage of the pattern we're going to be
7:04
using sunny skin tone what we're aiming
7:06
to do here is pick out some of those
7:07
raised areas where there's natural
7:09
actual highlights so usually this can be
7:11
around the face where there's creases in
7:12
the legs if you've got the pattern on
7:14
the legs and bits around the spines and
7:16
stuff like that it's more just to
7:17
emphasize the edges of the actual skin
7:19
as opposed to be part of a pattern so
7:22
you know picking out like rough bits on
7:24
its face around its eyelids Etc
7:27
for our eyes we're going to keep them
7:29
pretty simple for this video we're going
7:30
to start off with a base coat of deep
7:31
orange again just be mindful try and get
7:33
a nice point to your brush and just dab
7:35
that in then finish off with a little
7:36
dot of ivory
7:39
now we're going to move on to what could
7:41
be a bug bear for a lot of people which
7:43
is bone claws and teeth so like horns
7:46
and stuff like that so I'm going to
7:47
start first by using grimy gray and
7:49
we're just going to base coat any teeth
7:50
and horns and you can also do the claws
7:51
as well
7:52
I'm also going to pick out the tongue in
7:54
preparation for later on when we're
7:56
painting the tongue
7:58
now the first step here after the base
8:01
coat is to get some seraphim sepia I'm
8:03
going to apply that all over the horns
8:04
and teeth
8:07
once that's dry I'm going to get some
8:09
toggle raid shade now I'm going to work
8:11
about halfway up so you still want some
8:14
of that seraphim seep is showing at the
8:15
tips so your toggle red shade is halfway
8:17
get into the base of the horn or base of
8:20
the teeth and then what we're going to
8:21
do now is get some agraxia shade and
8:22
apply that in the deeper recesses what
8:24
this is going to do is give you a nice
8:25
transition from a nice sepia turn on the
8:28
tips get into a more of a ready Ruddy
8:30
kind of tone which is the toggle red
8:32
shade straight down to aggrex Surf shade
8:34
in those deeper recesses then we're
8:36
going to move on to our first highlight
8:37
which is grimy gray just picking out
8:38
some streaks again you can follow the
8:40
Contours of the actual Claws and Bone if
8:42
you're not sure just pick out what you
8:44
feel is comfortable
8:47
and on the extremities just pick out a
8:49
bit of white mostly going to be like the
8:51
tips of teeth and stuff like that
8:56
and then just to knock the back those
8:57
highlights just so they tie in nicely
8:59
and look a bit more yellowed when you
9:00
get some seraphim sepia and just apply
9:02
that over
9:08
now for the tongue we're also going to
9:10
apply this to the gums as well and
9:12
obviously like the roof of the mouth
9:13
we're gonna be using magos purple on all
9:15
those areas we base coated grimy Gray
9:19
with that dry we're going to tidy up in
9:20
some places and also highlight in others
9:22
with grimy gray so you can do some like
9:25
nice texture on the tongue they've got
9:27
some horrible warts on it as well so you
9:28
can pick those out too
9:35
with those highlights picked out we're
9:37
just going to reapply some magos purple
9:38
over those you can apply a little bit
9:40
more thin down and what that'll do is
9:42
just give it a bit of a glaze as opposed
9:43
to just coat it all over and make it too
9:45
neat and too dark so all in all I really
9:48
enjoyed painting this model that Draco
9:49
studios are sent is there's there's lots
9:51
to love about it I enjoy painting
9:53
creatures and monsters My Favorite
9:54
Things is doing the face and all the
9:55
pattern on it and that tongue the
9:56
texture on that tongue was really fun to
9:58
do so hopefully you've learned a lot
9:59
from this and if you want to learn how
10:01
to paint other monsters check out angron
10:03
video which is just going to appear as
10:05
well there's lots of things to learn
10:06
from that video that will help you too
10:08
as always thank you to Draco Studios for
10:10
supporting us on this video and thanks
10:11
to our patrons for being amazing as
10:14
always I'll see in the next one