Up next in 10

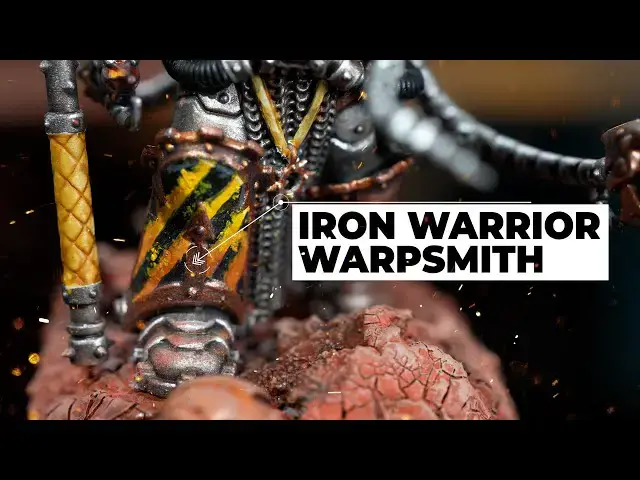
How I painted an IRON WARRIOR WARPSMITH - learning to paint iron warriors part 3
Jul 21, 2022

Part three of Patrick's pile of shame series see's him paint the iron warrior warpsmith, hazard stripes, martian bases, it has it all!
Support these creators:
Pete the Wargamer: https://youtu.be/dFfZ-06cTDE
The Painting Coach: https://youtu.be/eKOYmyAfSo0
Duncan Rhodes: https://youtu.be/DAnZjL-GsRI
Juan Hidalgo: https://youtu.be/-mz4g5dcGHI
Help Support the channel with our affiliate links:
https://elementgames.co.uk/?d=10835
Follow us:
https://www.instagram.com/thepaintingphase/
https://www.instagram.com/pileofshamepaints/
https://www.instagram.com/geoffsavory/
If you want us take on a painting challenge let us know in the comments!
Check out Faith and Damnation Hobby Group:
https://www.facebook.com/groups/14562…
Show More Show Less View Video Transcript
0:02
the time is finally here the preparation
0:04
is all done it's time to paint the waltz
0:06
smith if you want to see my journey to
0:08
get here you can watch some videos up
0:10
here if you want to but the abridged
0:12
version is
0:14
i'm a videographer who's new to mini
0:16
painting and i'm clearing my pile of
0:18
shame and learning to paint through
0:20
youtube tutorials i wanted to paint an
0:22
iron warrior warpsmith but had no idea
0:24
where to start so i followed four
0:26
tutorials to get a feel for it
0:29
number one was from p the war gamer two
0:32
from the painting coach three from mr
0:34
tooth and coats himself duncan rhodes
0:37
and four
0:38
juan hidalgo please go and follow them
0:40
if you don't already they have amazing
0:42
tutorials on how to paint i'm worries i
0:45
then painted up two test marines of my
0:47
own taking my favorite elements from
0:49
each
0:50
admittedly i did try really hard on
0:52
these but adding the rust to verdigris
0:54
it's all a bit much in hindsight i think
0:57
they're a little busy with all of the
0:58
extra effects but i'm glad i went too
1:01
far so now hopefully
1:04
i know where to stop it's all
1:06
a learning experience
1:09
this is my first character that i
1:10
painted and there's a lot of additional
1:13
details on the sprue i know the painting
1:15
coach painted his warpsmith fully
1:17
assembled but i'm not that brave or good
1:20
so sub-assemblies it is i also made
1:23
myself an order of operations to keep on
1:26
track and hopefully not forget any
1:28
stages
1:29
i want to reiterate as well that this
1:31
video is titled how i paint my iron
1:35
warrior warpsmith not how
1:37
you should paint it if you look at this
1:39
and think it looks terrible one
1:41
you're probably correct
1:44
and two i'm just cherry-picking some of
1:46
my favorite bits and just
1:48
documenting my sort of journey through
1:50
the process i don't for a second think
1:52
that i'm
1:53
telling you how to do things because i
1:55
barely know how to do them
2:01
[Music]
2:06
myself one issue that i came across that
2:09
seemed to be a bit more exaggerated this
2:10
time was the metallic spray base coat
2:13
not accepting paint very well i've seen
2:15
this a little bit before but never this
2:18
bad
2:19
i think i should have washed the armor
2:21
with
2:22
the contrast paint first to help the
2:24
white paint stick
2:25
um because when i did eventually get a
2:28
coat on the texture of it was less than
2:31
ideal which we'll come back to later
2:34
[Music]
2:40
[Music]
2:47
[Music]
2:53
at this stage in the process i was
2:55
making quite a lot of silly mistakes
2:58
placing the recess shade into some of
3:00
the little spaces on the
3:03
metal tentacles and things like that
3:06
so instead i opted to use some dark
3:08
brown pale liner to try and save some of
3:11
the details that i'd already painted on
3:13
underneath and it did work exceptionally
3:16
well
3:17
it smells
3:19
lethal and as far as i'm aware you can't
3:21
stock it in the uk but you can buy it on
3:25
amazon
3:26
i think it's delivered from italy or
3:28
something like that not dodgy
3:30
at all i think the panel liner was great
3:34
for the bits in between the tentacles
3:36
some of the bits in between the fingers
3:37
it's just one quick dab and it just
3:39
rushes into the recesses it did feel
3:43
like cheating i'm not gonna lie but i
3:45
can't argue with the results so i will
3:47
continue
3:49
so at this stage i'd elected to edge
3:50
highlight all of the silver areas i'd
3:52
painted three of the eight tendrils and
3:55
essentially had a mini meltdown
3:58
i wasn't happy with the results and i
4:00
left it and didn't paint anything on the
4:02
model for about two weeks instead i
4:04
painted this monstrosity which
4:06
apparently was a better use of my time
4:08
because it's currently sat with nearly
4:10
two million views on tutorial but there
4:13
we go
4:14
reading that the warpsmith was up for
4:16
pre-order individually this weekend gave
4:18
me the kickstart that i needed to get it
4:20
in my hands and start painting again and
4:22
everything you see after this
4:24
was filmed during that stupid 40 degree
4:27
heat wave that we had here in the uk it
4:29
certainly was
4:31
an experience
4:34
it's filmed exclusively in close-ups
4:36
because
4:38
nobody wants to see
4:39
what i look like
4:41
when it's the hottest day in the uk
4:45
ever
4:46
first step finishing up the metallics i
4:48
eventually got into a rhythm with
4:49
painting the tentacles in small sections
4:51
which kind of worked if you're doing
4:54
this yourself
4:55
save yourself a load of time and and
4:58
just dry brush them
5:00
i think this was probably one of the
5:02
silliest things that i did whilst
5:03
painting this model it was very time
5:05
consuming
5:07
and incredibly repetitive i have so much
5:10
respect
5:11
for the heavy metal guys that do this
5:13
professionally unbelievable next up was
5:16
trying to fix the weird texture on the
5:18
white panels i thought i'd paint over it
5:21
with some more thin layers of paint but
5:22
obviously that texture was still showing
5:25
up from underneath i don't know what i
5:27
thought that would achieve i am
5:30
an idiot
5:31
i didn't want to get into stripping
5:33
individual sections of models because
5:35
that's something that i have zero
5:37
experience with so is here to stay
5:41
who needs typhus corrosion when you are
5:43
just
5:44
terrible
5:51
[Music]
5:54
moving on to more mistakes and things i
5:57
did
5:58
wrong maybe it was the heat more likely
6:01
it was just me
6:03
for some stupid reason i completely
6:05
ignored my order of operations and i
6:07
glazed in my transitions on the yellow
6:10
panels before
6:12
i painted my black hazard stripes i
6:14
don't know why i did that i've never
6:16
never done it before and you'll see why
6:18
it was kind of bad
6:20
right now so from part two of the series
6:22
where i was looking to find the best way
6:24
to paint hazard stripes
6:26
the version that i'd settled on was
6:28
drawing pencil guidelines
6:30
onto your yellow paint
6:32
and then painting in grey and contrast
6:35
over the top
6:37
usually i'm just doing it on a base of
6:39
avalanche sunset but i was going from
6:42
flashgets down to fireslayer flesh
6:44
and as you can see the pencil is
6:46
struggling to make marks on
6:48
the contrast paint it's not the greatest
6:51
texture for it apparently
6:53
so that did make the process a bit more
6:55
difficult
6:56
another excellent example
6:58
on how to paint minis you're welcome i
7:01
opted to start chipping the hazard lines
7:04
with a sponge this time as the smaller
7:06
details it can bring are way smaller
7:09
than i'm capable of doing with a brush
7:12
i only brought the brush out to do some
7:14
slightly bigger chips and cover up some
7:16
mistakes with the black lines when they
7:17
weren't perfectly straight
7:19
i didn't weather the hazard cable
7:22
all of my inadequacies are laid bare on
7:24
this one unfortunately i think it looks
7:26
okay
7:27
from far away but the closer you get the
7:30
more it falls apart a running theme with
7:32
this model possibly as you might see in
7:34
the future
7:35
the white highlight looks too thick the
7:37
black stripes are irregular and a bit
7:39
messy i tried cleaning it up a bit but i
7:42
didn't want to make it any worse so i
7:44
just got it to a stage where where i
7:46
didn't think i'd be able to do any more
7:49
safely and risk messing it up and having
7:51
to start over again so done
7:53
is better than perfect
7:56
in this case i chose balthazar gold for
7:58
the trim washed it then highlighted it
8:00
back up again with balthazar gold it
8:02
wasn't quite as bright as i'd like so i
8:04
mixed a bit of retrobutor armor into the
8:06
bathtub gold and just went over those
8:08
top edges again
8:11
[Music]
8:43
i've never painted a plasma weapon
8:45
before and as if look would have it
8:47
sugg's released a tutorial on
8:48
masterclass very recently i struggle
8:51
with masterclass because i think it's
8:52
just
8:53
out of my league
8:54
not ashamed to say that
8:56
at all
8:57
but i feel like i managed to get the
8:59
general gist again
9:02
looks okay from far away but starts to
9:06
fall apart the closer up you have a look
9:08
at it i really struggled highlighting
9:10
the individual coils with the fist and
9:11
red back up from the glazes underneath
9:14
but alas
9:15
we move on
9:17
i
9:18
heresy hate
9:20
transfers
9:21
in this heat
9:23
i didn't film it in the end because it
9:24
was stressing me out and you'll notice
9:26
the footage just goes straight to the
9:28
base building yay
9:30
third time lucky i've got the transfer
9:32
on roughly in the right place again
9:35
looks alright from a distance just don't
9:37
go that close the grey highlight on that
9:39
shoulder is terrible as well it was
9:42
difficult to paint in this heat so i
9:45
used a bit of cork to build up a bit of
9:46
a platform tore it to shreds with my
9:48
clippers and then sprayed it mechanical
9:50
standard grey
9:51
and this is just following duncan road's
9:53
martian base tutorial from here
9:58
[Applause]
9:58
[Music]
10:04
so here we have it the grand reveal
10:08
[Music]
10:25
i can pick apart
10:27
parts of almost every element of this
10:30
paint job and say that it's crap some of
10:32
the highlights looked like they were put
10:34
on with crayon some of the glazing and
10:36
the blends are a bit yeah
10:38
i don't like the hazards on the head or
10:41
the right shoulder i think i should have
10:43
just left them metallic and have done
10:45
with it but having said all that
10:48
to me i feel like this model is greater
10:52
than the sum of its parts
10:54
a few months ago
10:56
me and jeff started this channel
10:59
i knew that i wanted to paint and i am
11:01
warriors walt smith and i had no idea
11:04
how so i set out trying to do it
11:06
and i have
11:08
of course it's not great
11:10
but it's mine and i'm happy
11:12
maybe i'll repaint one in a couple of
11:14
years put them side by side
11:16
and see how much progress i've made but
11:18
in seven models i've gone from these
11:20
heads of stripes which were my first
11:23
and these ones
11:25
which are my most current and any
11:27
progress is good progress
11:30
so that is the end of my iron warrior
11:33
arc for now thank you so much for
11:36
watching whether it's just this video
11:38
you've watched or
11:39
all three
11:40
to people that have left comments and
11:42
helped me get to
11:44
this stage with a complete design
11:45
warrior warpsmith i am very very
11:48
grateful for all of the help and support
11:51
now
11:52
i just need to try and figure out what
11:54
to paint next
11:55
[Music]
#Visual Art & Design
#Painting