Up next in 10

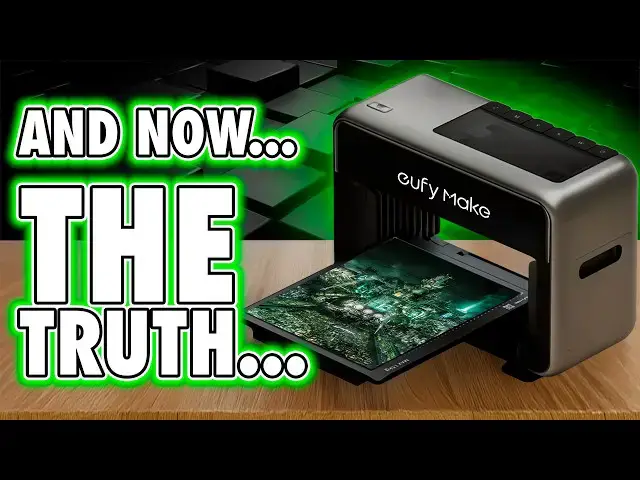
EufyMake E1 Review 2.5D Resin Printer - TIME for a REAL REVIEW
Aug 19, 2025

👉 Check out the eufyMake E1: https://geni.us/EufyMakeE1
$100 *DISCOUNT* with code "FAUXHAMMER"
Thanks to @TheRealSamPrentice
Great Gyrados off Kanegawa Design: https://makeitreal-beta.eufymake.com/projectDetail/?project_detail_id=eaad6ac23e3f24a71f5c14eb9f02f3ab
Northlight Images - Datacolor printer test Image: https://www.northlight-images.co.uk/printer-test-images/
🎥 The eufyMake E1 is a compact A3-class desktop UV printer for creators and small businesses. In this review I take it from unboxing to real projects with raised UV texture (embossed 2.5D), UV DTF decals, and rotary printing on mugs and tumblers. I cover design prep, AI camera alignment, multi-pass texture, white-ink underbase, clear-coat gloss, color management, and how JetClean maintenance keeps nozzles healthy. We then push the E1 on wood, metal, glass, acrylic, leather, slate, phone cases and coated blanks to see how far a desktop UV printer can go for merch, gifts and short-run product work.
🧪 What this machine does: a personal desktop UV flatbed that jets CMYK plus white and clear, curing between passes to build raised-ink texture for logos, nameplates, photo panels and custom merch. I demonstrate white under color for dark substrates, clear for gloss or texture, and multi-pass for thicker tactile results. If you came here via Anker or Ankermake searches, you are in the right place.
🥤 Rotary in practice: set up the rotary attachment for tumblers and mugs, measure diameter and placement, use the camera for precise repeats, compare UV rotary to sublimation and mug presses, and show where surface prep and coatings still matter.
🧷 UV DTF workflow: artwork to print to laminate to transfer to cure. Tips to avoid silvering, edge lift and bubbles, plus when UV DTF beats flatbed or rotary for odd shapes and textured surfaces.
📐 Materials and projects: wood nameplates, metal badge plates, glass panels, acrylic keyrings, leather patches, slate coasters, coated phone cases and bottles. Searches like print on wood, print on metal, print on glass, print on acrylic and print on leather with a desktop UV printer should lead you here with clear results under studio lights.
⚙️ Workflow detail you will actually use: vector vs bitmap art, DPI choices, layering for white plus color plus clear, dialing texture height, and fixes for banding, overspray, pooling and adhesion issues. I share startup routines, cleaning checklists, ink usage notes, and simple cost and time estimates per job for small-batch runs.
Show More Show Less View Video Transcript
0:00
I'm just going to say it. I don't like
0:02
Yuthi make, but I don't mean the
0:03
machine. I mean the name Yuthi. It
0:05
sounds silly. And it also makes me think
0:07
of the Final Fantasy character who also
0:09
happens to share a name with my last
0:11
surviving dog. So yeah, emotional
0:13
baggage before I've even switched it on.
0:15
And yes, later in this video, she'll be
0:17
helping with some tests we do. Not not
0:19
my dog, the character. We'll get on to
0:21
that. The printer itself, though, this
0:24
is the new anchor make. Yeah, the same
0:26
team behind the M5 and the M5C. two
0:29
machines I personally love, not for
0:32
crazy specs or reliability, but because
0:34
when they were released, they were
0:35
smart, user focused, and the whole idea
0:38
was they just worked. Honestly, they
0:41
could have dominated the FDM space if it
0:44
wasn't for a particular other brand
0:46
doing it better. An anchor losing steam
0:49
on development. But this isn't about the
0:52
name change or the nostalgia. This thing
0:54
just pulled in $46 million on
0:56
Kickstarter and it is a resin printer.
0:59
It is. And after all the hype videos
1:01
you've seen, you're about to hear from
1:03
someone who's not here to kiss its ass.
1:06
So, hi, I'm Ross and this is Fauxhammer
1:08
Videos. Now, first up, I have to thank
1:11
Sam Apprentice for this review existing.
1:13
He's the guy who put me back in touch
1:15
with Yuimake. So, please check out his
1:17
channel, too. Right, we're going to
1:18
blitz through the boring review
1:20
checklist and get straight onto the good
1:21
stuff because I've pushed this thing
1:23
hard in ways I don't think the marketing
1:25
team ever pictured. And the results
1:27
range from that's genius to oh that's a
1:30
choice. Now I've tested it in 2D, in 3D,
1:33
and in the kind of awkward space between
1:35
where you're not sure if you're printing
1:37
a picture or a lawsuit. And along the
1:39
way, I've found features I love and
1:41
limitations you'll definitely want to
1:42
know about before you drop your money
1:45
cuz it's a lot of money to drop. Now,
1:47
make no mistake. This is a resin
1:49
printer, which is my home turf. Now, the
1:51
industry calls it UV ink, but really
1:54
it's colored resin. And this works by
1:57
well, instead of a 2D printer spraying
1:59
ink that dries in the air, this drops
2:01
resin and cures it almost instantly with
2:04
a UV lamp in the print head. That means
2:06
it can print on almost any surface and
2:09
even build up physical height, too, in
2:11
layers, which makes it a 3D printer,
2:15
kind of. So, let's talk about user
2:18
experience. If you've never used the M5
2:20
printers, one of the reasons I rated
2:22
them so highly because at the time they
2:24
were released, they didn't feel like
2:25
your usual lump of semi-industrial
2:27
machinery that had accidentally wandered
2:29
into your living room. They felt like a
2:32
proper consumer product from the
2:34
unboxing. Yuthiake, just like Anchor
2:37
Make before it, has absolutely nailed
2:39
that same premium vibe. Even the
2:41
packaging, it's clean. Everything feels
2:43
deliberate. And even the way you crack
2:45
it open has that you've bought something
2:48
fancy energy. You undo the Velcro
2:50
straps, lift off the lid, and it all
2:52
just presents itself like it's worth
2:54
your attention. And before you start
2:56
typing, why is he reviewing the bloody
2:58
box? Well, think about it. First
3:00
impressions matter. You don't show up to
3:02
a first date smelling like burnt toast.
3:04
And based on how well this thing's done
3:06
already, yeah, I'll happily put out on
3:08
the first date. Everything's clearly
3:10
labeled, walking you through each step
3:12
of setup before pointing you to install
3:14
the software on your phone or computer,
3:16
and either option works perfectly fine
3:19
with this machine. Visually, it's very
3:21
much aimed at the consumer market,
3:23
sharing far more in common with 2D
3:25
printers than something with a hulking
3:27
resin vat. It's got dual fold down doors
3:29
on the front and back that hold closed
3:31
with magnets, and you can just uncip
3:33
these and remove them easily if you need
3:35
to. Just a note that despite the
3:37
physical dimensions of the unit listed
3:39
online, running it with the large
3:41
standard bed installed means the forward
3:43
and back motion needs about 73 cm of
3:46
full bench depth just to operate. And
3:48
that's about the same as when it's got
3:50
the doors folded down. There's only two
3:52
ports, power and Ethernet on the bottom
3:54
left side, and it also has built-in
3:56
Wi-Fi, which stayed stable for the
3:58
entire time I was testing. But the power
4:01
on and off routine is a little odd. When
4:03
you plug it in, you need to wait for the
4:05
light to turn green. Then you hold this
4:07
button for a few seconds so it can boot
4:09
up and run its self tests. But the
4:11
startup chime it plays is surprisingly
4:14
cheerful. This is the sort of sound that
4:16
makes you feel like the printer is
4:18
actually pleased to see you.
4:21
[Music]
4:24
Powering down the machine is the
4:26
reverse. So, you've got to hold the
4:27
button for several seconds until you
4:29
hear the shutdown audio,
4:32
but then you've got to wait about 15
4:34
minutes while it completes a full power
4:36
down cycle and the button turns red. And
4:39
that process is intentional because it
4:41
clears the lines of any residual UV ink
4:43
so it doesn't harden inside whilst the
4:45
machine sat dormant. If you leave it
4:47
switched on but unused, you'll actually
4:50
hear it run a short cycle roughly every
4:52
20 minutes or so. And that's to keep
4:54
everything fresh for exactly the same
4:56
reason. It's only got one button. This
4:58
is on top. Send a job remotely. Press
5:00
this. The print starts. Whilst it's
5:02
printing, hold this, the print stops.
5:05
Well, pauses. There are six inks which
5:07
tidily click clack into place. Cyan,
5:09
magenta, yellow, and key. That's black.
5:12
Plus, it's got white and gloss. White
5:15
here is for when your material isn't
5:17
already white, like paper. Now, you
5:19
might need anywhere from non to several
5:21
layers depending on the surface you're
5:23
printing on. Now, don't worry, the
5:24
software sets this automatically when
5:26
you pick a material type, and having
5:28
gloss is fine, but the standard inks are
5:31
already pretty shiny anyway. So,
5:33
personally, I'd rather have seen a matte
5:35
option. But Yuimake have already
5:37
confirmed they are working on more
5:39
materials for the future, and that is
5:42
super exciting. If you can already
5:44
imagine the possibilities or you've got
5:46
an idea of what you would want to see,
5:48
comment below. There's also this
5:50
cleaning cartridge on the right side.
5:52
This is hidden behind a vanity plate.
5:54
And this flushes the lines with
5:55
detergent and it actually stores purged
5:58
resin cuz UV ink is still resin, which
6:01
means it's hazardous. So, wear gloves
6:03
when doing any maintenance and dispose
6:05
of it properly. And be aware, it gives
6:08
off VOCC's. It has got a built-in carbon
6:11
filter in the front, but this only
6:12
really helps when you've got the doors
6:14
closed using the small plate, and even
6:16
then, it only reduces fumes. It doesn't
6:19
remove them. I'm going to be covering
6:21
general resin safety in an upcoming
6:23
video, so click subscribe and keep your
6:25
eye out for that. But yeah, this comes
6:26
with two print beds. The mini bed,
6:28
installed by default, has an area of
6:30
333x 88 mm. And the larger standard bed,
6:34
also in the box, swaps it easily. Just
6:37
unlock the latch, drop it in, and the
6:39
power and data connect through the
6:40
extrusion underneath. Whatever bed or
6:43
accessory you fit, the E1 tells the
6:45
studio software automatically. But this
6:47
larger bed is listed at 330x 420 mm
6:51
online. In truth, though, the software
6:53
confirms it's actually 333x
6:56
418, only slightly smaller than A3 in
7:00
depth or height, depends how you're
7:02
holding the paper. Now, the height
7:04
clearance from the bed to the actual
7:05
print head is about 150 mm, but in
7:08
reality, anything that's over about 60
7:11
to 70 mm tall triggers a snapshot failed
7:14
error and you can't print. So, that's
7:16
your object's height limit. And as for
7:18
the height of prints themselves, the
7:20
maximum height of a printed image is 5
7:23
mm from a surface, which we're going to
7:25
dig into later in the print tests. What
7:28
is super handy and cool is that before
7:30
every job, these dual lasers actually
7:33
scan your material to keep the print
7:35
head at the right distance or at least
7:37
two or three mm from the top surface.
7:40
Again, there's more to cover about that,
7:41
especially when we look at materials
7:43
that have got texture or variable depth.
7:45
We'll come on to that later. Now, it's
7:47
also got a built-in camera for bed
7:49
previews, much like a lot of modern
7:51
laser engravers. Now, it works well,
7:53
giving you a clear photo of the bed, so
7:55
you can line up designs. And on the
7:57
larger plate, it shoots in sections and
7:59
then stitches them together, which keeps
8:01
the center more accurate than if it was
8:04
trying to take a wide-angle photo of the
8:06
whole thing. But with that in mind, the
8:08
further you go widthwise, the more
8:10
distortion creeps in, and that's just
8:12
the reality of a fixed camera.
8:14
Personally, I'd love to see it mounted
8:15
in the print head on a future model so
8:18
it can take perfect top- down shots
8:20
anywhere across the plate. Now, this is
8:22
where I'd normally talk about the UI,
8:24
but this doesn't have an onboard screen,
8:25
just like their M5C. Everything's
8:28
controlled remotely through the phone,
8:30
tablet, or computer app. Setup's quick.
8:32
Connect to the printer's hotspot, give
8:34
it your Wi-Fi details, and you're in.
8:36
The interface is the same across all
8:38
devices. And there's also a web version,
8:40
too, and even a fully offline mode for
8:42
those who like to keep their printers
8:44
airgapped from society. Unlike many
8:46
modern maker apps, this one opens to Yui
8:49
Makes It Real platform. their design
8:52
storefront. Now, it's already got
8:54
hundreds of curated files with more
8:56
coming as more people get hands-on
8:58
because after every print, they give you
9:00
the option to upload and share your
9:02
designs if you're feeling generous with
9:03
the community, which is exactly what I
9:06
did with this great Gyarados over
9:07
Kanagawa design that I did. I'll put a
9:10
link in the description. But I've got to
9:11
say, even for beta software, this is
9:14
impressive. Now, sure, there are some
9:16
small bugs and some missing nice to
9:18
haves right now, but in the 3D printer
9:21
world I've existed in for a few years, I
9:23
have genuinely seen final release
9:26
software in far worse shape than this.
9:28
And here, the Yuimate team are actively
9:31
listening to and talking with the beta
9:33
testers, which is a promising sign.
9:35
Though, we do have to keep in mind that
9:37
their track record under the anchor mate
9:39
name wasn't exactly lightning fast on
9:42
updates. So maybe that's why they
9:44
changed it. I honestly think we'd be in
9:46
the same place if they just kept that
9:47
better name and delivered these results.
9:50
But yeah, from a usability point of
9:52
view, this is built for your workflow.
9:55
It's intuitive, simple, and it gets out
9:57
of your way so you can just make things.
10:00
And here's how it works in general
10:02
practice. Place your object on the
10:04
plate, take a snapshot, drop your image
10:06
where you want it, hit print. But there
10:08
are some variables such as selecting
10:10
your material type that makes changes
10:12
such as setting the default number of
10:14
layers for color and adhesion. For
10:16
example, printing on 3D printed plastic
10:19
plates as I did defaults to five white
10:21
layers and one CMK. Pick another
10:24
material and those numbers adjust
10:26
automatically. Or as you start to learn
10:28
it, you can set these layer counts
10:30
yourself, probably with the idea of
10:32
saving ink in mind. If you're printing
10:33
on something white, you don't need any
10:35
white layers before CMK because it's
10:38
already white. Now, before we dive into
10:40
showing these print tests, I've stripped
10:42
out my usual sexy color grading, so
10:44
you're seeing colors as close to reality
10:46
as possible. And I've used a Calibbrite
10:49
color checker video to grade this
10:50
following footage. So, what you see here
10:52
should be close to real and accurate
10:55
enough for anyone who wants to geek out
10:56
over color. Feel free to pause and take
10:59
screenshots. Now, first up is this
11:01
Northlight Images test chart, which I
11:03
used years ago to test my 2D printer
11:05
because there were guides available for
11:07
it online on YouTube. This thing covers
11:09
everything. Gradients, detail, solid
11:12
colors, grayscale, variable colors in
11:14
one shot. It's the sort of reference
11:16
pros would use to check how well a
11:18
printer can handle tricky transitions
11:20
and fine detail. I'm going to put a link
11:22
to the source of this in the
11:23
description, which will explain what all
11:25
of these images are actually showing and
11:27
what we're testing. But next, I made my
11:29
own custom test card. And this one
11:31
focuses on line width, text sharpness,
11:33
gradients, and a simple color chart.
11:35
Again, pause if you want to take a
11:37
closer look, but it's the easiest way to
11:39
see exactly what this printer can
11:41
resolve in terms of resolution and
11:43
accuracy. Now, on that, the E1 claims a
11:46
resolution of 1440 dpi, and that works
11:49
out to about an 18 micron dot, roughly
11:52
the same as a 12 to 14K resin printer's
11:54
pixel size. But just like resin
11:56
printers, theoretical resolution isn't
11:58
the same as practical. It can't
12:01
perfectly do a checkerboard of one dot
12:03
on one dot off at this scale. I actually
12:05
had to grab a microscope to verify this.
12:08
But what we need to consider is the way
12:10
this print head expresses ink is a few
12:12
millm above the surface of a print. So
12:15
these tiny droplets will spread a bit as
12:18
they travel through the air. That said
12:20
though, from a normal viewing distance,
12:22
the detail and color rendering you get
12:24
from prints on this still looks
12:26
fantastic. But yeah, for any 2D image
12:29
pros out there, this runs on a custom
12:31
CMK profile, not a standard one, and you
12:34
can't edit the ICC's. Now, for profile
12:37
tests, here's almost Yuthi from Final
12:39
Fantasy to help us out. And I UV printed
12:42
her on 3D printed PLA boards in various
12:44
combinations of CMYK, white, and gloss.
12:48
And these show not just the available
12:50
ink modes, but how changing the order,
12:52
adding or emitting layers can completely
12:54
alter the final look. Along the bottom,
12:56
you'll see the different quality
12:58
settings available. 720x 720 for draft,
13:01
720x440 for standard, and 1440x440
13:05
for high quality. And yeah, it's clear
13:07
that these improve in sharpness as you
13:10
increase the resolution. And going back
13:11
to those layer combinations with the
13:13
different orders, printing on
13:15
transparent materials is where CMYK
13:17
first then white really shines
13:20
literally. Without the white, the
13:22
print's actually translucent. If you add
13:24
the white, it now pops. And you can also
13:27
add another CMYK layer on top of that to
13:29
make it double-sided. And that would be
13:31
perfect for things like signage or
13:33
window graphics. Now, not everything's
13:35
perfect. There are still some quirks.
13:37
You might even notice there's some
13:38
scratches on this print, but we'll come
13:40
back to those shortly. The thing that
13:42
really sticks out is this faint white
13:44
halo around the images. Now, Yuimake are
13:47
working currently on a white underbase
13:49
choke setting to fix this, and that will
13:51
reduce how wide the white layer is below
13:53
it. But right now, as I'm testing, this
13:55
is still in beta. And the E1 can also
13:58
print in raised textures. As I
14:00
mentioned, there's three main modes, and
14:01
I've done them all. But here, I'm going
14:03
to show the default values in terms of
14:05
height and the maximums. So, flat is
14:07
standard. Flat raised can actually lift
14:10
the whole image up to a maximum of 3 mm,
14:13
but the image stays flat. Pattern
14:16
texture basically treats dark areas as
14:18
low and bright areas as high up to a
14:21
maximum of 2 mm in print height. And
14:23
this can also print in glossonly mode
14:26
for if you only want to add the texture.
14:28
Now, relief texture is the clever one.
14:30
This uses machine learning. I'm not
14:32
calling it AI because that's not what it
14:34
is, but this tries to build more of a
14:36
natural raised surface. And this is one
14:39
of several machine learning tools built
14:41
into the software. This along with
14:43
editing your own images can cost 1 to
14:45
two credits. And at the point of
14:46
recording, anybody who has one of these
14:49
gets 200 free credits a month. You can
14:52
buy more. But yeah, as for relief
14:54
texture, I tested it at the default 2.3
14:56
mm with smoothing set to one. Then the
14:59
same again with smoothing set to seven.
15:01
And then I completely maxed it out at 5
15:03
mm. And yeah, you don't need to add the
15:06
texture on this printer because this
15:07
will print on pre-extured objects, too.
15:10
For example, I printed directly onto
15:12
some Warhammer scenery by photographing
15:14
it on the E1, adding the textures in
15:16
Photoshop, and then sending that back to
15:19
the E1 to print it. And yeah, I'll admit
15:21
the results here look awful because I
15:23
picked terrible colors and textures, but
15:25
I just wanted to get it done quick to
15:27
prove that this concept works. However,
15:30
there are some printing height limits to
15:31
be aware of, though. For example, on
15:33
this 35 mm half sphere, it could only
15:36
print accurately down to about the
15:38
halfway point. So, I then made a test
15:40
ramp with 1 mm steps, and this showed,
15:43
well, the print quality is pretty
15:45
spot-on up to about a 3 mm depth change
15:47
and still fairly decent up to 5 mm, but
15:51
it starts breaking down steadily on its
15:53
way up to around 10 or 11 mil and is
15:55
completely blown out afterwards. But
15:57
still, I'd say that's a pretty solid
15:59
range in terms of print depth. But one
16:01
tip here is never mix objects of
16:03
different heights on the same job
16:05
because the E1 will only focus on the
16:07
tallest object it sees. and print
16:09
everything else as if it's at that same
16:11
height. Right, then the not fun bit.
16:14
Let's talk pricing. Now, we know this is
16:16
an expensive machine and the inks aren't
16:18
exactly pocket change either. Yuth's ink
16:21
runs at 50 cents per milliliter and
16:23
that's best case scenario assuming you
16:25
use every last drop in a cartridge on
16:28
prints. So, yeah, the consumables do put
16:31
the fee in UI. Yeah, even I heard how
16:34
terrible that was. Let's move on. So,
16:36
what do the prices actually mean in the
16:38
real world? Well, here's a few of my
16:40
test prints as examples. This Gyarados
16:42
print done in high quality, estimated to
16:44
use about 0.24 ml, and that was with six
16:48
layers of white. So, we're talking
16:50
somewhere around 12 to 19 for this
16:53
print. But all of these raised UI
16:55
profile tests on PLA plastic used 30.34
16:59
ml of ink, which is $15 to $25 just for
17:04
this test sheet. So, I've got to be
17:06
honest, it's a good job. I'm not
17:07
personally a big fan of raised prints.
17:10
I'd probably be more inclined to create
17:12
a separate 3D printer to create depth or
17:15
texture because the cost of filament or
17:17
resin is going to be far cheaper than
17:19
this ink. Now, another example, this
17:21
small page of stickers was just 0.13 ml.
17:24
So, that makes it less than 10. And my
17:26
biggest print, this huge Midgar poster
17:29
printed on a metal plate, completely
17:31
dissimilar to any other brands out there
17:33
who may print on metal plates, came in
17:35
at 0.41 ml. So, we're looking 20 to 32
17:39
cents to print it. Again, this had six
17:41
layers of white. So, yeah, it's not as
17:44
cheap as our typical office printer, but
17:45
it's still far less than I expected when
17:48
we're not adding height to it. And yeah,
17:50
I would also love for this to be
17:51
cheaper, but it isn't. Right about those
17:54
scratches. So, one consumable that I
17:57
don't see gets talked about much is the
17:59
print bed. Not the rigid plastic base,
18:01
but the top sheet. This has got a peel
18:04
away white cover, and underneath is a
18:06
gummy rubbery layer that grips onto
18:08
whatever you're printing on. Now, with
18:09
my thin PLA plates, the curing ink
18:12
sometimes actually made them contract
18:14
and curl up and pull away from that
18:16
sticky base, which meant the print head
18:19
started scraping across them mid print.
18:21
Now, Euimake already has a flexible
18:23
version of the white ink that will help
18:25
with this sort of thing when you're
18:26
printing on more flexible materials. And
18:29
as I said, they've hinted at even more
18:31
material options coming too. But over
18:34
time, especially if you do print off the
18:36
edge of a material, which I've done both
18:38
by accident and on purpose to make sure
18:41
I get full edgeto edge, you'll end up
18:43
with ink baked onto the bed. Now, you
18:45
can scrape it off, but the sheet will
18:48
eventually lose its stick, which for me
18:51
took about a week because of all the
18:52
tests I did and my lack of caring. In
18:55
the real world, you'd slow that down
18:57
with better care, or even 3D print some
19:00
jigs for batch jobs just to keep the
19:02
surface safe and clean. In desperation,
19:04
I actually broke out the old FDM
19:06
survival kit, which included glue stick
19:08
and hairspray. Just remember, I did
19:11
print a lot during testing and tried to
19:13
push it to breaking point. I wasn't
19:15
gentle. You can get replacements for
19:17
these and from what Euthake told me,
19:19
they're expected to be under $10 a
19:21
sheet. So, at least it's not the biggest
19:23
wallet killer when you inevitably ruin
19:25
one. Now, before we wrap up, I've got to
19:27
show you two accessories I tested with
19:29
this. First, the rotary tool. Honestly,
19:31
this is one of the best rotary tools I
19:34
have ever used. It attaches just like a
19:36
print bed. It locks in place and holds
19:38
pretty much any cylindrical object,
19:40
including cups with handles. And the
19:42
E1's built-in lasers can even help to
19:45
tilt the object to handle tapered edges,
19:47
which is incredibly cool. But right now,
19:50
this isn't perfect. For example, I
19:52
printed my son a Fortnite bottle, and I
19:55
did another bottle for my mate who runs
19:56
a local gymnastics club. But the E1
19:59
often misread the diameter. You can set
20:02
it manually in the software, but then
20:04
when you go to print, the auto
20:05
measurement currently forces you to
20:07
override your settings, which left me
20:09
with overlapping designs instead of a
20:12
more perfect wrap. And unlike when you
20:14
use the flatbeds, there's currently no
20:16
way to use the camera function. So, you
20:18
can't pinpoint exactly where a design
20:20
will start, either in height or
20:23
rotation. So, this does currently lead
20:25
to quite a bit of guesswork. Don't get
20:27
me wrong, a lot of this is still great,
20:29
but in comparison to how much of the
20:31
rest of the Yuimake system works so
20:33
incredibly well, this area does still
20:35
need some work to make it seamless as
20:37
the rest of the machine's functions. And
20:39
the second thing is sticker sheets.
20:41
There's not really much to say here.
20:42
This is super easy. You literally just
20:44
print your sticker design down onto
20:46
these sheets and then run them one at a
20:48
time through Yui Makes Laminator and
20:50
that's it. Ultra durable stickers,
20:52
really easy. and I've actually used them
20:54
to come up with some new faux hammer
20:55
branding tests. So, please let me know
20:57
if you've got any favorites in the
20:59
comments. Now, before I conclude, I
21:01
really want to just hammer home how easy
21:03
this machine is to use. So, here's the
21:06
first thing I ever printed on it. No
21:08
test runs, no calibration. This was just
21:10
an idea I had that I wanted to
21:12
desperately apply as soon as I knew the
21:14
machine existed. And I had no idea if
21:17
this would even work. But going from
21:19
idea to this being my first immediately
21:22
working print shows just how easy this
21:24
was. And it was as simple as I grabbed
21:26
some random terrain textures from the
21:28
internet, cropped them into circles, ran
21:31
them through the depth map tool in
21:32
Yuimake Studio, and printed them
21:35
straight onto Warhammer bases. And it
21:37
worked first try. I now have colored and
21:41
textured Warhammer bases ready to go
21:43
with incredibly little effort. It worked
21:46
first try. That's how easy the E1 is to
21:49
learn how to use. So, here's where I
21:52
land on it. It's brilliant. It's not
21:55
perfect, but it is unmistakably
21:58
brilliant. And that's worth underlining
22:00
because we're only at the start of this
22:03
tech being something we can actually
22:05
have in our homes. What's here is
22:07
already powerful, easy, and wildly fun
22:10
to use. And the potential is huge. Like
22:14
imagine they swapped out that gloss
22:16
material for a soluble support material
22:19
and then opened the door to printing
22:20
actual full color 3D models straight out
22:24
of the machine fully cured and ready to
22:26
handle without cleanup. Yeah, then we'd
22:28
be looking at something that could
22:30
completely shake up resin printing
22:31
entirely. But whether that's just a pipe
22:34
dream, a patent problem, or just a not
22:36
yet, I honestly don't know. What I do
22:39
know is that it's technically possible
22:41
and I'm fine dreaming. Even if it wasn't
22:44
full color, just a soluble support
22:46
material and the ability to make 3D
22:48
objects out of this means we'd be able
22:51
to take stuff off the plate and get rid
22:53
of 90% of that post-processing that we
22:56
hate in resin printing. But even with
22:58
what this is now, I'm blown away. The
23:00
truth is, Yuimate didn't just make a
23:02
clever concept. They nailed it in the
23:04
same way they nailed some big elements
23:06
of their M5 series. The focus on user
23:09
experience means you're not learning a
23:11
new hobby just to use it. You're free to
23:14
create. Just sit there, think of
23:16
something. You load it in, and the
23:18
machine actually gets out of your way,
23:20
and the software helps you make the
23:21
thing you've thought of. But yes, there
23:23
are still things to keep an eye on.
23:25
Software polish, ongoing updates, and
23:28
making sure they don't slip into the
23:30
slower dev pace that hurt them when they
23:32
were anchor. But the way they've already
23:34
been interacting in the beta user
23:36
Discord server is already miles ahead of
23:38
how most brands treat paying customers.
23:41
I've got to be honest with you, this is
23:43
the most fun I've had with a new piece
23:45
of tech in a long time. And what I love
23:48
is that this isn't just another
23:50
incremental update pretending to be
23:52
innovation. It's a big swing and it's
23:55
already connected. So, if you came into
23:57
this video looking to answer the
23:59
question, should I buy it? Well, if
24:01
you've made it this far, you probably
24:03
already know the answer. And let's be
24:05
fair, you probably already knew that at
24:07
the start. But if you do buy it and this
24:09
video was helpful, I would love it if
24:11
you'd use my affiliate link in the
24:13
description or pinned comment because it
24:15
costs you nothing, but it earns me a
24:17
commission and that's what helps me keep
24:19
making videos like this instead of
24:20
selling my soul to brands who'd rather I
24:22
just read their press releases. The UI
24:24
E1 isn't perfect. Nothing is. But I've
24:28
got to be honest, this is probably the
24:29
closest I've seen any product come. And
24:32
it's still in beta. I genuinely can't
24:35
wait to see where this goes from here.
24:37
And this is a product that is not going
24:39
to leave my office anytime soon. I love
24:42
it. I want to say thanks for watching.
24:44
And a huge thanks goes to our members
24:46
who are on screen now. They get Discord
24:48
rolls, early access, and exclusive
24:50
videos. Please consider joining them.
24:52
That's also a great way to support the
24:54
channel. We also accept super thanks.
24:56
And if you want, I'll do one of them buy
24:58
me a coffee things. But anyway, I want
25:00
to say until next time. The scientists
25:02
were so preoccupied with whether or not
25:04
they could, they didn't stop to think
25:06
whether or not they should. And if those
25:07
scientists are the people at Yuimake,
25:09
I'm glad they didn't. Keep doing stuff
25:11
like this. Anyway, until next time,
25:13
Fauxhammer out.
25:18
[Music]
#Business & Industrial
#Hobbies & Leisure
#Shopping