Up next in 10


Order the Anycubic Photon P1 Here: https://geni.us/AnycubicPhotonP1
IMPORTANT UPDATE: Thanks to community feedback, Anycubic will be replacing the UV cover on this machine to one that blcoks UV light much better! YAY! - Also, the Wavy Layer will be both removable and replaceable.
Want a Mobile Power Supply or UPS? Checkout the Aferiy P210 here: https://geni.us/AferiyP210
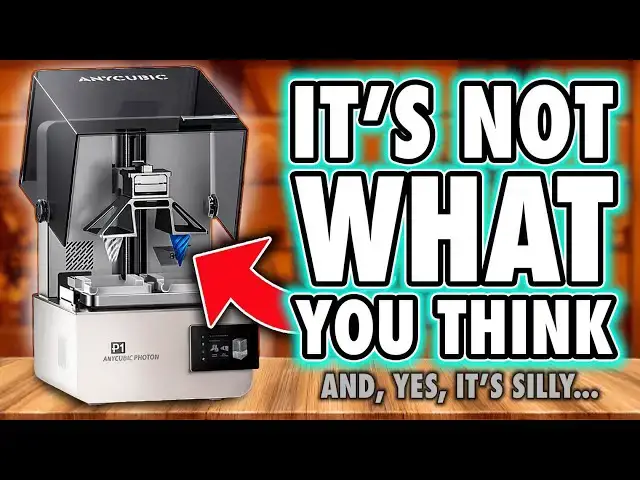
The Anycubic Photon P1 is the newest 10-inch resin printer from Anycubic, pitched as a more professional alternative to the cheaper consumer machines dominating the market. A lot of people are wondering whether the Photon P1 is just another budget unit with a fancy number on the box, or a genuine attempt to bring prosumer features to a wider audience. This video looks at what the machine actually is, how it works in practice, and what Anycubic are trying to achieve with it.
If you’re researching the Anycubic Photon P1 because you want to know whether the 14K screen makes a difference, whether the corrugated screen surface affects detail, whether the PFA film improves print reliability, or how this compares to the Photon M7, Photon Mono X2, Elegoo Saturn 3 Ultra, or Phrozen Sonic Mega series, all of those questions are explored during real-world testing rather than repeated from marketing documents. People are also asking whether the dual build plate is standard, what the dual material workflow looks like, how exposure and layer settings are handled, whether the resin heater improves consistency, how loud the machine is, whether WiFi printing works well, whether auto-leveling is real or assisted, and whether the new compression latch system actually changes anything. These are the kinds of things that matter to everyday users rather than theoretical spec sheets, so they're all covered here from actual use.
One recurring question is whether Anycubic finally addressed the reliability and workflow issues seen on earlier machines, especially the M5 and M7 ranges, and whether the Photon P1 is a return to what made the Photon M3 Premium so highly regarded. A lot of buyers still want to know whether this is a machine designed for hobbyists who want convenience, or for people who obsess over pixel density, C7 ball screws vs C5 hardware, or who demand truly professional tolerances. Another common question is whether the Photon P1 is good for miniatures, whether it prints sharper than previous models, how well it handles small details compared to competing printers, and whether the new firmware and slicer tools have caught up with the rest of the industry.
There is also interest in the practical elements you don’t see on product pages, like UV penetration from the lid in bright environments, how the air sealing performs, how the vat behaves when filled to capacity, how easy it is to swap screens, what kind of remote monitoring the built-in camera actually provides, and whether the dual-plate workflow is useful for ordinary users or just for dental and industrial applications. These kinds of questions tend to get buried beneath marketing hype, so the video looks at them directly and pragmatically without assuming everyone has the same priorities.
Whether you're deciding between the Photon P1 and another 10-inch resin printer, wondering how much the 14K screen matters in real models, trying to understand Anycubic’s strategy with the P1, or exploring whether it's a better fit than a more expensive “true prosumer” machine, this review should help you form your own opinion without being sold a narrative. The aim isn’t to tell you what to think, but to show you what matters, how it works, and what questions you should ask when comparing resin printers in this category.
The title says it’s not what they say, and the thumbnail says it’s not what you think. Watch the video to see why both of those things are true, and how much of that comes from the specs, from the engineering choices, and from the real-world behaviour of the machine when it's actually used the way hobbyists use printers.
If this video helps you understand the Anycubic Photon P1 better, or gives you clarity on whether it fits your needs, please consider using the affiliate links below when you buy machines, materials or accessories, since that directly supports the channel.
Show More Show Less View Video Transcript
0:00
If you're new here, you won't have heard
0:02
me gush about the Any Cubic Photon M3
0:04
Premium before. That was my fourth ever
0:06
printer review, but longtime viewers
0:09
know I've loved it for a long time. Even
0:11
the thumbnail back then just read, "Buy
0:13
this printer." It wasn't clickbait, no
0:16
hyperbole, no drama, just me being
0:18
aggressively confident. Those who bought
0:20
it sing its praises to this day as being
0:22
one of the last great printers
0:24
available. But in truth, it simply
0:27
didn't sell well. at least not enough
0:28
for any cubic to keep it alive for more
0:30
than 6 months. And the spare parts
0:32
disappeared soon after. That unfortunate
0:35
flop pushed the brand into a bit of a
0:37
spiral. One where they wrongly assumed
0:39
people just want cheaper machines. And
0:41
that's how we ended up with the
0:42
relatively awful M5 line. Now, the M7s
0:46
were better, but also weird. Some solid
0:49
ideas mixed with some choices that still
0:51
make my eye twitch. So, when I say the
0:54
P1 is a solid, thoughtful equipped entry
0:56
into the 10-in category, I'm not hyping
0:59
it up. I'm acknowledging that it's more
1:02
capable than most people expect from the
1:04
brand. It deserves your attention, even
1:07
if just to see where they've landed.
1:09
because of course this is still any
1:11
cubic. So they've sprinkled just enough
1:13
chaos into this design to remind you
1:16
exactly who you're dealing with. Whether
1:18
those choices actually impact you
1:20
practically or psychologically or
1:23
whether this is still a better deal than
1:25
the compromises forced on you by other
1:27
brands. Well, that's for you to decide
1:29
after you watch this. Hi, I'm Ross and
1:31
this is Fhammer Videos. Let's get into
1:33
it. Okay, first up, this dual build
1:36
plate thing. Ignore it. any cubic have
1:38
plastered it across every piece of promo
1:40
they've shown, but it's an optional
1:42
add-on, not the default machine. We'll
1:44
get into what it's good for later. Just
1:47
know it's not how the printer ships. And
1:49
I think it's a stupid marketing choice
1:51
because yes, it grabs attention, but it
1:54
also confuses people right up front by
1:56
making the printer look like some
1:58
ridiculous contraption before you've
2:00
ever had a chance to see what it
2:02
actually does. I'm quite confident that
2:04
more people will bounce after seeing
2:06
this than be impressed by it. But
2:08
anyway, now we know what it isn't. Let's
2:10
talk about what it is. At its core, it's
2:12
a standard 10-in resin printer. A normal
2:15
build plate, a normal VAT, and then a
2:17
collection of weird, sometimes clever,
2:19
sometimes questionable engineering
2:21
decisions stacked around it. Unboxing
2:23
here is business as usual for any Cubic.
2:26
There's no premium experience. Just a
2:28
brown cardboard box with the printer
2:30
gently sandwiched in some foam. Tilt the
2:32
box, slide it out, peel the wrapping,
2:34
and remove the accessories embedded in
2:35
the top layer. Basic, but it works. The
2:38
printer is pretty light considering the
2:40
supposed quality they've advertised is
2:42
inside. But visually, it's fantastic. It
2:45
feels like the next step in any Cubix's
2:48
professional aesthetic phase. Clean,
2:50
plain, borderline medical. It doesn't
2:52
scream at you like a gaming PC. It just
2:55
sits there looking competent. The lid is
2:58
an up and over design, this time with an
3:00
integrated handle. Just be aware that
3:02
when you lift it, it extends beyond the
3:03
machine's footprint that you'll see
3:05
advertised online. So, you'll need
3:07
roughly 65 cm of height and 53 cm of
3:10
depth for full clearance. Or you can
3:13
just remove the screws on the side and
3:15
use this as a removable face plate,
3:16
which is actually ideal for farms. Now,
3:19
the first problem, I actually normally
3:22
don't bother testing UV leakage from
3:24
these covers because historically most
3:27
brands have been good enough. But after
3:29
my first print, I noticed some cured
3:31
resin on top of my build plate, which
3:34
shouldn't happen. So, I grabbed a UV
3:36
meter and a UV torch. And yeah, UV light
3:39
gets through the lid. It's not a ton,
3:41
but it's clearly enough to cure the
3:43
resin that's in my machine. Now, to be
3:46
fair, my workshop isn't exactly a dim,
3:48
cozy side room, the same sort of place
3:51
most people keep their printers at home.
3:53
I've got daylight fatigue reducing LED
3:55
strips and big studio lighting. So, my
3:58
environment is certainly harsher than
4:01
normal, but still this has never
4:03
happened to me before. And when I raised
4:05
it with any cubic, they basically said
4:07
this is the lid they're shipping with it
4:09
and suggested using it in dimmer rooms,
4:12
which I've got to be honest is a
4:14
hilarious solution to a hardware design
4:16
floor if nothing else. And it's a good
4:19
job they aren't positioning this as a
4:20
professional machine for controlled
4:22
environments like dental studios then
4:25
cuz they're not going to use daylight
4:26
lamps or whatever lamps have UV in them
4:29
to prevent fatigue. Anyway, since we're
4:31
on the lid, the ceiling is also
4:34
creative. They've added felt-like strips
4:36
on the top of the body, but they seem
4:38
more like soft closed dampeners than
4:40
actual seals because the rest of the
4:42
edges and the entire top perimeter have
4:45
noticeable gaps where VOCC's will
4:47
escape, but also fresh air can pour in.
4:51
I'll come back to that in a minute. Now,
4:52
ports wise, the power socket is on the
4:54
back, but there's no rocker switch.
4:56
There's also a rubber bung on the back
4:58
covering a vent hole. And now we know
5:00
what it's for. It's a proprietary
5:02
connector for any Cubix's Air Pure 2.0,
5:05
which essentially is a hose with an
5:07
inline fan that vents fumes outside your
5:09
home. And I've got to be honest, this
5:11
looks like a solid add-on. Finally,
5:13
someone is doing this properly with an
5:15
official product. And they even offer
5:17
printable connectors for old machines or
5:20
third party units, too. Also, on the
5:22
back, like the M7, you can access some
5:24
of the internal controller boards, which
5:26
should help maintenance a bit. The USB
5:28
port, however, is on the front just
5:30
above the power button on the side of
5:32
the offset screen. And realistically,
5:34
most people won't use it much because
5:36
the printer has built-in Wi-Fi, which
5:38
allows for remote sending, starting, and
5:40
monitoring of prints from both the
5:42
slicer and the phone app, and that is
5:44
incredibly handy. But sadly, there's no
5:46
Ethernet socket available, something
5:48
more common in professional devices. So,
5:50
it's a good job they're not pushing this
5:52
towards professional users. Anyway,
5:54
jumping inside. First up is the build
5:56
plate. This is now a solid high-grade
5:59
stainless steel platform, much tougher
6:01
than usual aluminium plates because
6:03
it'll resist scratches far better. The
6:06
downside is the completely flat top
6:08
rather than a taper, which means manual
6:10
cleaning after every print. If you don't
6:12
wipe it before removing the plate, resin
6:15
is going to run everywhere. Now, just
6:17
quickly jumping down to the vat. This
6:18
has two small prongs at the front which
6:20
let you mount this plate sideways so
6:23
resin can run off. Now, this helps, but
6:25
I'd prefer this to be on the side of the
6:27
vat because the current position limits
6:29
the height of models you print to the
6:31
depth of the screen. And you also do
6:34
still get runs down the handle, and you
6:37
can't close the lid with this in place.
6:39
It's definitely useful, but it's
6:41
imperfect. Also, this steel plate has
6:44
four recessed screw holes, which means
6:46
it isn't perfectly smooth, and these
6:48
recesses will leave dents in parts of
6:50
your bottom layers. Again, not ideal if
6:53
you're printing direct from the plate,
6:55
as professionals, engineers, and dental
6:57
users sometimes do. So, again, it's a
6:59
good job this isn't being targeted at
7:01
them. There are also two other plates,
7:02
which I got to see firsthand at Form
7:04
Next. One is another steel plate which
7:07
has relief holes to reduce early layer
7:09
suction, and the other is the dual VAT
7:11
aluminum plate. And let's just say it,
7:14
for most hobbyists and most users of
7:16
this machine, this dual plate looks
7:18
ridiculous. But there are some real use
7:21
cases. Some like dentistry where
7:23
printing two materials with different
7:25
exposure settings at the same time would
7:28
actually matter. I can also see it being
7:30
useful with expensive resins like
7:33
casting resins. Putting a small amount
7:35
into one side and only printing what you
7:37
need rather than filling a whole vat
7:40
certainly has its upsides. So yes, it's
7:42
niche. It's kind of industrial and it
7:45
has genuine use cases, which makes it
7:48
amusing that other design choices don't
7:50
fully support those users or their
7:52
environments. But all the plates do
7:54
attach with a compression latch, which
7:56
is very handy and should honestly be
7:59
standard by now. Now, when it comes to
8:01
the mechanism, we have dual linear rails
8:03
and what any cubic are calling an
8:05
industrial-grade ball screw. Now, that
8:08
sounds very professional, but it's a C7
8:10
grade, not a C5. C7 is more commonly
8:13
used on hobbyist machines rather than on
8:15
proper industrial equipment. It's still
8:18
good. It's just not as good as the
8:20
wording would lead you to believe. Will
8:22
it impact the average user? Probably
8:24
not. But this is the kind of choice that
8:27
makes the machine look proumer and
8:28
professional from the outside rather
8:30
than being genuinely professional-grade
8:33
hardware on the inside. And this is one
8:35
of the things that keeps the cost down.
8:37
Now, moving on to the VAT. It's metal,
8:39
which is good. And they finally ditched
8:41
ACF release film in favor of clear PFA.
8:44
So for all my haters out there who
8:46
argued I was wrong about frosty release
8:48
film reducing print quality, please
8:50
explain why any cubic have now ditched
8:51
it here. Yeah. All right. You also get
8:54
the aforementioned clip so you can mount
8:56
the plate sideways for runoff and a very
8:59
good pore spout. This alone could be a
9:01
solid reason to get this printer. But
9:04
one very odd thing or dangerous thing
9:06
which I hope is just in my early model
9:08
is the max fill line. Now the specs of
9:11
the machine say that it holds up to one
9:13
liter of resin. But even with a full
9:14
bottle of frozen Hyperfine in mine, my
9:17
resin level was still well below that
9:19
line. I could have easily poured in
9:21
another bottle and probably more before
9:24
actually reaching it. Now, the problem
9:26
here is if you filter that line, the
9:28
resin will most definitely and almost
9:30
immediately spill out of the spout as
9:33
soon as the plate enters the vat. So,
9:35
either that needs fixing or you need to
9:37
know not to fill it that high. So, it's
9:39
a good job you're watching my videos.
9:41
Please subscribe for more tips on how to
9:43
avoid screw-ups by avoiding the
9:45
manufacturer's defects. The best feature
9:48
of this vat by far is the built-in resin
9:50
heater, which includes temperature
9:52
sensing rather than just a simple onoff
9:55
that other brands deliver. Now, this is
9:57
great for colder environments or just
9:59
getting your resin to a consistent and
10:02
ideal temperature during prints, and it
10:04
can be set as high as 40°, too, which is
10:07
going to be incredibly handy for those
10:09
really dense resins, more engineering
10:11
stuff. So, that's something. And not
10:14
only does this a fix with latches, but
10:16
when you mount this to the machine, you
10:18
get a really satisfying click, which
10:21
yeah, is something I'm still weirdly
10:22
fixated on and was since my Form Next
10:25
preview. But this is something that does
10:28
feel premium. So overall, this is a good
10:31
featurerich large with a couple of
10:33
questionable markings. Now onto the
10:35
screen, and it's number time because
10:38
this is where a lot of people get hung
10:39
up on the stats. The P1 uses a 14K panel
10:43
10.1 in with a resolution of 13,312x
10:48
5,120
10:49
pixels across an area of 223x
10:53
126 mm. That gives us 16.8 micron pixels
10:57
on the X-axis and 24.8 8 micron pixels
11:00
on the Y or technically 17x 25 because
11:04
who the hell is working in fractions of
11:06
microns other than any cubic to make it
11:08
look slightly better in their write up.
11:10
And while we're talking about size, the
11:12
build height is 230 mm. So it sits
11:15
comfortably at the slightly larger end
11:17
of the current 10-in category. Now this
11:20
resolution in practice, most resins can
11:23
only render at around 25 to 30 microns
11:26
in ideal conditions anyway. So, the
11:29
screen is already outperforming what the
11:32
materials can physically reproduce. So,
11:34
I want to say that before anyone jumps
11:36
on the why is this not 16K or higher
11:38
bandwagon. And well, not only that, but
11:41
the 16K screens used in a lot of current
11:44
machines are physically smaller and
11:46
require more UV power and heat to push
11:49
light through the tighter pixel grid.
11:52
That means they tend to run hotter and
11:54
burn out faster. So yes, 16K is a bigger
11:57
number, but in this context, it doesn't
11:59
automatically make things better. Trust
12:01
me, this 14K panel was the better
12:04
choice. However, the bigger and possibly
12:07
more obvious question is, does this
12:09
corrugated layer they've added to reduce
12:11
peel forces affect print quality? Well,
12:14
if you've been watching my videos, you
12:16
already know the answer. Yes, of course
12:18
it does. And if you need external
12:20
validation, go and watch J3D's video on
12:22
screen protectors. Even clear flat glass
12:25
protectors soften detail a bit. So, you
12:28
shouldn't be surprised that there's more
12:30
distortion from a wavy bonded surface
12:32
that scatters light in various
12:34
directions. And to back that up, when
12:36
you compare prints on this to the same
12:38
14K panel on any Cubic's own M7 printer,
12:41
of course, once you've swapped its
12:42
default ACF for PFA, the P1 is softer,
12:46
not dramatically, but visibly. And here,
12:50
you can't remove it and get the
12:51
sharpness back. Unlike ACF, this is a
12:55
built-in hardware bottleneck. Now, any
12:57
cubic have obviously been obsessed with
12:59
reducing peel forces without copying the
13:01
mechanics that other brands use. First
13:04
with ACF and now with this. And yes, it
13:07
does reduce peel forces slightly, but
13:10
the price is a small loss of surface
13:12
quality every time they chase this goal.
13:14
Now, I'm saying that I am splitting
13:16
hairs. Does it matter in practice? For
13:19
most people, probably not. Most users
13:21
are probably printing pre-supported
13:23
miniatures with anti-aliasing and using
13:25
softer, tougher resins, not the more
13:27
brittle, highdetail stuff I use for
13:30
screen testing. In real world prints,
13:33
you'll struggle to see a meaningful
13:34
difference. In terms of print success or
13:37
speed, the benefit is marginal. Reduced
13:40
peel force does help during the first
13:42
few millimeters of a lift in terms of
13:44
speed, but most of the speed advantage
13:46
in this machine probably comes from the
13:48
dynamic pressure sensing algorithm,
13:50
which I'll talk about in a minute. The
13:52
other theoretical benefit I was shown at
13:54
form next is the idea of fewer supports
13:56
are needed because of reduced peel
13:58
forces. But any cubic slicer doesn't
14:01
implement this. The auto support tool
14:03
gives you the same density if you're
14:05
printing on this as if you were printing
14:07
on the original any cubic photon. So
14:09
unless you're manually supporting and
14:11
iterating your own models supports,
14:14
you're unlikely to see that benefit
14:16
either. So maybe, but it's only a maybe,
14:19
you will slightly reduce the fails you
14:21
could get from models tearing from the
14:23
plate, assuming we can trust any Cubix's
14:26
dynamic force sensors and reaction to
14:28
that. But the truth remains, the P1
14:31
trades a small amount of sharpness for a
14:33
small reduction in peel force. And here,
14:35
unlike with ACF, you can't swap it out.
14:38
This is a fixed design choice. And this
14:41
time, you're stuck with it. It makes me
14:43
wish for a version of this printer
14:44
without this because I can all but
14:46
guarantee if somebody figures out how to
14:48
safely remove this wavy cover, you'll
14:51
get sharper prints. If we can give this
14:53
some praise though, any cubic have
14:55
finally given us a much better screen
14:57
replacement process rather than take the
14:59
whole base apart like with previous
15:01
machines. Here you just remove the
15:03
surrounding tape and undo eight screws
15:06
and that lets you lift out the screen
15:07
and unclamp the ribbon cable. Fantastic.
15:10
I genuinely have half a mind to check if
15:12
a normal M7 screen will work in this,
15:15
but I don't currently have one to hand.
15:17
So maybe that's a future video. Right,
15:19
leveling. So despite the product manager
15:22
of this machine telling me at Form Next
15:24
that this doesn't have autoleveling but
15:27
assisted leveling, the marketing team
15:29
still calls it autoleveling. And
15:31
honestly, I've got more of an issue with
15:33
the term than the implementation. To be
15:37
clear, this is not autoleing. The plate
15:40
doesn't magically set itself. What
15:42
actually happens is the plate presses
15:44
down on the screen and there are force
15:45
sensors in each corner that measure how
15:47
much pressure is applied. You then turn
15:50
the four screws on the top of the build
15:51
plate until the readings match, meaning
15:54
it's parallel to the screen. So, it's
15:56
assisted leveling at best. You still
15:58
have to do it, but Any Cubic does say
16:01
they'll calibrate the machines at the
16:03
factory. And that there is the real
16:05
value, giving you the impression that
16:07
it's doing it automatically. And if you
16:10
do ever need to rele yourself, at least
16:12
it's in a measured way. But the bigger
16:14
issue I have with this is a
16:16
spring-mounted screen because any
16:18
pressure on that screen during printing
16:20
from the plate or the resin beneath it
16:23
will push the screen downwards. The zero
16:25
point isn't mechanically fixed. Unlike
16:28
systems from other brands that actually
16:30
lock the screen in place, this one stays
16:33
somewhat fluid, and that can lead to
16:35
some early layer compression, sometimes
16:38
visible as a line across prints or even
16:40
tearing if the model volume changes and
16:43
pressure drops. However, any cubic has
16:45
been leaning heavily into dynamic
16:47
pressure sensing for years, more than
16:49
most other consumer brands. So much of
16:52
this behavior is compensated for in the
16:54
software, in their algorithms. The
16:56
printer detects when movement stops,
16:58
manages lift heights, and even detects
17:00
when a layer has fully peeled from the
17:02
release film before moving on. And in my
17:05
testing so far, the results have been
17:08
mostly flawless with a couple of prints
17:10
that have shown this compression line
17:12
partway up. But most of the errors have
17:13
been caused by me having to go back to
17:15
performing manual exposure tuning on
17:17
this printer, something I haven't had to
17:19
do in a while. So, it's a bit of a weird
17:21
system. Good, bad, good. you are relying
17:24
on any Cubix's pressure sensing to make
17:26
potential issues disappear. And this
17:28
seems to do a passable job in most
17:31
scenarios. I mostly print pre-supported
17:33
models anyway, so those lines are
17:35
normally part of the support structure,
17:36
and I never actually see it on the
17:38
models themselves that I'm printing, but
17:40
I know this is going to bother some
17:41
people, like those looking at this for
17:44
engineering use. So yeah, you're
17:46
beholden to any Cubix's algorithms, but
17:49
if you don't like it, you can turn most
17:50
of this off and go back to basics,
17:52
setting your lift heights and retract
17:54
speeds and all that manually, albeit
17:57
with a springy screen underneath. And
17:59
finally, on main hardware, the light
18:00
source. It's a 405 nm chip on board
18:03
array, which is pretty standard for
18:05
consumer resin printers. It's reliable,
18:08
it works, and it's a sensible choice for
18:10
this price. Again, it's just not the
18:12
kind of thing you'd normally find in
18:14
actual professional machines, which is
18:16
typically more 385 nm. But again,
18:19
thankfully any cubic aren't pretending
18:21
this is for pro users. When it comes to
18:23
ancillary features, though, there's also
18:24
the built-in camera, which is only 480p,
18:28
but it's sufficient for remote
18:29
monitoring through the Any Cubic phone
18:31
app, and it'll generate some passable
18:34
time-lapses. It's not going to win
18:36
cinematography awards, but it works. On
18:39
the software side, the UI has had a
18:42
noticeable upgrade. The layout is
18:43
similar to previous generations, but
18:45
you've got more control on screen and
18:47
more information available without
18:48
digging through menus. It's still clean
18:51
and it genuinely feels more mature than
18:53
earlier versions. One thing missing
18:55
though is the ability to set up multiple
18:57
exposure tests directly in the UI like
19:00
on other brands. But this is still much
19:02
better than it was before because now
19:04
you can easily set up tests using the
19:06
built-in model or your own. The starting
19:09
exposure time is set in the resin
19:10
profile and then you define the
19:12
increments using this tool. And the test
19:15
actually prints with numbers physically
19:17
printed next to each sample so you can
19:19
see which is which. Just be aware that
19:21
it will shrink larger models that you
19:23
import. And speaking of the slicer, this
19:25
itself has come a long way. Resin
19:27
profiles are now neatly nested by brand
19:30
and you can create multiple plates with
19:32
auto layout options that actually work.
19:34
For the dual build plates, you can
19:36
select each side independently and then
19:38
assign different resin curing profiles,
19:41
but the layer heights need to match for
19:43
hopefully obvious reasons. And speaking
19:45
of that dual plate function, I said I
19:47
wanted to cover it for those who want
19:48
the specification. Each of the two zones
19:50
on either side of the screen have a
19:52
volume of 66x 126x 195 mm XYZ. And the
19:58
Y-axis obviously matches the full screen
20:01
depth. And while any cubic hasn't
20:03
provided me with the exact resolution of
20:05
these zones, doing a bit of math, it
20:07
works out to approximately 3,940 pixels
20:10
wide by the same 5,120 pixels deep. And
20:14
yes, the printer even has a built-in vac
20:16
cleaning function for each of these
20:18
zones independently. Anyway, back to the
20:21
slicer. The thing that now feels dafted
20:23
is the new placement of basic movement
20:24
controls behind nested menus. there's
20:27
plenty of space to put them permanently
20:29
on the screen in the same way that Orca
20:31
Slicer does it. That would be much
20:33
handier. But overall, I do think this is
20:36
a very competent program that does keep
20:38
improving. And I usually prefer sticking
20:40
with the manufacturer's slices anyway
20:42
just to avoid more compatibility
20:44
nonsense. And finally, because I know
20:47
someone will ask, yes, the printer does
20:49
have a power loss resume feature, but a
20:51
lot of people still message me about
20:53
backup batteries or UPS units for 3D
20:55
printers in case of a power cut. Now,
20:58
Apherey, which I think is how it's
20:59
pronounced, actually sent me one of
21:01
theirs to test it out, and I've been
21:03
using it just fine. It's solid. It's got
21:05
loads of outputs, and it's portable
21:06
enough to take camping if you ever want
21:08
to charge gear off-rid. And I even
21:10
learned this week that it's got
21:12
expandable power storage, which is
21:14
pretty neat. So, if you want a decent
21:15
UPS to pair with a resin printer, I'll
21:18
drop an affiliate link to it somewhere
21:19
in the description. But here we are with
21:21
the printer. Where does that leave us?
21:24
The P1 is a very capable machine with
21:26
smart upgrades, sensible workflow
21:28
improvements, smart features like adding
21:30
a camera, and a genuinely better user
21:32
experience than anything any Cubic has
21:35
put out in years. But it's still not the
21:37
second coming of the M3 Premium, and
21:39
it's not the proumer resolution that the
21:41
marketing implies. It's very much a
21:44
consumer machine that's wearing proumer
21:46
clothing. It's got the look, the
21:48
features, and the ambition, but it's
21:50
built from the cheapest viable versions
21:52
of those parts to hit a price point. And
21:55
because of that, it falls short of being
21:56
the premium, uncompromising successor
21:59
some of us were hoping for. Let's be
22:01
honest, this is just the successor to
22:04
the M7, not a proumer beast. But here's
22:07
the thing. If you want a reliable,
22:09
modern, wellfeatured 10-in resin
22:12
printer, you don't obsess over
22:14
microscopic differences in sharpness,
22:16
and you're not expecting it to replace
22:18
an $800 to $1,000 plus real proumer
22:21
unit, then this is a pretty great
22:24
option. If though you're the kind of
22:26
person who buys a machine based on the
22:28
theoretical maximum print resolution,
22:30
microscopic edge fidelity and you feel
22:32
the emotional trauma of not having C5
22:35
grade hardware, you're going to hate
22:37
this loudly on the internet. I think for
22:40
everyone else, look, this is a good
22:42
printer at a fair price with some
22:44
meaningful quality of life features that
22:46
genuinely can improve day-to-day use.
22:49
It's not perfection. Please ignore the
22:51
hype. This is little more than a capable
22:54
machine that genuinely improved
22:56
day-to-day use. Although, if you
22:58
accidentally cure resin on that wavy
22:59
screen, good luck getting it off. This
23:01
is little more than a capable modern
23:03
machine for the user who actually
23:05
intends to print with it. And that's
23:07
okay. So, if that's what you want and
23:09
you're happy to accept the limits it
23:11
imposes, then yeah, definitely pick this
23:13
one up because if the M3 Premium was the
23:16
best thing they've ever built, the P1 is
23:18
the closest they've come since. even if
23:21
it's mostly playing dress up. If this
23:22
video was helpful to you, at least open
23:24
your eyes on what you're buying here,
23:26
then please, as always, consider using
23:28
my affiliate links and discount codes
23:30
when I have them in the video
23:32
description. I'll get a commission on
23:34
the sale. That won't cost you more, but
23:36
it is how I fund this channel. If you
23:38
enjoyed what you saw, hit subscribe, hit
23:40
like, hit the new hype button, whatever
23:42
that does. Tell your friends, and even
23:44
consider joining us to get your name in
23:46
the credits like these wonderful people
23:48
who are on screen now. They do
23:50
legitimately help to keep the lights on.
23:52
So, for this reward along with Discord
23:54
rolls and early access, please consider
23:56
signing up. I want to say thanks again
23:58
to you for watching and until next time,
24:01
I can't carry it for you, but I can
24:03
carry you. Fauxhammer out.
24:10
[Music]