Up next in 10


Use code: THEPAINTINGPHASE for 10% off
Link: https://weprintminiatures.com/thepaintingphase
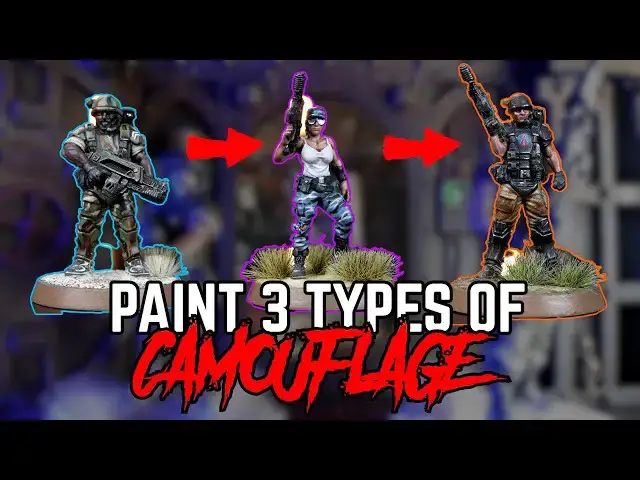
Stuck on how to paint camouflage on your miniature troops? Or can you just not decide on what style of camo? Never fear, Peachy is here... to guide you through painting three different types of camouflage on your miniature soldiers. Warhammer 40k, aliens, or your own military army, we've got you covered #warhammer40k #camouflage
Join our Patreon: https://patreon.com/thepaintingphase
Help Support the channel with our affiliate links:
UK: https://elementgames.co.uk/?d=10835
EUROPE: https://taschengelddieb.de/?affiliate=tpp
US: use code paintingphase to get 10% off at https://www.goblinshut.com/
Follow us:
https://www.instagram.com/thepaintingphase/
https://www.instagram.com/__peachy_tips__/
https://www.instagram.com/geoffsavory/
https://www.instagram.com/pileofshamepaints/
Where we get our music:
https://artlist.io/Patrick-75781
Show More Show Less View Video Transcript
0:00
hi I'm peachy time to stop your grinning
0:03
and drop your limit welcome to the
0:06
painting face
0:07
[Music]
0:10
now a painting camera can be quite
0:11
tricky because you want your model to
0:12
look camouflaged without it being
0:14
camouflaged therefore distort the model
0:16
and making it seem a bit blurry and just
0:17
breaking it all up you don't want that
0:19
you want it to look cool and stand out
0:20
so in this video we're going to show how
0:22
to do that we're also going to show you
0:23
a selection of cameras which you can use
0:25
on any miniature whether that be a
0:26
Sci-Fi onto a Sci-Fi hunting a thatha
0:30
alien badass but we're going to show you
0:34
a selection of ways to paint camo that
0:35
you can use on any miniature whether
0:37
that be a Sci-Fi alien hunting badass a
0:40
modern day Soldier or anything else like
0:42
ashimovitorium so stay tuned keep
0:45
watching for that we're awesome we're
0:46
using some clone and Marine style prints
0:48
from we print Miniatures now they have
0:50
quite a vast selection of models that
0:52
you can check out there's something
0:52
there for everybody now we have an
0:54
affiliate Link in the description so
0:55
also check out that I'll take you
0:56
straight to the site and you can see all
0:58
the cool stuff they have we particularly
1:00
like Barry McGuffin in all his guises
1:06
palette
1:07
[Music]
1:09
and if you check to our fingertling you
1:12
also get a discount
1:14
yeah now the top tip when doing camo
1:16
patterns it's a good idea to get
1:18
yourself some reference material whether
1:19
that's on screen on your phone but I
1:21
like to actually physically paint it so
1:22
over here I've used palette pad and I've
1:24
just painted the designs and I'll always
1:25
have that next to me when I'm painting
1:27
and referring to it just you can see the
1:29
colors next to each other how they work
1:30
top tip there I always recommend doing
1:32
it I'm gonna use a base instead of a
1:34
pallet pad does the same job so first up
1:36
it's gonna be our cloning Marine Corps
1:38
kind of skin which is inspired by the
1:39
film aliens and we'll be starting off by
1:41
using an undercoat of army painter army
1:43
green first up is the base coat the
1:44
figure and for this I'm applying an
1:46
olive green tone I'm using daffield
1:48
Forest but there's plenty of other
1:49
varieties out there you can use again
1:52
just do a couple of coats to get a nice
1:53
even coverage
2:02
with the fatigue is now base coated I'm
2:05
going to begin with my first pattern
2:06
design these are going to be fairly
2:08
sizable splodges of a dark greenish gray
2:10
for this I'm using Army painter dark
2:12
stone
2:13
[Music]
2:20
thank you
2:23
with the first pattern painted on I'm
2:25
now moving onto the cream pattern as a
2:27
bit of a greenish tint to it I opted to
2:29
use iron rack skin because I think it's
2:30
a near perfect match
2:33
when doing this move on to a smaller
2:34
brush but be mindful not to paint over
2:36
too much of the olive green base or that
2:37
field grade pattern you've just done
2:40
as we're still on the base coat stage
2:41
you can always amend this if you don't
2:43
like some of the patterning
2:45
[Music]
2:54
now our pattern is painted and we're
2:57
happy with it we shall now coat over
2:58
with thin down Nord oil I'm using two
3:00
parts water to one part shade this will
3:02
shade the camera pattern trousers where
3:04
we need it and from a speed point of
3:06
view there's no reason to highlight once
3:08
the shade is dry and depending on how
3:09
thin the application was in some place
3:11
you might need to add a bit more punch
3:12
to those camo colors as you can see I'm
3:14
just Tiding back up with a little bit of
3:15
death wood forest and a little bit of
3:17
eye rack skin
3:19
foreign
3:20
spray as a base we should apply our
3:22
first pattern color and for this we'll
3:23
be using black Legion again I've used a
3:25
piece of reference to keep me on track
3:27
with the pattern whether the T-Pain is
3:29
more Splat and sponge style pattern the
3:31
armor is more blobs and sausages
3:44
continue with that effect what we're now
3:46
going to do is use more than Fang Brown
3:48
and follow the same process
3:51
foreign
4:03
I'm using zandro dust and applying a few
4:06
sausage shapes here and there
4:07
[Music]
4:22
now our camera pattern is painted on the
4:24
armor we should now coat over with a
4:26
thin down coat of normal oil again using
4:28
the same mix as the fatigue so two part
4:30
water to one part shade the unit
4:31
painting I would apply this wash all at
4:33
the same time so once you've done the
4:34
fatigues and the armor just kept
4:36
everything with normal oil
4:41
and just for a little extra definition
4:43
I'm going to use some black Legion just
4:45
to help separate the armor from the
4:46
cloth so it's a bit of a pin wash here
4:48
and there
4:49
again that is just to help separate the
4:51
arm and the cloth I'm going to use some
4:53
matte varnish now to remove any Shine
4:54
from the cloth as Shades can dry a
4:56
little shiny this is great because it
4:58
then makes the armor and the cloth feel
4:59
like two different textures there we are
5:01
our colonial marine camo is now done
5:03
both the arm and the cloth now on the
5:05
armor it does have a little bit of like
5:06
white camo here and there I chose not to
5:08
do it a bit of artistic license it's up
5:09
to you if you want to put it in there
5:10
but I just think it added too much to
5:12
the model got a bit too confusing so
5:14
next up is the urban color scheme which
5:16
is perfect for the astrum of time
5:17
regiment the canine 122nd as well which
5:20
are the one from the old city fine book
5:21
if you've ever seen them very nice over
5:23
a great undercoat I'm going to begin by
5:25
using rust gray as a base layer for the
5:27
camo as it's in layer paint you might
5:29
want to do two Thin coats
5:31
foreign
5:35
for our first camo pattern design
5:39
again testing this beforehand and having
5:40
reference is key I will describe this
5:42
pattern as well as horizontal almost
5:45
horizontal wise proper case or lowercase
5:48
doesn't really matter
5:48
[Music]
6:02
the black pattern done we're now going
6:04
to move on to the last pattern color
6:05
which is white for this I'm going to use
6:07
Pro curls bolt titanium wine if you
6:09
don't have any white a light gray or
6:10
off-white will work as well
6:15
foreign
6:30
now picked out we're now going to shade
6:33
over the cloth for this I'll be using
6:35
thin down lawn oil again like the
6:36
previous camo scheme I'm using two parts
6:38
water to one part shade
6:42
thank you
6:53
now the previous two camera schemes do
6:55
require you to take your time do some
6:57
practice and have a nice Steady Hand
6:59
however the next scheme is going to be
7:00
fairly quick and for this we'll be using
7:02
a sponge so this is aimed at any level
7:04
hobbyist it's probably not the best
7:05
camera scheme in the world but it is a
7:07
really nice simple way of getting
7:08
current pans put on the model looks a
7:10
little bit like the multi-count slash
7:12
Fleck tone that we see in modern day
7:14
camo patterns first up we're going to
7:16
base cut our clothing or for teams with
7:17
a Light Beige or green if you want here
7:19
I'm using xandry dust
7:21
[Music]
7:23
with a clothing now base coated I'm now
7:25
going to apply wild flesh with a sponge
7:27
this is a little like dry brushing so
7:28
once you've loaded up the sponge I'm
7:29
going to dab it onto some tissue to
7:31
remove a fair bit of that pigment
7:33
this will stop the color making a mess
7:34
but also give a nice simple fleckton or
7:36
multicam vibe
7:37
[Music]
7:40
[Applause]
7:45
continue with that effect what we're now
7:47
going to do is use more than Fang Brown
7:48
and follow the same process
7:52
for extra detail you can choose to add
7:54
to the camera pattern with a few dots
7:56
for the brush again just using the same
7:57
brown and green colors from our previous
7:59
steps
8:07
now Pat has painted on the clothing we
8:10
should now coat over with a thin down
8:11
coat of agrabs at her shade here I'm
8:13
using two parts water to one part shade
8:15
and there we have it our three ways to
8:17
paint camo is done and I hope you've
8:19
enjoyed it and please let us know in the
8:20
comments which one you choose for your
8:22
armors as well now we'll also be
8:23
dropping in the paints in the
8:25
description and talk in the description
8:26
we've got a whole bunch of links down
8:28
here we've got some affiliate links so
8:30
if you're shopping in the UK or Mainland
8:32
Europe check those out also we have a
8:34
link for we print Miniatures as well and
8:37
you'll get a nice juicy discount if you
8:39
shop there as well which is very nice we
8:41
also have a patreon as well not only
8:43
does this help support us it keeps the
8:45
lights on Keeps Us stocked in tea and
8:47
also you get loads of cool benefits as
8:49
well and juicy behind the scenes like me
8:51
saying this over and over and over
8:54
because I can't say the bit at the end
8:56
because I'm an idiot that's what's
8:58
happened Pat knows it you guys know it
9:00
because you're watching this I'm making
9:01
this video goal for like 20 minutes now
9:03
just by waffling away here but I don't
9:04
care well I hope you've enjoyed this
9:06
video anyway we better to get back
9:08
because it'll be dark soon and they
9:09
mostly come out at night
9:11
mostly
#Board Games
#Miniatures & Wargaming