How to Paint Rust on Miniatures and Models
Last Updated on May 5, 2022 by FauxHammer
If you want to paint rust on your models, then there are a few ways, but with this rust effect paint, it takes any level of difficulty out of the effect and leaves you to essentially slap it down and wait for the result. here we try out a few ways of applying DirtyDown Rust effect paint.
Please Note: This site uses affiliate links. Our Affiliate Partners are shown below
(Affiliate links will result in compensation to the site on qualifying purchases)
Click this link & buy your hobby stuff from Element Games for the UK & Europe to support FauxHammer.com – Use Code “FAUX2768” at the checkout for double reward points.
Our Affiliates / Hobby Stores
- UK: Element Games, The Outpost, Wayland Games, Mighty Lancer, Goblin Gaming, Forbidden Planet, Model Scenery Supplies, eBay, Amazon
- US/Canada: MTechCave, GameKastle, eBay (US), eBay (CA), Amazon
- Germany: Taschengelddieb
- Europe: eBay (DE), eBay (FR), eBay (ES), eBay (IT), Amazon
- Australia: eBay, Amazon
- Global: RedGrass Games, Warcolours
- 3D Printers: Phrozen 3D, Elegoo, Anycubic
FauxHammer – Latest Video on YouTube
How to Paint Rust on Miniatures and Models – Paints and Tools
Tools
- Some brushes – none you are too attached to. If you’ve got some old, spare, or cheap brushes lying around anywhere, you’ll want to use them for this. Don’t use your FauxHammer Artis Opus Mixed Brush Set. Wait, what do you mean you haven’t purchased a set yet?!
- A decent drybrush. I hear the FauxHammer Artis Opus Mixed Brush Set contains a couple of good drybrushes.
- A makeup sponge
Paints
We’re going to be going through several methods for painting rust in this article, so we’ve organised the paints, washes, and other similar things you’ll need into this table below:
| Product | @gobble_inz‘s Method 1 | @gobble_inz‘s Method 2 | @LukeMockeridge‘s Method | The FauxHammer Method |
| Any Black Primer | ✓ | ✓ | ✓ | ✓ |
| Mournfang Brown (Citadel) | ✗ | ✓ | ✓ | ✗ |
| Typhus Corrosion (Citadel | ✗ | ✓ | ✗ | ✓ |
| Rust Water Soluble Paint (Dirty Down) | ✓ | ✓ | ✓ | ✓ |
| Vallejo Rust Model Wash (Vallejo) | ✓ | ✓ | ✓ | ✗ |
| Stirland Mud (Citadel) | ✗ | ✗ | ✗ | ✓ |
| Agrellan Earth (Citadel) | ✗ | ✗ | ✗ | ✓ |
| Darkstar Steel (Darkstar) | ✓ | ✓ | ✓ | ✓ |
| AK Worn Effects Acrylic Fluid (AK Interactive) | ✗ | ✗ | ✗ | ✓ |
How to Paint Rust on Miniatures and Models – Introduction
Some miniatures just need a good coating of filth and weathering to make them really stand out. Whether it’s your Death Guard for Warhammer 40,0000, the skeletons in your Age of Sigmar Soulblight Gravelords, or something else entirely different, this guide will give you everything you need to get your miniatures looking as rusted as possible.
How to Paint Rust on Miniatures and Models – Video
For those of you unaware – this article is taken directly from our video, with some extra details here if you want them, if you just want to check out the vid. see it in its entirety below.
Don’t forget to Like, hit the notification bell & subscribe.
How to Paint Rust on Miniatures and Models – Tutorial
The majority of this guide is going to be built around using the above-mentioned Rust Water Soluble Paint from Dirty Down. Because this is in-part an exploration of this product, in part a painting guide, we’re actually going to go through a couple of methods for using this rust paint instead of just one.
A huge thanks to @gobble_inz, who originally put us on to this product and shared with us much of the wisdom we impart to you in this article. The first three guides that we’ve included – marked with their Instagram tag – are their work. The final method – the FauxHammer Method – is our own work, but would not have been possible without their input and tutelage – for which we are extremely grateful.
Warning! We’re going to be using Dirty Down’s Rust Water Soluble Paint for this guide. Now, as I said at the top of this guide, and will say it again here for anyone in the back who wasn’t listening, this stuff is flammable. Be careful how you use it and store it. Also, use it with gloves on or else it will stain your hands.
The @gobble_inz Method 1: Straight From the Bottle
The first method we’ll look at is a very easy, straight-out-the-bottle way of using Dirty Down’s Rust Water Soluble Paint. This requires only a few products, so is a great one for beginners or those on a limited budget.
Step 1 – Priming
The first step is very easy: prime your model or miniature in your black primer of choice.
On the model in the accompanying video, we use Vallejo’s black airbrush primer.
Step 2 – Shake Shake, Shake Shake-a-Shake It!
Grab your Dirty Down’s Rust Water Soluble Paint and shake it.
Literally, shake it. That’s this step.
Shake it. And don’t stop.
You thought shaking your can of Retributor Armour or Leadbelcher spray was bad? This stuff is a thousand times worse.
Get your loved-ones, housemates, co-habitors, neighbours and anyone who happens to walk by to give it a shake to. When your arms are all no longer responding to commands from your brain, you can stop shaking it and move on to Step 2.
Step 3 – Apply All Over
Apply a good layer of the Dirty Down’s Rust Water Soluble Paint to all the areas of your model or miniature that you want to look rusty.
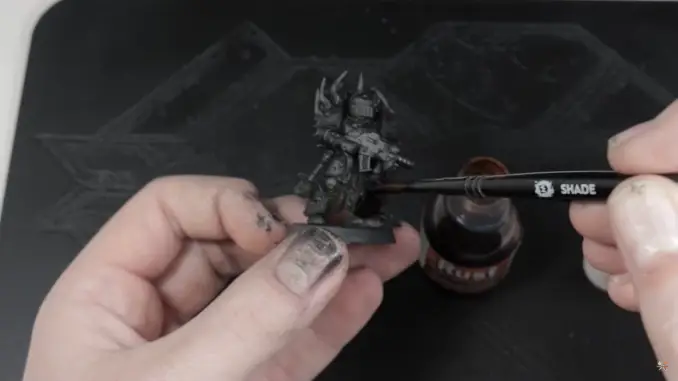
Give it plenty of time to make sure it’s completely dry.
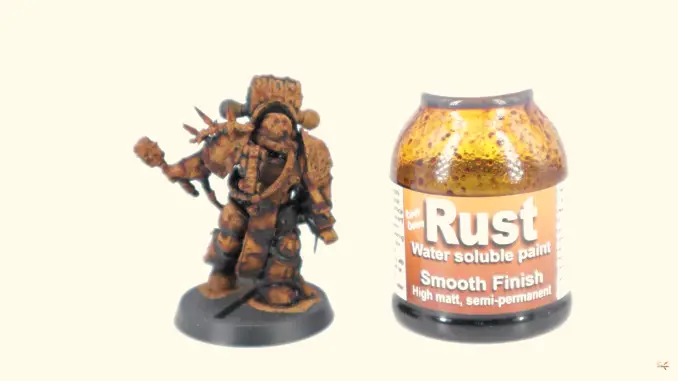
Once it’s dry it should look like this. Pretty cool, right?
Step 4 – Brighten Up and Darken Down
Now, Dirty Down’s Rust Water Soluble Paint looks great by itself. But it’s a very clever paint, and you can achieve some very clever and realistic effects with it by using just a few techniques. The first is to simply add a few small drops of water to some select areas of the miniature.
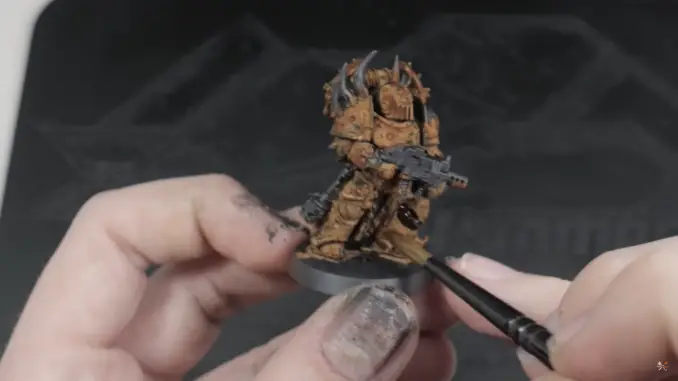
Leave the model for around half an hour, and when you return to it you’ll see the area you applied water to will have gone quite yellow and will have left a very dark edge around any raised detail. You can see this on the front of the helmet in the image below.
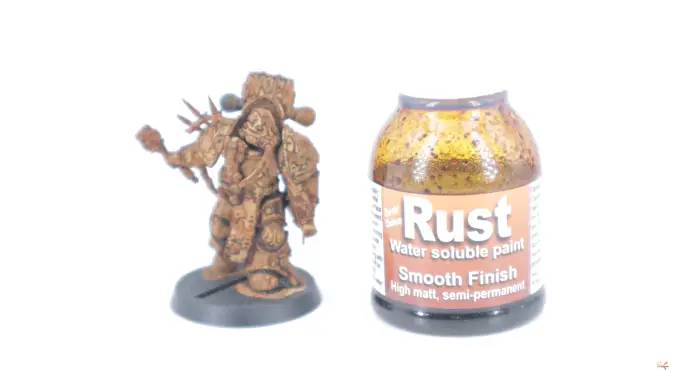
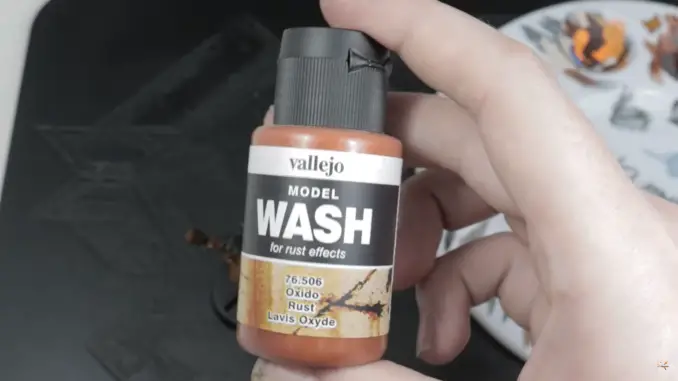
Next, very carefully apply some Vallejo Rust Model Wash around the edges of some of these more yellowed areas.
You’ll be able to build up a very realistic rusty transition from the brighter areas touched by the water to those very dark edges.
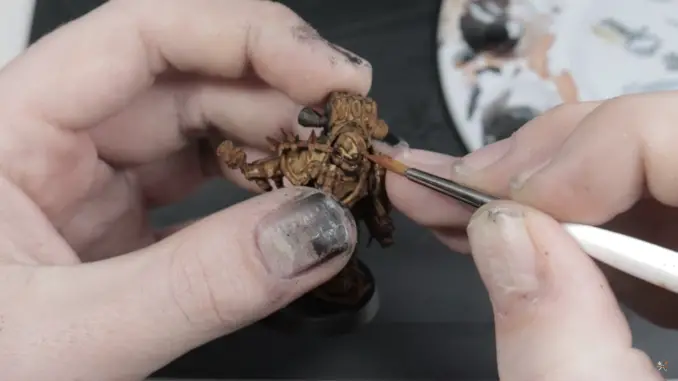
This will help tie those yellow areas back into the rest of the model so they don’t stand out too much.
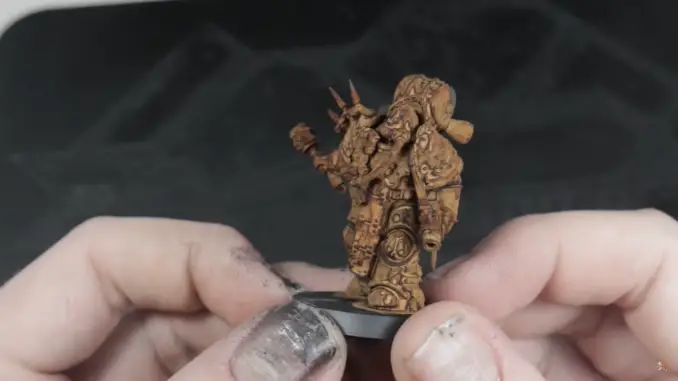
You’ll be left with a very realistic rust effect that takes full advantage of your model’s texture and explores a whole spectrum of worn-out, grimy colours.
The @gobble_inz Method 2: The Mournfang-Typhus Method
Whilst this might sound like something you’d expect to receive a lecture on whilst doing a Biology degree, our second way of using Dirty Down’s Rust Water Soluble Paint requires some different products to the first. Namely, Mournfang Brown or Typhus Corrosion.
This method is a little more involved and does require the use of an airbrush, so it’s not a great one for new painters or those without an airbrush (though you can achieve the same effect without using an airbrush – but we’ll get to that in a moment).
Step 1 – Priming
As before, prime your model. Again, in the accompanying video, we used Vallejo’s black airbrush primer to do this.
Step 2 – Shake, Shake, Shake Senora
As with Method 1, this product still needs to be shaken until your arms hurt, so grab that pot and shake it until there are tears in your eyes and you’re begging to be allowed to stop. Then, shake it for another ten minutes.
Step 3 – Corrosion
Once your model is primed and ready to go, cover some of the areas with Citadel’s Typhus Corrosion.
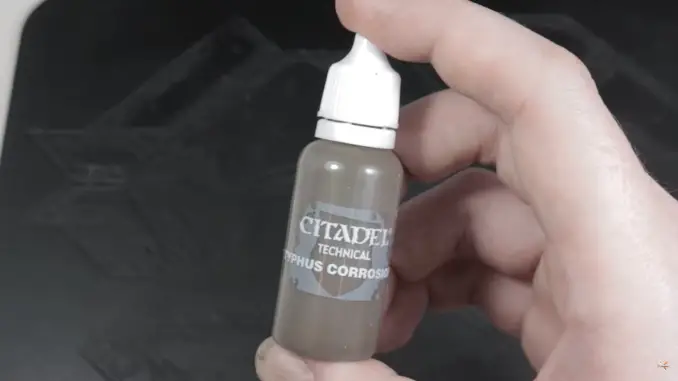
The Dirty Down rust paint works by pooling unevenly across a texture to create different colours and effects. If you add more texture to your miniature, you’ll only enhance this effect.
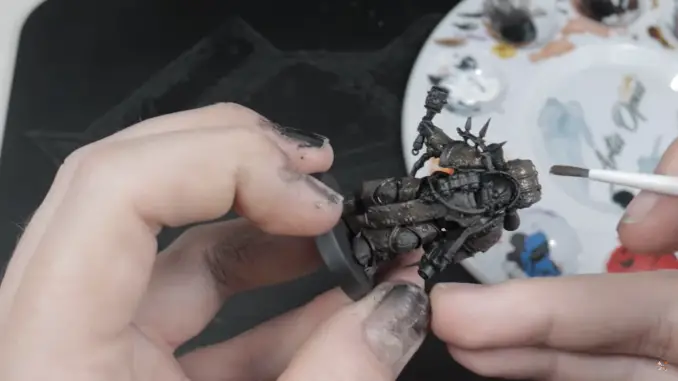
Typhus Corrosion is designed to be used as a rust effect itself, and is commonly used by painters to add rust-like weathering to models . If you want a more extreme texture, you could always try using something like Agrellan Earth or Agrellan Badland
Step 4 – Brown
Once your Typhus Corrosion is dry, coat the model in Mournfang Brown.
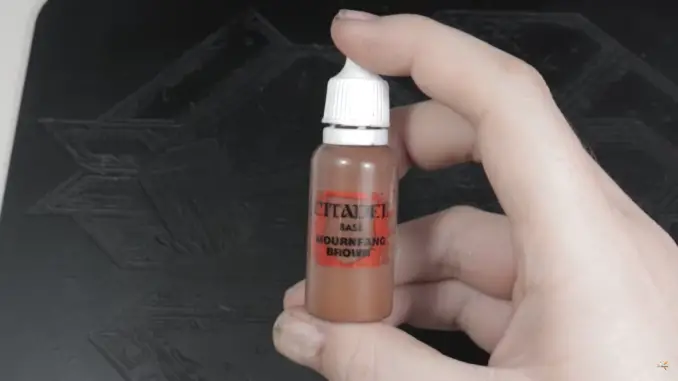
Mournfang Brown is a nice, reddish-brown, so works very well as a basecoat for rust.
Step 5 – Dirty Down
Once the Mournfang Brown is dry, cover the areas of the miniature you wish to appear rusty with Dirty down’s Rust Water Soluble paint.
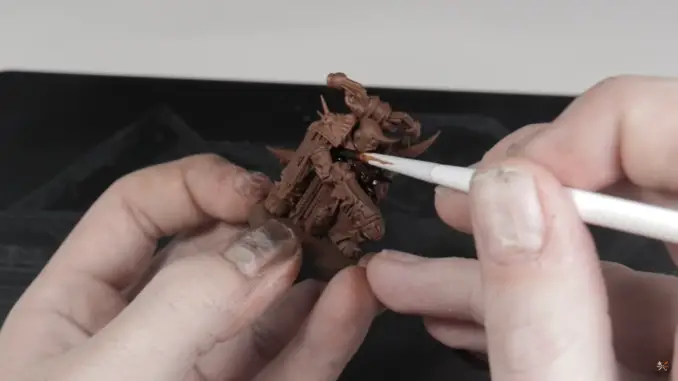
Apply it liberally and allow it to look on those textured areas.
Step 6 – Applying Water
Similar t what we did in Method 1, we’re now going to apply some water to the miniature again. In the video, we used an airbrush on a very low pressure to spit small droplets of water over our model.
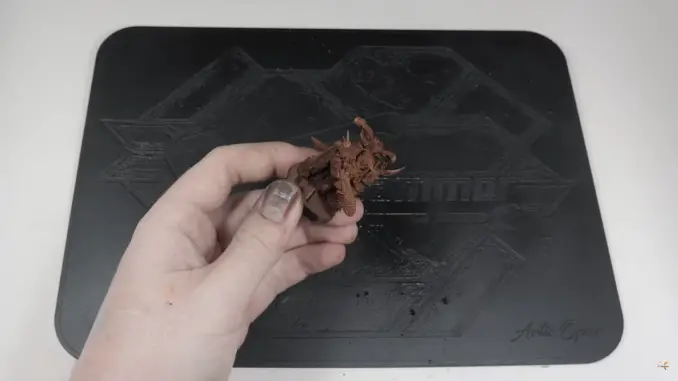
You could do this with a paintbrush by wetting the bristles and then flicking the brush at the model. You’ll be left with a model with small, bright rust spots that help add some visual interest to the texture.
The @LukeMockeridge Method 3: The Magic Mix
We can take absolutely no credit for this one. This method exists entirely thanks to @LukeMockeridge, though we accidentally credited @gobble_inz‘s in the video.
The final method we’re going to look at is a little more involved, and is one better suited to intermediate to advanced-level painters. Straight out of the pot, the Dirty Down rust effect maybe a little too thick and gloopy for your needs. As such, we’re going to look at a way of making it thinner and thus more controllable on miniatures without sacrificing that awesome rusty effect.
Step 1 – Priming
As with the previous miniatures we’ve used in this review and the accompanying video, we used Vallejo’s black airbrush primer.
Step 2 – The Return of Mournfang Brown
Once your miniature is primed, make sure you cover it in Mournfang Brown paint.

This is very important this time around, as we’ll be using a thinner mixture of Dirty Down’s rust, so we’ll need that brown base coat.
Step 3 – Shake it Off Up
I get it. Your arm is tired. I’m running out of shake-related songs. But the rust demands sacrifice, so get shakin’.
Step 4 – Mixing
In order to achieve @LukeMockeridge‘s perfect mix, you need:
- 4 parts Vallejo rust wash
- 3-4 parts Dirty Down rust
- 2-3 drops of water
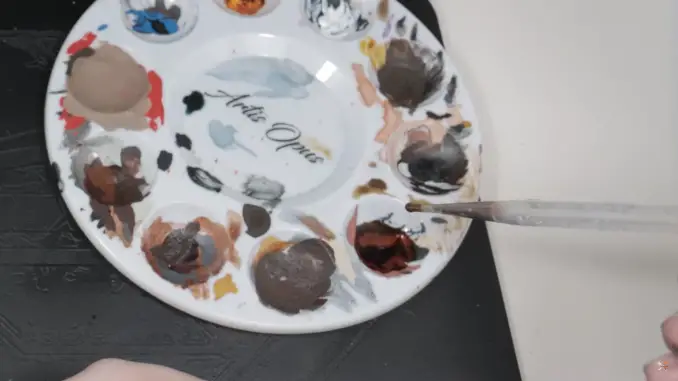
Have a play with the mix, but you’ll likely want to add or remove the Dirty Down depending on how strong you want the rust effect to be.
Step 4 – Applying
As you’d expect, with a thinner mix, the paint goes on much smoother.
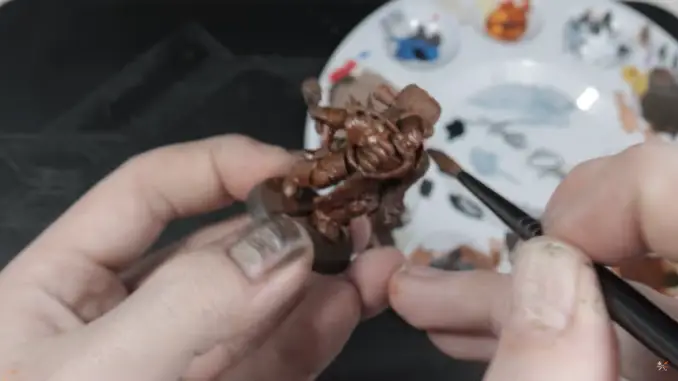
However, in order to get an awesome rusty effect, you’ll need to apply two coats of your mixture at the very least.
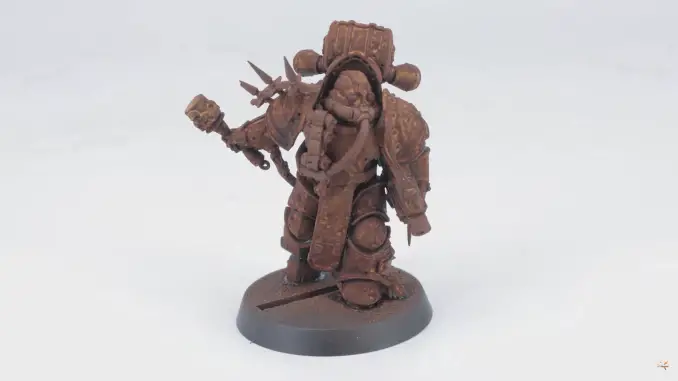
The effect you’ll achieve, though, will be far more subtle – and much more suited to smaller miniatures.
The @gobble_inz Methods – Follow-On Steps
If you’ve completed any of the three methods we’ve just explored, there’s one last thing to do – and that’s apply a good drybrush of a nice, dark metallic paint across the whole miniature. For this, we used Darkstar’s Steel.
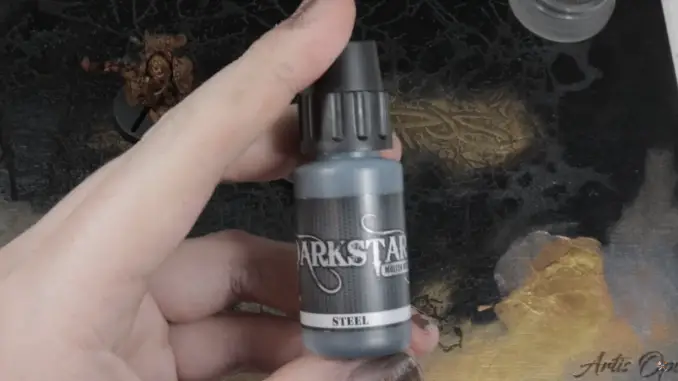
Work this into your drybrush of choice and then apply it across the texture of your miniature using slightly circular, rotating motions.
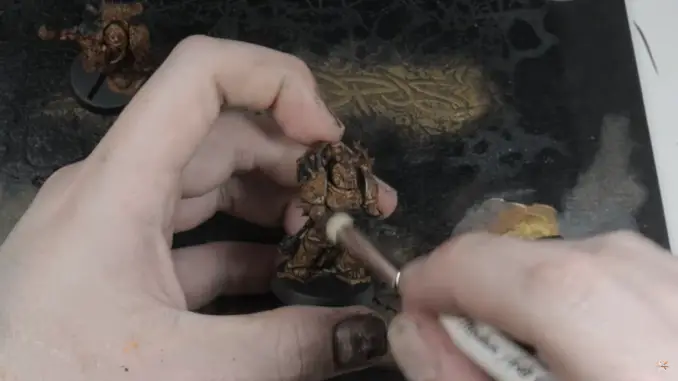
With that, you should be finished!
The@gobble_inz Methods – Finished Models
Here’s the miniature from method 1…
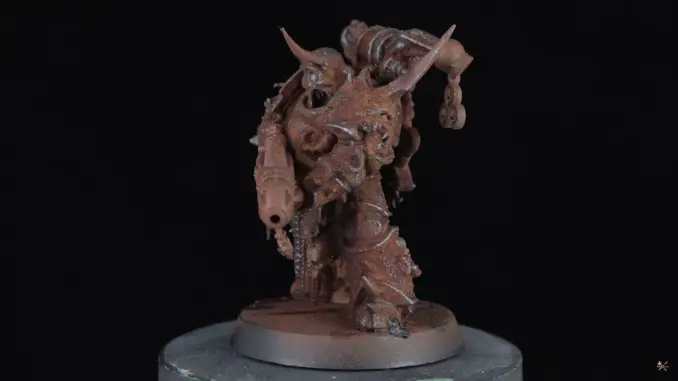
…Here’s the miniature from method 2…
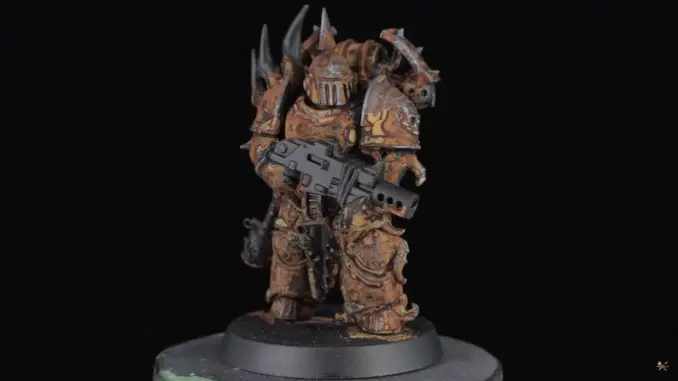
…And here’s the miniature from method 3.
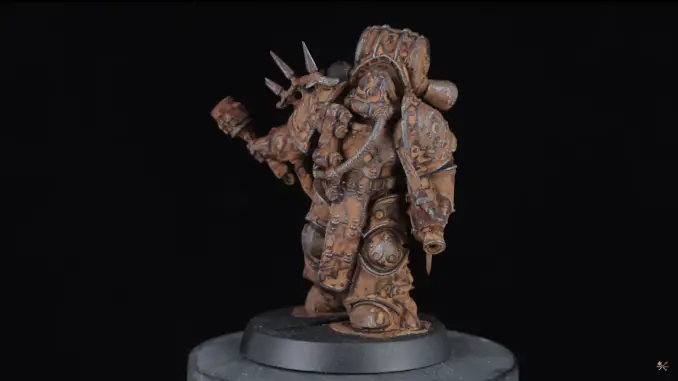
These all look absolutely incredible, and we’re so grateful to @gobble_inz for sharing their wisdom with us and getting us using this paint.
Painting Rust – The FauxHammer Method
So, taking all that we learned from @gobble_inz and applying some of that signature FauxHammer corner cutting and hobby cheating charm, this is the method we came up with for painting rust using Dirty Down’s incredible Rust Water Soluble Paint.
Step 1 – Priming
Prime your model of choice with a black primer of your choice. As we have in all the other tutorials in the article, we’ve used a black airbrush primer from Vallejo.
Step 2 – Add Texture
Next, apply some Sitrland Mud onto all the areas of your miniature – or in the case of the video, your piece of terrain – to all those areas where corrosion and weathering would build up.
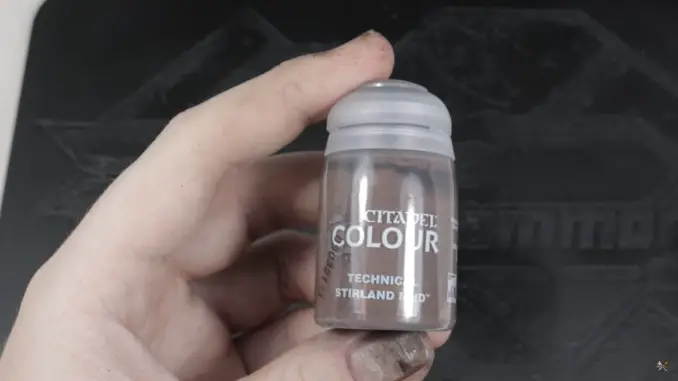
If you wanted, you could apply a crackle paint, such as Agrellan Earth here to create a mixed effect.
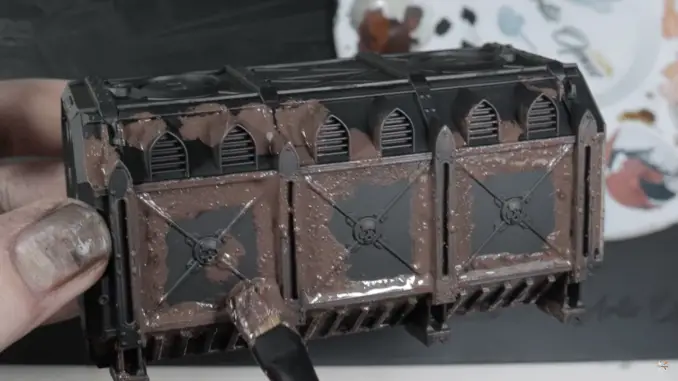
Once you have done this, blend the very edges of these areas with some Typhus Corrosion.
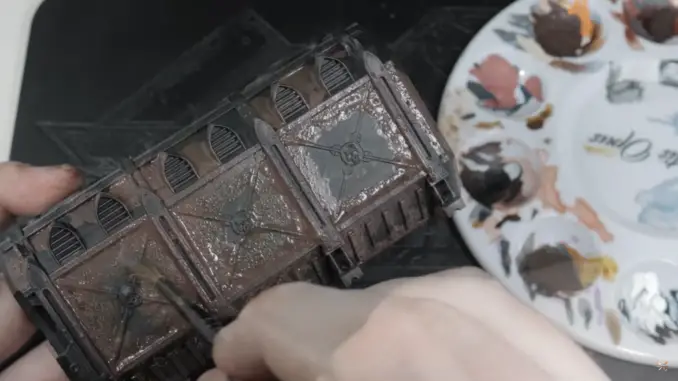
This paint isn’t as heavily textured, so will give the impression that some areas are more worn than others.
Step 3 – The Browning
You guessed it, cover everything you want rusty with Mournfang Brown!

We’ll be needing that nice, reddish brown later, so make sure you’ve built up a good, opaque layer before moving on to the next step,
Step 4 – Dirty Down (Again)
Cover – no, drench – the miniature or model in Dirty Down.
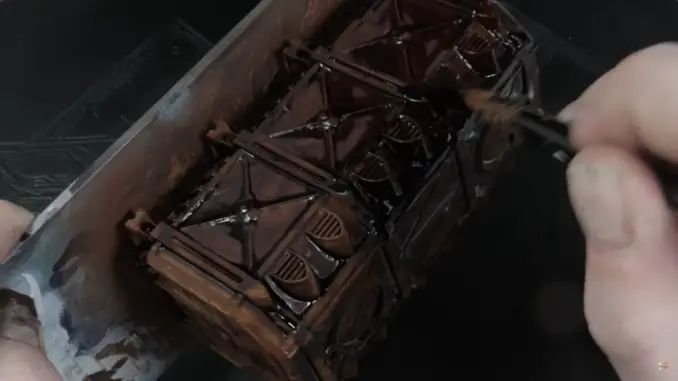
Don’t be shy, slather it on!
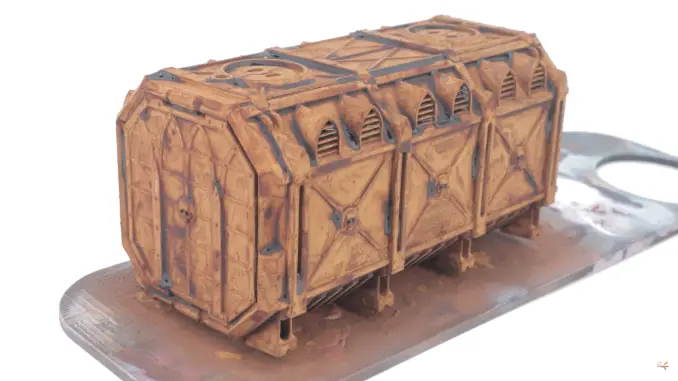
We want a really heavy, built-up texture to make it look super grimy.
Step 5 – Drybrushing
Grab yourself that metallic paint of choice and get drybrushing!
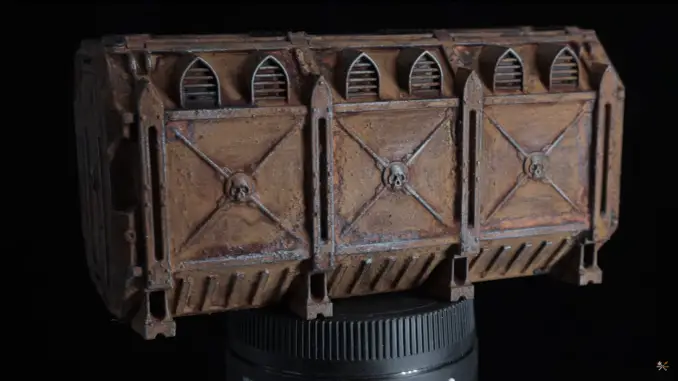
Again, in the video we used Darkstar’s Steel.
Step 6 – Add More Grime
We’re going to take this already pretty grimdark model to the furthest extremities of grimdarkness.
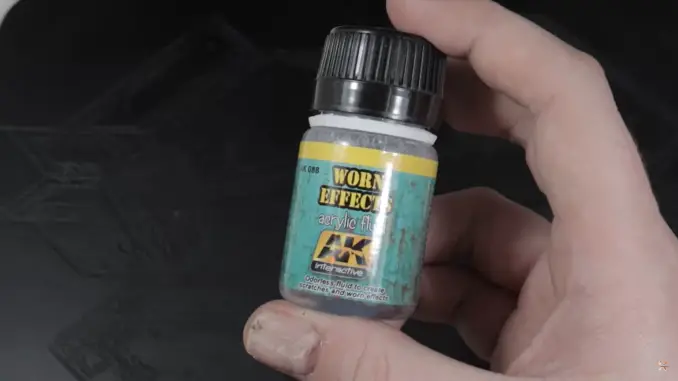
Cover the model in AK Worn Effects Acrylic Fluid. We used an airbrush for this, but you can use a regular brush too.
Step 7 – Add Colour
Like most things that have gone rusty, there’s a good chance that whatever it is you’re painting will have once upon a time sported a colour that wasn’t just rusty orange-brown.
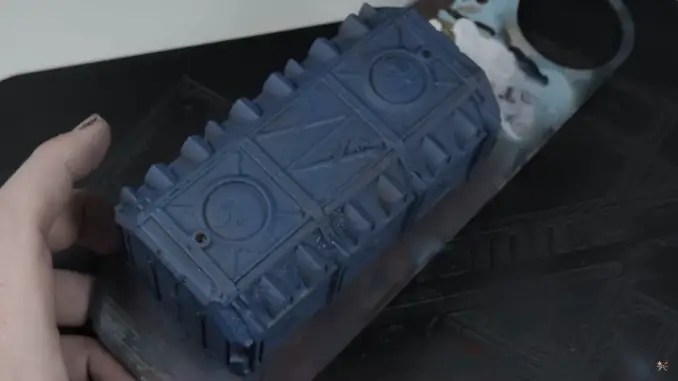
How, where, and what colour you paint your model now is largely dependent on what you’re painting, but in our video, as we were painting a cargo container and a plague marine, so we painted they blue and an off-white.
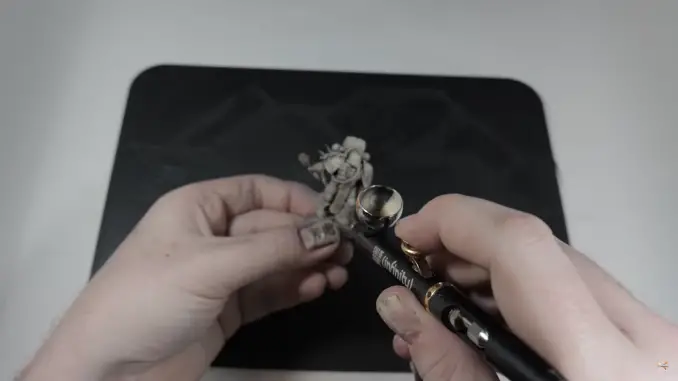
This might seem counter-productive, as you’ve just covered up all the areas you’ve just painted with weathering effect, but read on…
Step 8 – Remove Colour (and Probably a Fair Bit of Weathering Product)
Make sure everything is dry, then take a wet brush and begin scrubbing away at those worn areas with a wet brush.
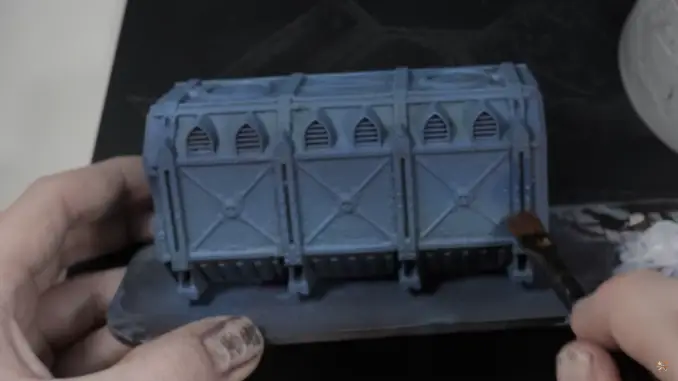
This will remove some of the paint (and likely some of the weathering effects, which you’ll end up swirling across the miniature – but this is good, and we’ll get back to this in a moment) and the miniature or model will begin to look really grim.
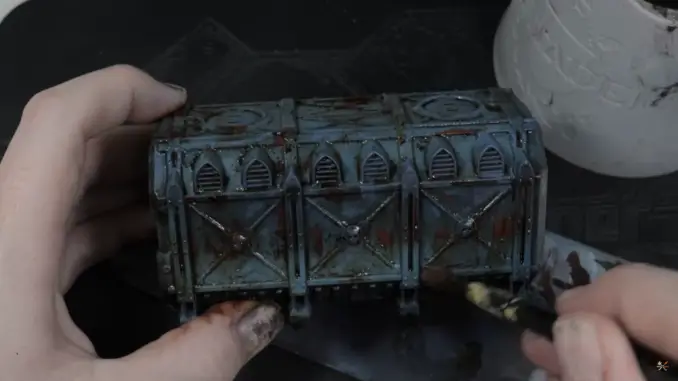
Now, you can do one of two things here. You can leave the model as it is. You’ll probably want to leave it a good 8-10 hours to ensure it dries completely.
It will dry down and look a little something like this…
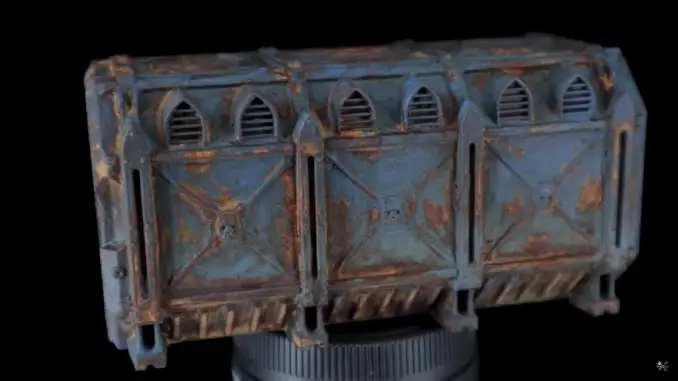
Moving around those weathering effects really helps make a grimy, well-worn texture to the final product.
Alternatively, you don’t have to stop here. You can keep going, and make the model really nasty.
Step 9 (Optional) – Add More Dirty Down
Cover the model in more Dirty Down.
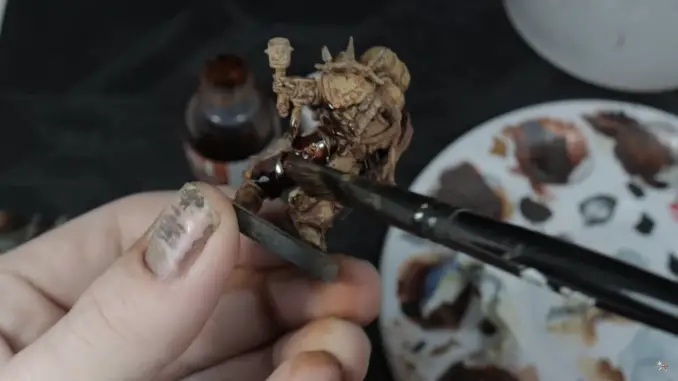
Then, before it can dry, take a makeup sponge and gently dab away at those raised edges.
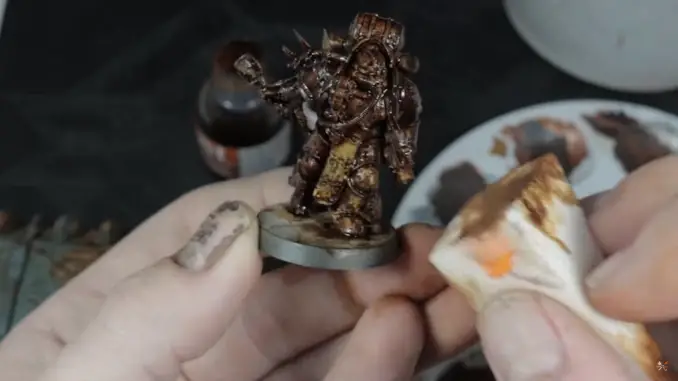
Very carefully add some water to some of the transitional areas to lighten the colour.
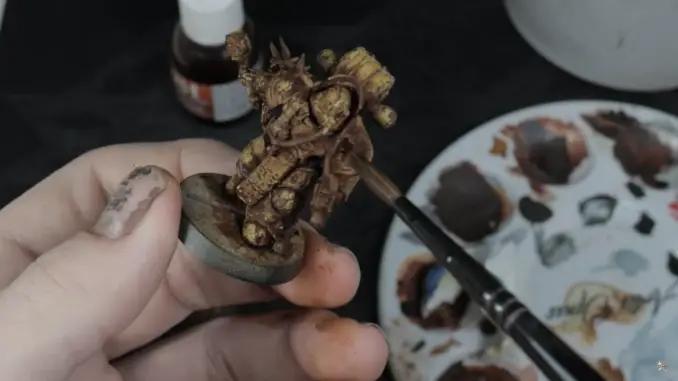
And with that, the model is complete!
How to Paint Rust on Miniatures and Models – Complete
Here are our two completed models from the FauxHammer.com Method. First, the storage container that we’ve already seen…

…And the finished Plague Marine.
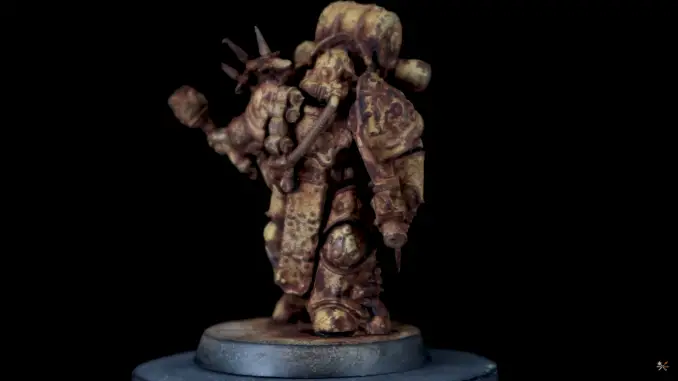
So, there we have it. Four (well, five if you count the optional extra step at the end of our guide) different ways to create realistic rust effects on miniatures.
Which one do you like the look of the most? Let us know in the comments!
Please Note: This site uses affiliate links. Our Affiliate Partners are shown below
(Affiliate links will result in compensation to the site on qualifying purchases)
Click this link & buy your hobby stuff from Element Games for the UK & Europe to support FauxHammer.com – Use Code “FAUX2768” at the checkout for double reward points.
Our Affiliates / Hobby Stores
- UK: Element Games, The Outpost, Wayland Games, Mighty Lancer, Goblin Gaming, Forbidden Planet, Model Scenery Supplies, eBay, Amazon
- US/Canada: MTechCave, GameKastle, eBay (US), eBay (CA), Amazon
- Germany: Taschengelddieb
- Europe: eBay (DE), eBay (FR), eBay (ES), eBay (IT), Amazon
- Australia: eBay, Amazon
- Global: RedGrass Games, Warcolours
- 3D Printers: Phrozen 3D, Elegoo, Anycubic
FauxHammer – Latest Video on YouTube
What did you think of this Tutorial? please let us know in the comments.
If you like what we’re doing here you could really help encourage more content with a share on any social media platform.
Click the share links at the bottom of this screen (or on the left for computers and tablets)
Want to keep updated with the blog? You can subscribe in the sidebar for RSS or by email below
(Sidebar is below the article on Mobile Devices)


