Iwata Eclipse HP-CS Airbrush Review – For Miniatures & Wargames Models
Last Updated on April 23, 2021 by FauxHammer
So I’m finally done with my Iwata Eclipse HP-CS Airbrush Review. This Review is specifically tailored to Wargames Miniature & Model painters.
The Iwata Eclipse is an incredible airbrush that delivers the precision and quality you would expect of any Japanese product. With very few individual components it’s easy to clean and maintain, it just keeps going and going. Featuring PTFE Seals, this will withstand some of the harshest chemicals you can throw at it. And the 0.35mm nozzle is an excellent choice for the beginner to advanced airbrusher
The Iwata Eclipse actually took the number one spot on our Best Airbrushes for Miniature Painters and Wargames models 2019 article.
The Best Airbrush for Miniatures?
This Review is part of our Best Airbrushes for Miniature Painters and Wargames models.
See our other reviews and the complete list of the best Airbrushes.
Iwata Eclipse HP-CS Airbrush Review Sponsored by Airbrushes.com
The best airbrush company in the UK, featuring top brands, courses, paints, accessories and servicing.

Having worked with Airbrushes.com for the last few weeks it’s clear they know their stuff. They provided this airbrush and most of the technical details from the article below. Some of these details even strip the airbrush down to its manufacturing process! I was pretty much speaking with Iwata directly. If you have “any” questions about selecting the best airbrush for your needs, have a look at Airbrushes.com
Iwata Eclipse HP-CS Airbrush Review – Unboxing
Iwata’s branding is bright and clear, and whilst the information on the front of the box may not tell you too much, the colour alone is saying a lot more than meets the eye.
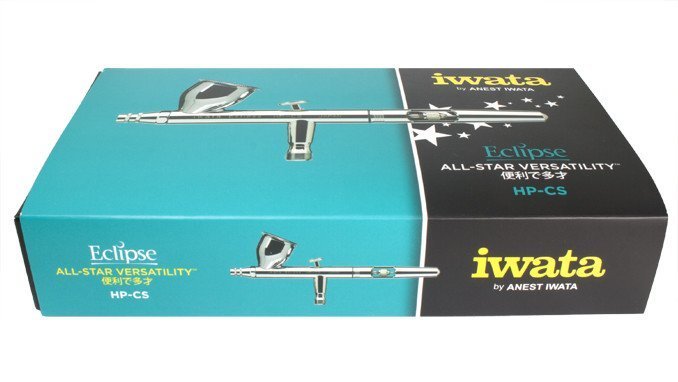
Iwata has made Airbrush selection much easier within their brand by introducing the “5 ways to Spray” branding. The following infographic should give you an idea.

Spray categories include “ABSOLUTE PRECISION” for the Custom Micron (which I will review soon) “TOTAL CONTROL” for Hi-Line & High-Performance Airbrushes, “ALL-STAR VERSATILITY” for Eclipse. “EFFORTLESS COVERAGE” is for the Revolution & Neo airbrushes and “FULL FINISH” for Iwata’s Spray guns
So with the Eclipse sitting right there in the middle, offering a perfect balance between Fine and Wide spray. It positions itself as a perfect Airbrush for the Beginner to Intermediate Miniature painter, touching on use for many advanced users as well. For most Miniature painters at least, you could start with this airbrush and never need anything more. Everything from base-coats to detail work is possible here – we’ll go into that a little later. Right now, let’s take a look at what’s in the box.
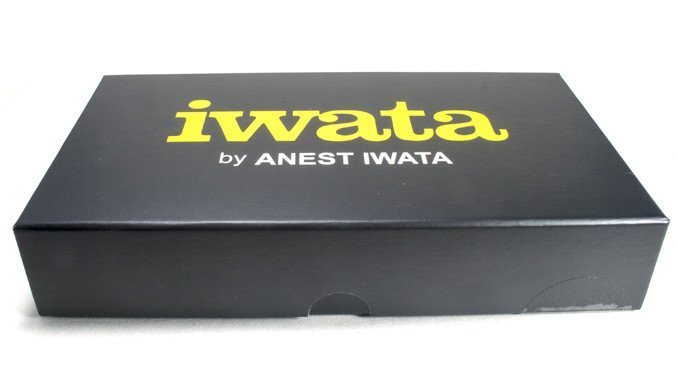
Once the outer sleeve is removed, the actual box is revealed. This is a nice container to keep your kit in when not in use. It is, however, thick cardboard, not plastic. so it will easily wear if you frequently store and remove your airbrush in it.
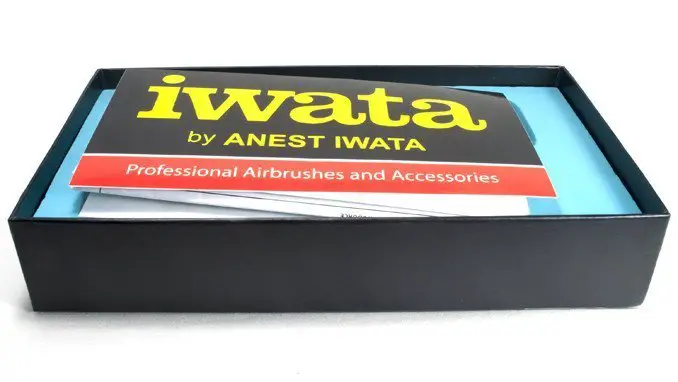
Inside you get some instructions and a sticker. You can give or take, but I love when a product comes with a sticker. I am a sucker for product stickers.
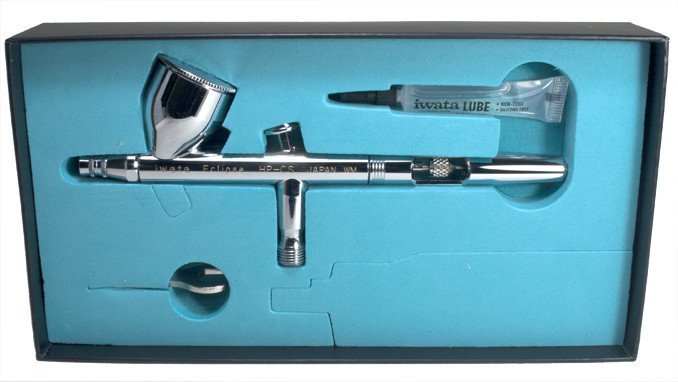
The foam inlay houses the airbrush perfectly and nicely re-echoes the brand with the colour showing the ALL-STAR VERSATILITY airbrushes. The cutaways are for varients of the Eclipse such as the HP-BS which has a smaller colour cup. The HP-BCS which is siphon fed and the HP-SBS which is side fed.
For miniature painters, the gravity-fed (paint cup at the top) HP-BS and HP-CS are normally the preferred choices as you are working with smaller amounts of paint. The large siphon-feed bottles are usually overkill.
There’s also much less work to keep gravity-fed airbrushes clean when compared with the side-fed. Side-fed airbrushes do have some benefit, as you don’t have a colour cup in your way as you’re looking down an airbrush. So it can improve accuracy. But a smaller colour cup such as the one on the HP-BS can also help here. But I’m already used to the paint cup being there and wanted the extra capacity the HP-CS offers.
Iwata Eclipse HP-CS Airbrush Review – Airbrush Overview
The airbrush itself is relatively simple with the only additional components in the box being a wrench to loosen the nose and a bottle of Iwata lube to maintain protect the mechanism.
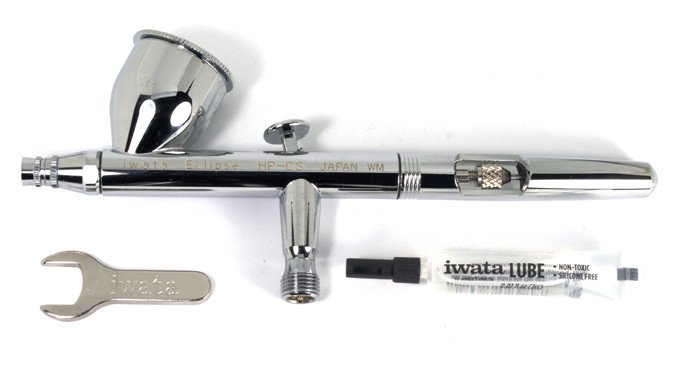
Just to note, the wrench is to “loosen” the head cap, not to tighten it. The standard rule of airbrushes is that screws should be screwed finger tight only
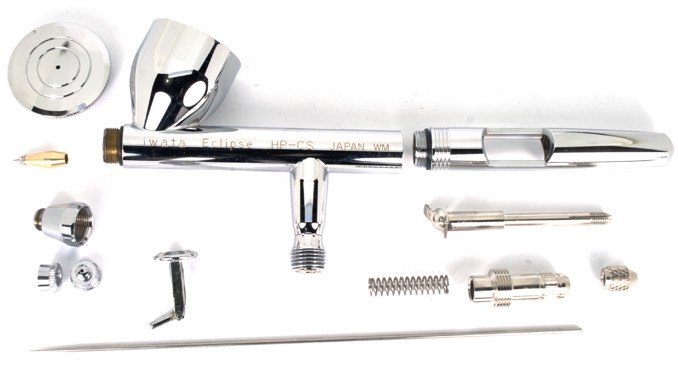
Once stripped down, the airbrush again is rather straight forward. sure if you’re new to this the above can look quite complicated, but there are many online guides will see you right. There’s no breakdown on the instructions but this page is a useful reference guide along with links to replace the individual components should you need to.
I actually lost the needle chucking nut for several weeks during this review as it ended up under my desk and I had to pinch a spare off an old brush.
My advice here. don’t lose vital components.
Iwata Eclipse HP-CS Airbrush Review – Spray Detail
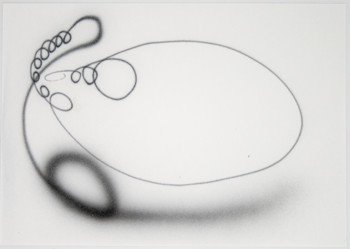
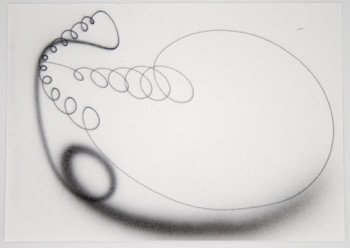
As though to echo the point on precision directly, the Iwata Eclipse comes with evidence of it’s QA Test in the box.
Showing that this airbrush is capable of everything from Fine-Detail to wide spray cones, as the above QA results show.
The images above are from 2 different Iwata Eclipse’s, I’ll explain more on that in a moment.
It was good to see a slightly different spray pattern with the second airbrush. It shows that these brushes have been individually used and tested by Iwata before you receive it. The spay detail on this paper is so fine I genuinely thought they may just be print-outs and before I had the replacement brush to compare. I had to ask the providers at Airbrushes.com to confirm if this was the test of the actual brush I have.
Obviously, from the images above. it is.
I made my own attempts at replicating this using dedicated miniature paints. the image below is using a pre-thinned airbrush paint Nocturne Green – Air.
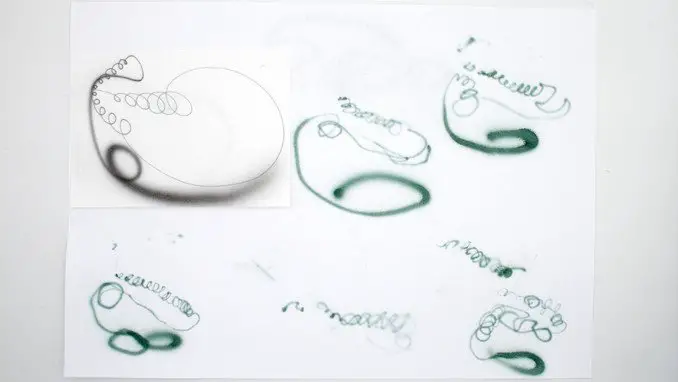
As you can see, I wasn’t quite as successful. But for one, I don’t spend all day every day doing this, and two. The guys at Iwata will have used inks, not Acrylic paint. The latter of which uses a much denser medium and heavier physical pigment. Inks will use liquid pigments for thinner, richer colour. Generally, though I was able to get a very fine and consistent spray from the airbrush.
I then moved on to normal acrylic paint, thinned with Vallejo Airbrush Thinner. In this case, I used Abaddon Black, a base paint which has a dense pigment for solid coverage by brush.
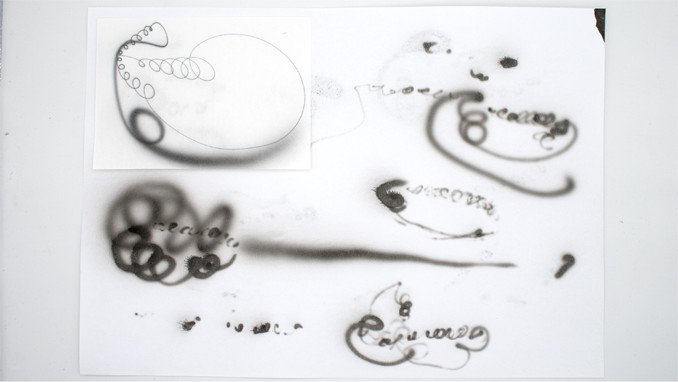
AS you can see, Similar results, but I did have some extra challenges as the flow was not consistent due to some heavier parts of the mix. You can see above (directly to the right of the Iwata QA sheet example) I was able to spray some comparable lines.
With the accuracy allowed by this brush, you can paint very fine details. I, like many others, started airbrushing to save money on model primers and to quickly apply the base coats, at most some basic Zenithal Highlighting.
The next step up from this is direct spot-highlighting. Something this brush gives you the confidence to do.
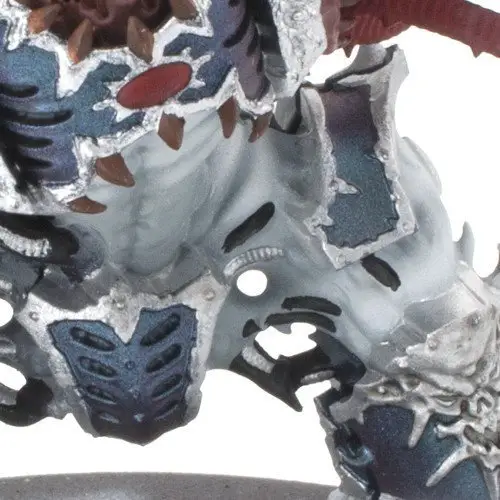
Shown above (not in the best way as I didn’t think to take shots showcasing this when I did it) you can see highlights on the individual abdominal muscles in this Warhammer 40,000 Hellbrute’s 10-pack.
The inner part of the hip bone and upper thigh have also been directly highlighted without overspray onto the silver areas which were painted prior to this highlighting.
This is also a preview for another upcoming review, you can see the latest info and more shots on our Instagram page.
As mentioned above, we did have this airbrush replaced during our review.

New 
Used
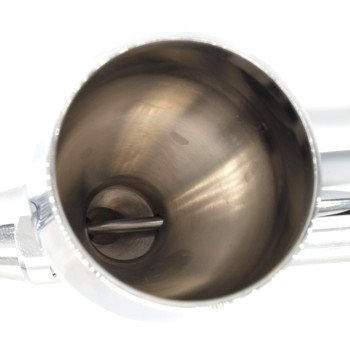
As I was using the airbrush, I slowly started to notice the plating wearing away as shown in the picture above captioned “Used”. I have used the airbrush very heavily over the last few weeks. I’ve had paints and all kinds of chemicals through it to push it through its paces. So I went back to Airbrushes.com who contacted Iwata directly to get a clear explanation of this.
[The] Airbrush Body, Handle, Trigger, Needle Cap, Nozzle Cap and all other exposed components are comprised of Copper, Lead, Iron, Zinc and Cadmium. The Plating used is Chromic Anhydride. There is a Nickel alloy used in the nozzle however, it is encapsulated with Chromium and Silver.
They had also advised that the plating is done in very thin layers. Over time certain acids (and even salts in your skin) can wear off the chrome. Scrubbing with abrasives will take off the chrome. It is also worth noting that cleaning an airbrush with chlorine bleach will damage the plating and damage the brass.
The most important thing to note is that this is purely a cosmetic issue and will not affect the performance of the airbrush. I had absolutely no issues with the functionality of the airbrush. I arranged a replacement as I was writing a review and hadn’t taken all of the photos I needed to before this started happening.
If by chance it does happen to you, Iwata asks people to get in touch as they will inspect and replace it if is defective.
Like with anything though, if this has been abused or had the chrome scratched out on purpose, it’s not going to get you a replacement airbrush.
IMHO, expect this to happen at some point through general wear & tear.
Iwata Eclipse HP-CS – Application to Miniatures
So, it’s time to actually get this airbrush to work on some models. For anyone who wants the steps for the models below, I generally followed this incredible guide on YouTube from Buypainted. A great airbrush painter, who, unfortunately, hasn’t posted anything in a few years.
Before I begin I’ll let you know how the models were prepared. As it will serve as an example of how fine this airbrush sprayed. You will be able to see how much detail was retained after so many layers.
These models were Originally primed in Vallejo Grey Airbrush Primer and coated with Typhon Ash. I started to paint the base colours, but I wasn’t happy. So I used one of them in my paint stripping guide.
For another product review, I sprayed them all again (Including the stripped model) with Skeleton Bone Spray Primer from a rattle-can. Which is why they are already a bone colour before I added the shadows below.
So in Summary, except 1 (the guy on the left) these models already had 3 layers, one of them a rattle-can before I even started with the airbrush.
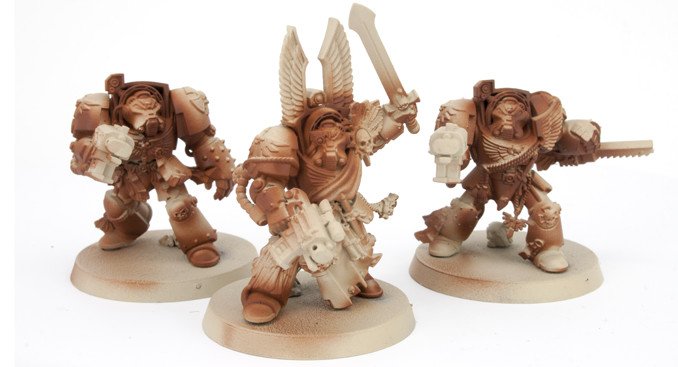
Layer 4 – A layer of Thinned Mournfag Brown was applied to the shadow Areas
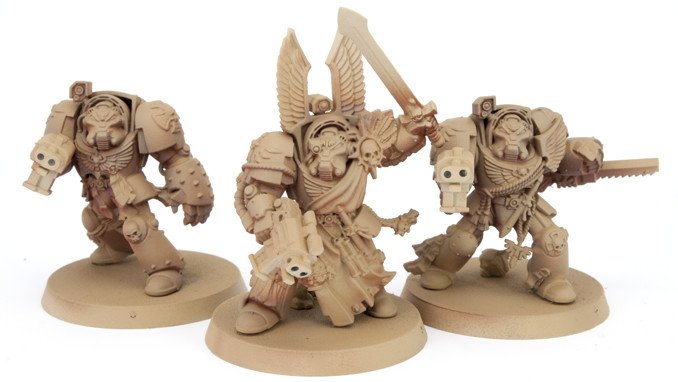
Layer 5 – Thinned Zandri Dust was painted all over the armour from above
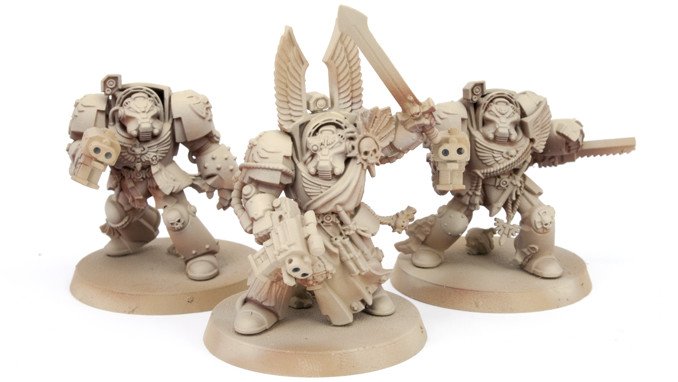
Layer 6 – Thinned Ushabti Bone was then applied right from above leaving some of the Zandri Dust showing through
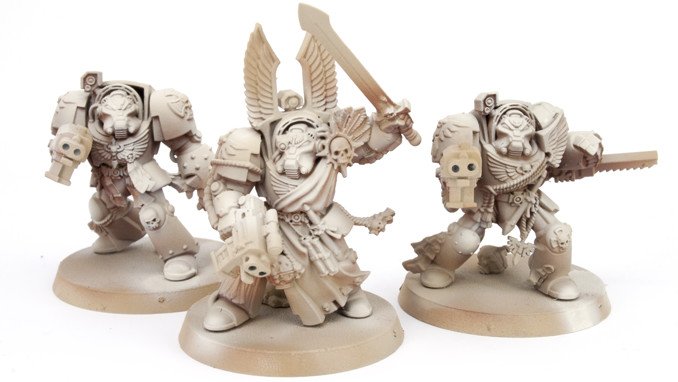
Layer 7 – Thinned Screaming Skull was applied to the highest areas such as the heads, tops of shoulders, pronounced Kneecaps and Toes.
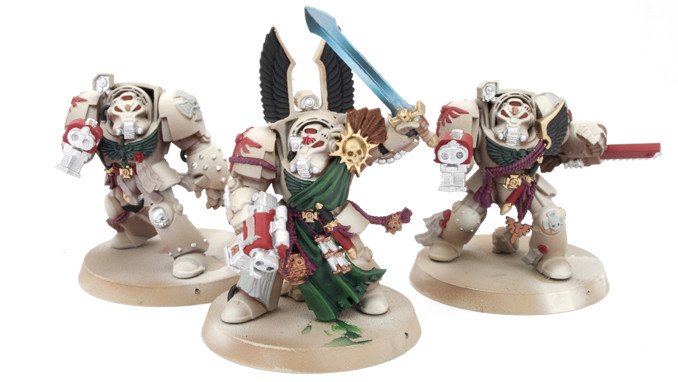
Layer 8 – Along with painting the Eyes, Ears, Mouthes and Noses I added the base colours to the rest of the models. Then covered them with Vallejo Acrylic Gloss Varnish.
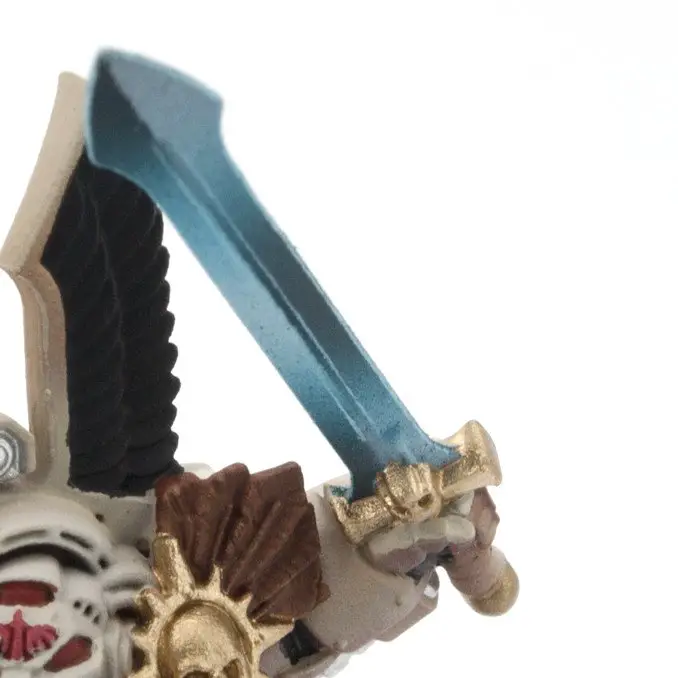
I got a lot of positive feedback on the Power sword. Again for this, I just followed the guide by Buypainted And Substituted the colours for Stynlrez White Primer, Thinned Thousand Sons Blue & Thinned Incubi Darkness. The reason you see the spatter of the darkest blue on the white areas is becasue I hadn’t turned up the pressure on the compressor enough.
My fault, not the airbrush.
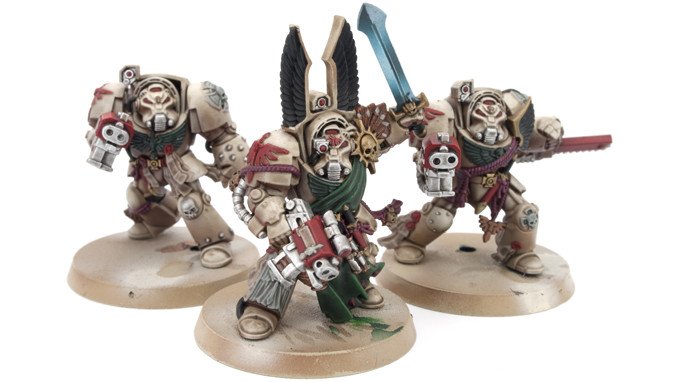
Layer 9 – An all-over wash of Dark Tone and Strong Tone (not mixed together, each tone was applied to complement the appropriate base colour). This wasn’t applied with the airbrush, but it’s an important extra layer we applied.
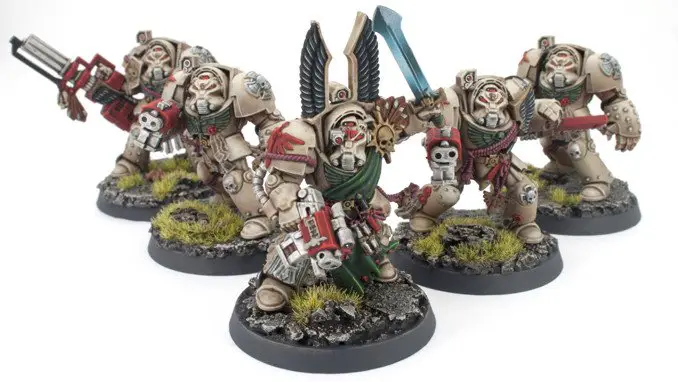
Layers 9-11 – Vallejo Matte Varnish was applied all over the models.
From the front, the transition of the colours on this model are not shown in the best detail. You can see the contrast under the arms and such but the best way to show this off is with the 360° image below.
The Transition is shown best on the back of the shoulder pads where there’s a smooth gradient from the lightest cream to the darkest brown. Give the image above a spin to see for yourself.
The other important thing this shows is how much detail is retained on the model after more than 10 layers of paint were applied.
Iwata Eclipse HP-CS – Availability
The Iwata Eclipse is available in a few variations. As mentioned above, the focus for Miniature painters are normally the gravity-fed airbrushes. In this case, there are still 2 options.
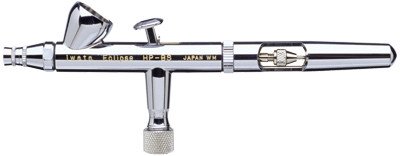
The Iwata Eclipse HP-BS Gravity-Feed Dual-Action Airbrush has a 1.5ml / 0.05oz fluid cup and is ideal when using small amounts of paint.
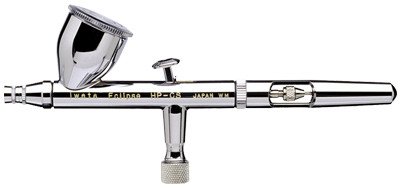
Whereas the model reviewed is the Iwata Eclipse HP-CS Gravity-Feed Dual-Action Airbrush. Which has a generous 7ml / 0.24oz fluid cup with a lid, which is ideal for colour mixing?
There’s no mechanical or financial difference between the two. The question really is down to what better suits your needs. If you want to look down the length of the airbrush as you spray, the HP-BS paint cup does not obscure your vision as much. Personally, I prefer pouring and mixing paints in the cup. So the extra volume you can add here was my personal choice.
Iwata Eclipse – Nozzle & Needle
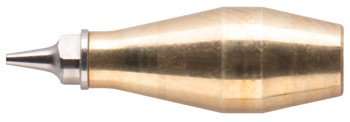
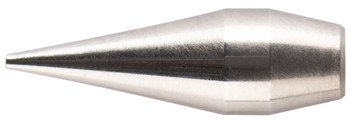
Iwata has also tried to simplify the nozzle naming convention too, The Iwata Eclipse comes as standard with an E3 nozzle/needle. The needle and Nozzle are separate parts but you need to use the correct ones together. If you are considering changing to the optional E5, you will need to get a new Nozzle Cap too.
Honestly though, entering into the Iwata world, I actually found this brand-specific naming convention more confusing.
If this is your first proper Airbrush and you are comparing brands. E3 probably doesn’t mean a lot to you, And if you look at the spec of an E3 component on Iwata’s website. It doesn’t do much to clear it up.
If you’ve started looking for a miniatures airbrush by reading or posting on websites, groups and forums. You probably know by now that the range of nozzle sizes for miniature painting is varied. It can be anywhere from 0.15mm for extreme detail work to 0.5mm if you are just wanting to basecoat lots of vehicles. This is why Iwata’s naming convention doesn’t help you.
Sure, It’s useful when you already have this airbrush and you know you are looking for an E3. But all other brands simply list the size of these nozzles in mm.

E3 – 0.35mm 
E5 – 0.5mm
So let me clarify what Iwata’s nozzle sizes are now. The E3 is a 0.35mm nozzle, specifically for Iwata’s Eclipse model airbrushes. The optional E5 is 0.5mm.
permalink=”https://www.instagram.com/p/ByYs3nZnXny/” data-instgrm-version=”12″ style=” background:#FFF; border:0; border-radius:3px; box-shadow:0 0 1px 0 rgba(0,0,0,0.5),0 1px 10px 0 rgba(0,0,0,0.15); margin: 1px; max-width:540px; min-width:326px; padding:0; width:99.375%; width:-webkit-calc(100% – 2px); width:calc(100% – 2px);”>
I find the 0.35mm E3 to be the perfect size for the majority of miniature painting due to the fine lines you can achieve with it. Whilst it also sprays wide enough for priming to base coating large models. Such as Warhammer tanks like the one above.
Will The Iwata Eclipse HP-CS Improve my Hobby?
To answer this question, it really depends on your current set-up. If you have no airbrush at all and you’re looking for something that works well and will last. This thing is perfect, offering great results out of the box.
If you currently have a cheap airbrush that came with you’re the compressor. The sort I recommend in this complete beginner guide. Then again, yes. massively! As I said in that article, those airbrushes are absolute trash. They have only 2 uses. 1, to learn how to disassemble an airbrush and not worry about losing components as they are so cheap. 2, to cut your first teeth with airbrushing. I know many hobbyists refer to those cheapo brushes one-use. There’s a good reason for that.
The Eclipse allows for simple maintenance ensuring you will always have something ready to use, time and time again. Even if it does start to wear, you can always get support from companies like Airbrushes.com should you need a repair or more thorough maintenance.
Iwata Eclipse HP-CS – Final Thoughts
There’s no surprise the Iwata Eclipse is the most popular airbrush amongst miniature painters. It sits in that sweet spot between price and Functionality. There are more precise brushes available but at a considerably higher cost. There are cheaper brushes too but most of these do not offer the quality, lastability or immediate reliability of the Eclipse.
| Pros | Cons |
| Excellent Presentation All-Round Precision Easy Maintenance Highest Quality Multiple Purchase Options Optional Extra Nozzle Size Popular Amongst Miniature Painters | Nozzle Size Names Screw-on Needle Cap No Trigger Lock Cardboard Storage Box |
If you are an airbrush beginner, the range of work you can do with this is incredible. Form Airbrushing Space Marine Eyes to base-coating tanks, this brush has you covered out of the box.
If all I can put in the negative column are issues about how Iwata chooses to name them or that the box it comes in is cardboard rather than plastic. then there isn’t much to complain about at all. Even the lack of a magnetic needle cap and trigger lock are just minor convenience features anyway. The latter of which actually encourages you to learn proper airbrush control.
Even as an intermediate to advanced painted you have a lot to gain from it’s comfort and reliability. You should know that buying from Iwata you are investing in a quality brand. With care, The Iwata Eclipse is an investment that will last years and years.
What did you think of this Review? Please let us know in the comments.
If you like what we’re doing here you could really help encourage more content with a share on any social media platform.
Click the share links at the bottom of this screen (or on the left for computers and tablets)
Want to keep updated with the site? You can subscribe in the sidebar for RSS or by email below
(Sidebar is below the article on Mobile Devices)


What is the recommended compressor to use, and recommended pressure. It’s my 1st airbrush and I’ll be Painting Model Railroad HO Scale equipment, etc.
Mike
Ooh, if this is your first airbrush, I’d start with this article https://www.fauxhammer.com/featured/best-beginner-airbrush-for-miniatures/
For compressors, check this out which pretty much recomends the same thing.
https://www.fauxhammer.com/top-10/best-airbrush-compressor-for-miniatures-models/
As for PSI, it depends how thin your paint is, but aim for something which can achieve at least 30psi operating pressure for a decent range of options
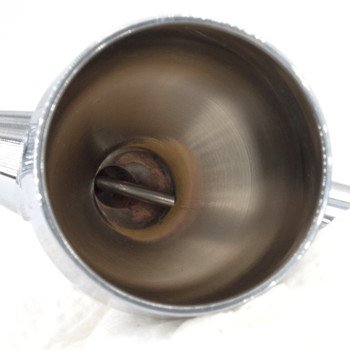
I’m probably too late with this. I wanted to say that this paint cup’s inner coating coming off, sadly is not just a cosmetic effect. If you can feel the spot where the coating has come off, you can feel that it’s texture is rough, a lot rougher compared to the surface where the coating is still intact. And this rough surface being at the bottom of the cup really obstructs a paint flow. You probably won’t feel it while doing some general painting, like priming, base coat or varnish layer. But should you attempt the detail painting that requires lower pressure like camo spots, smoke stains, etc., you can really feel that, paint flow is obscured. Not to mention that this rough texture absorbs some of the paint particles, so sometimes when I’m spraying a varnish, it gets the tint of the last paint I sprayed before. That is my experience with this.