HobbyZone OM05s – 26mm Paints Module Review
Last Updated on April 23, 2021 by FauxHammer
Here we go then, the first module review for the Hobbyzone Modular Workshop System. I couldn’t think of a better place to start than with the HobbyZone OM05s – 26mm Paints Module.
I decided to step up my hobby game and get some organisation in my life, the most important thing to was to organise my paints. With over 160 GW paints, a handful of Vallejo, and some others. The OCD part of myself fancied a treat.
Put bluntly, paint organisation is damn important. Whilst there are a number of options out there, nothing else would provide me with the flexibility that the Hobbyzone Modular Workshop System offered. I’ll cover the FULL system itself in a separate review, but right now I’m just focusing on single modules.
Full Disclosure: I am not affiliated with Hobbyzone and I have not been paid for this review. I purchased this with my own money (well, my wife & mother contributed as part of this year’s Christmas present) and I am sharing my personal opinions about them.
Notice: This article uses affiliate links
Buy OM05s – 26mm Paints Module on Amazon using the link below
| Global | Click here |
Buy OM05s – 26mm Paints Module on eBay using the links below
| UK | Click here |
| US | Click here |
| Canada | Click here |
| Australia | Click here |
HobbyZone OM05s – 26mm Paints Module -Packaging
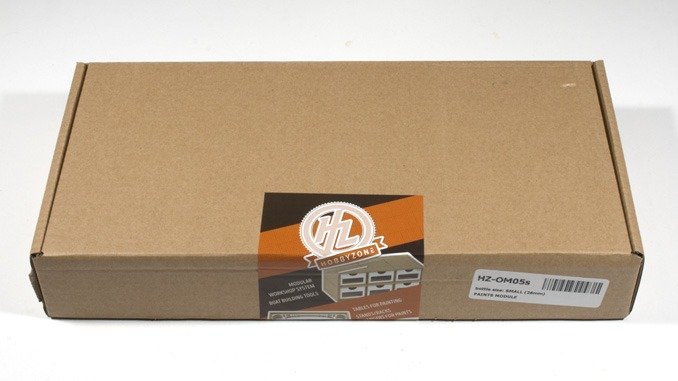
All of the Hobbzone Modular Workshop System modules come in these neat little boxes. T
It’s not sexy but I do like the design of the packaging, almost modern industrial. The simplicity of the packaging is perfectly synchrounous with the cleanly milled design of the modules themselves.
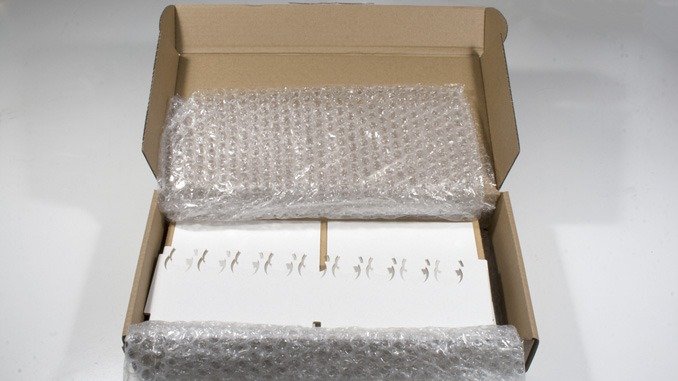
The contents are quite thoroughly packaged, this again is consistent across the range. Within the box lies a layer of bubble-wrap (which thanks to this kit, I won’t be short of any time soon). Within this, the components are evenly spaced (where possible) to avoid damage any during transit.
I’ve noticed some clear precision in the wrapping of these boxes. As you can see from the top image, there’s no bulging of the box prior to opening it. Yet the couple of times I’ve tried to repackage them to take more photos. I’ve created some severe bulging of the box in trying to stuff the bubble-wrap back in. This shows great care and attention to detail on part of the Hobbyzone staff and that they have their packaging process down to an art.
When I received all my kit the outer box they all came in was quite badly damaged in the corner. Whilst one of the actual boxes inside this was damaged, none of the actual components were affected at all. At the time of writing this, I’ve constructed 14 modules with no notable damage at all, not even a scratch.
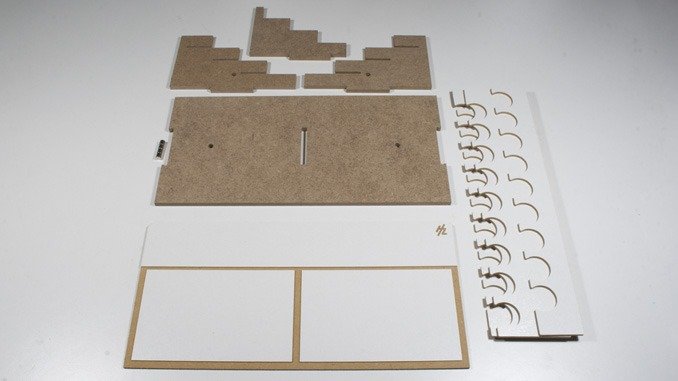
Laid out , the components are simple and clean cut.
I hate overword use on in articles, but I’m going to be saying “precision” a lot. Sure I could use thesaurus.com, but the best alternative is “exactitude”, which just sounds rubbish. So, these parts are damn precise, of course, they are C&C machined out of fibre board, so quite obviously they are going to be cut pretty exactly. I’ve had Ikea furniture which doesn’t marry up this well. I’ll talk more about this in the build section.
HobbyZone OM05s – 26mm Paints Module – Instructions
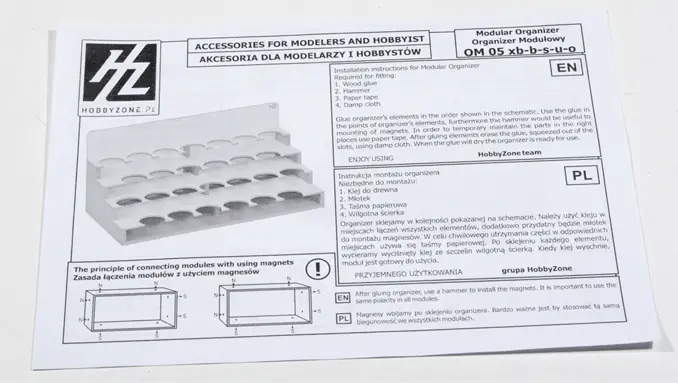
The instructions are the first negative I came across with the whole system. And no, it’s nothing to do with half of the surface area being taken up with Polish text.
Nie znam wielu polskich słów, więc używam Tłumacza Google, kiedy tego potrzebuję.
The front of the instructions (as always) is an image of the completed module and information about the
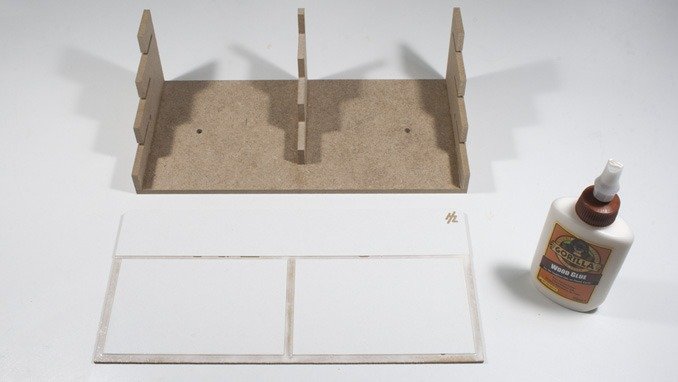
It also advises you of the tools you will need to build this module. which in this case are;
- Wood Glue
- Hammer
- Paper tape
- Damp Cloth
1. For Wood Glue, I used a 118ml bottle of Gorilla Wood Glue. (I’m pretty sure Wood Glue is just a thicker version of PVA glue). But the main reason I picked this is that I remembered I needed some during the weekly grocery shop, and I could easily hide a hobby purchase from my wife by bundling it in. Also, it had an easy pour spout which I’ve found very useful. After building 14 modules I still have about 1/4 of the bottle left. I’ll need another, guess I can offer to do another family grocery shop soon.
2. For the hammer, I just used a small toffee hammer. It’s only for hammering the magnets in (I’ll get on to the magnets in a mo). Sometimes a hammer can be useful to persuade the component pieces into place for super-flush fit.
3. Paper tape (which I call masking tape) was used on the first module I built, and only the first module. After that, I pulled out some large g-clamps I once ordered by accident. (I wanted some mini g-clamps for holding my mini’s together as the glue sets. bought the wrong size and ended up with large clamps). They certainly came in useful during this whole project. When the masking tape stuck down well, it stuck too well. When it was pulled-off (lol), It would start to pull away at the surface of the fibre board, leaving a rough texture. But that is when it stuck, most of the time it didn’t because of item fourth required tool.
4. This is the most useful tool of the bunch, I used an old microfibre cleaning towel but really should have used a thin cloth. When you add glue to the parts and push them together, it will squidge out of the seams. If like me you want a nice tidy finish then you need the damp cloth to wipe the excess away (you’ll see more of this in the build section). In the end, I think I probably had more glue on the cloth than on the unit itself. This was the same with all the modules I’ve built
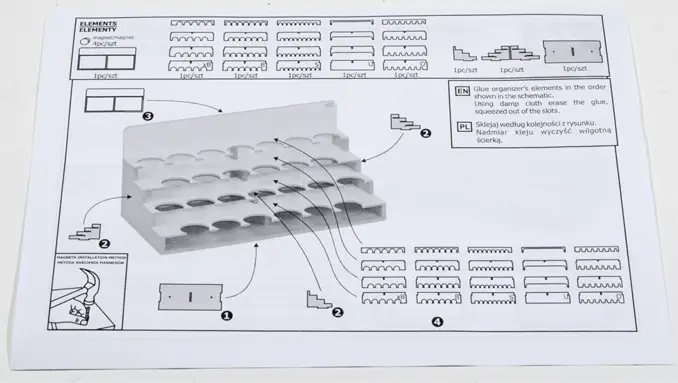
The instructions on how to build the item are not great. This is actually one of the simpler ones. But as you can see from the above its the same image from the front of the instructions and the annotation, it simply shows the order in which you put the pieces together.
Perhaps I’ve been spoiled by Lego & Ikea Instructions over the years. Whilst I’m not expecting HobbyZone to put as much design work in as Lego or Ikea. There were certainly times during all of these builds where I could have used some additional steps.
Perhaps HobbyZone could do some build instruction videos to walk you through building each item. I’d do it myself, but I don’t have the charismatic presence for a YouTube Channel, nor time for video editing.
There are times when you should simply glue two pieces together and wait until they dry before moving on. Other times you had to work fast to ensure the glue wasn’t dry before you lined up the next 2, 3 or 4 pieces. On some instruction leaflets, the order for putting the pieces together was not the best order to do things in.
However for this module, the order is correct at least, I’ll talk about the extra information they could have provided as I go through the build.
HobbyZone OM05s – 26mm Paints Module – Assembly
Normally with any product review, you thoroughly test out the features of the product you’re reviewing. But with this, it’s a paint rack. I’d tested out its full range of features within 5 minutes of it being built. It sits there, you put paint bottles in and take them out when you need to. You then put them or others back in, and so long as the bottle is not wider than the holes provided, they fit. Not exactly an exciting range of features here to talk about.
So with these reviews, it’s more about the building of the modules. Since this is the most hand’s on you’re going to be with any of the products in the range.
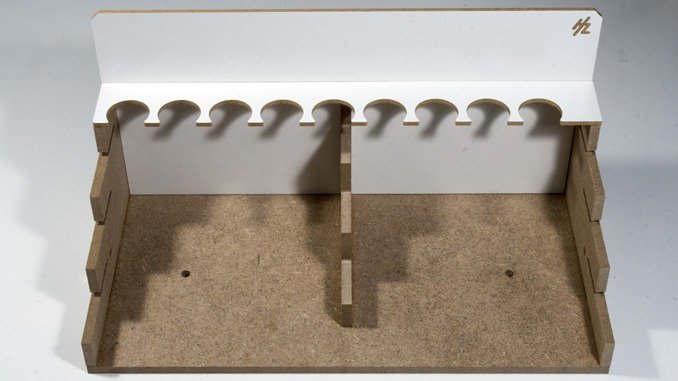
OM05s Assembly – Steps 1 & 2
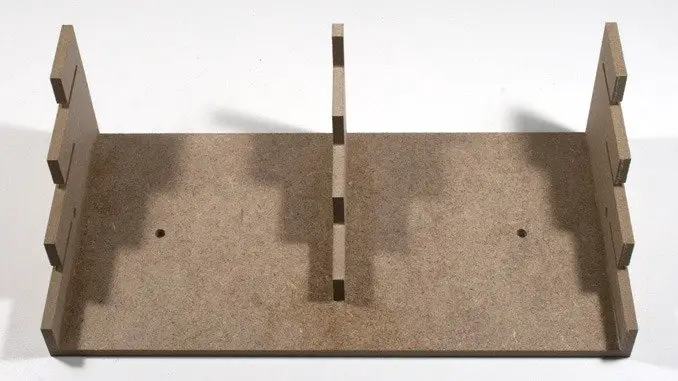
As per the instructions, Step1 just pointed at the baseboard, so I laid that down. What you are seeing above is the completion of step 2, glueing on the side panels and centre panel. The side panels are identical so you can’t get them the wrong way round. The centre panel is a single piece and the instructions clearly show the 2 different type of piece and where they go. Even if they didn’t this would be pretty obvious.
Just run some glue along the bottom of these 3 panels where they will connect with the base and slot the tounges into the grooves. Then wipe off the excess glue and move quickly on to step 3.
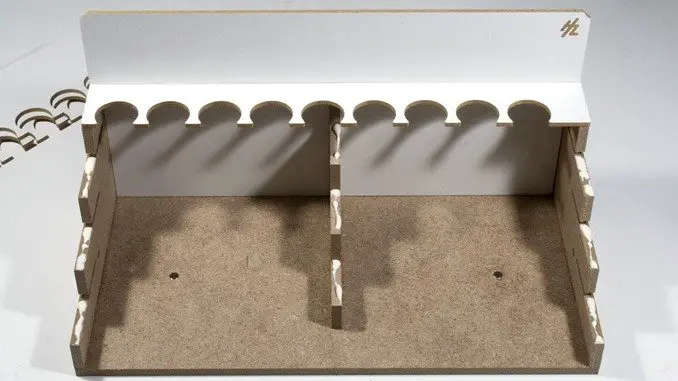
OM05s Assembly – Step 3
What the instructions don’t tell you, is that you have to move pretty quick with this next bit. The backs of the side panels and centre panel need to line-up perfectly with the grooves in the backboard. Don’t wait for the glue to dry on step 2 before you move on to step 3. If you do, you are likely to have those pieces dry at the wrong angle and you won’t get the backboard to line up. These things are machined with such “exactitude” that a millimetre off angle will mean you breaking the dried glue and going back to step 2
Get some glue into the recesses on the backboard and line up the side panels and centre panel and get the whole frame together whilst the glue is still wet.
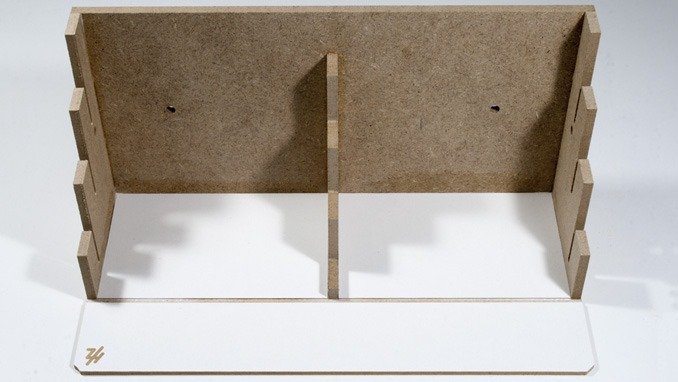
The weight here helps hold the side panel and centre panels to the backboard, so you can just set it on it’s back until it dries. I’d recommend you use the time now to thoroughly wipe away the excess glue so you aren’t left with nasty stains.
You can use some tape at this point to hold everything together, but because of the damp cloth used to wipe away the excess glue, you may have trouble getting it to stick. I used some g-clamps and spring clips to hold this all together as the glue set. Using these also added some excess pressure which drove more glue out of the seams. More wiping for me, but at least I got some solid straight joins.
OM05s Assembly – Magnets

I said above I’d get on to the magnets. If you don’t know, this module is part of a modular workshop system. You can marry up numerous different modules together for your own configuration. The magnets help line the modules up together. Dependant on the size of the module you get varying amounts of magnets in your box. You get the exact amount you need, no more, no less.
It’s a good idea to get the magnets in whilst no more than the frame is built, this gives you enough freedom within the frame to get your hammer in without damaging any of the main components.
What is important here is ensuring the magnet polarity is correct. If this is your first module then just follow the guide in the bottom left corner of the instructions. Facing the module, North polarity should be on the left side and top. South polarity should be on right side and bottom. You have no way of telling which sides of your magnets are north and south unless you have another magnet somewhere which is marked. But so long as you have the same polarity on the left and top then the opposite on the right and bottom, you can just use this first module to determine which way the rest of your modules will be.
The holes for the magnets are really tight. For the first few I just lined up the tower of magnets with the hole and hammered the top until one goes in a bit. Then hammer the magnet itself to get it flush. The last 2 are always a bugger as you have to force them in the holes with your fingers. Normally causing it to spring across the desk the first few times. This means you have to recheck the polarity against the other magnets before trying again. Once they are all in it’s a good solid fit. no glue needed.
I’ve never had any come out on their own, but if you do make a mistake you can easily knock them back out. later
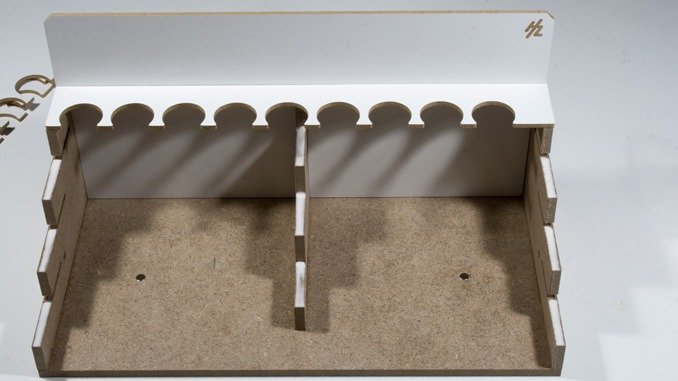
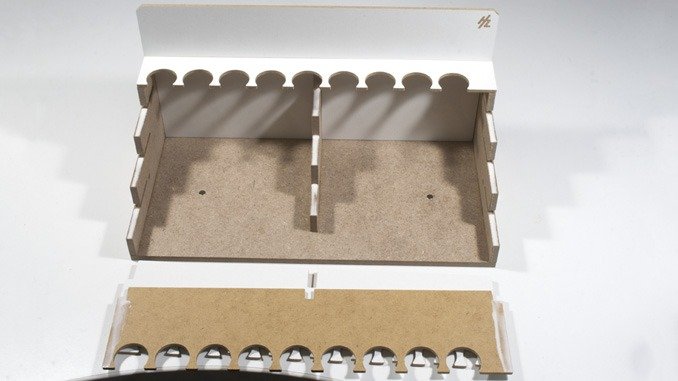
OM05s Assembly – Step 4

The next bit is really simple, there’s just lots of it. I had to move quickly here too. When I put glue in the backboard’s grooves I accidentally put glue down the crease meant for the top shelf. So I had to get the shelf in there before the glue fully set. Because of this, I started with the top shelf, whereas it actually makes more sense to start from the bottom. Again, another opportunity for improved instructions to give you these helpful hints.
Once it’s in. you dont need to let it set, just move on to the next piece
This is how I always do my glue, something I learned back in school with woodworking. First just run a line of glue down the edge that will connect
In many cases, less is more, in the case of wood glue, more is more, you can always wipe the excess off after. But you want to ensure that there is some glue between all the connecting parts. Rub it in so that the whole surface area is covered. No tools needed for this, just use one of your digits (fingers).
Then I added some to the underside of the shelf itself so that it can get glue all the way to the back of the supports.

It’s important to have made sure you know the order of the shelves before you fit them. It’s quite simple. the smallest shelf is on the top and the largest on the bottom. each shelf will have
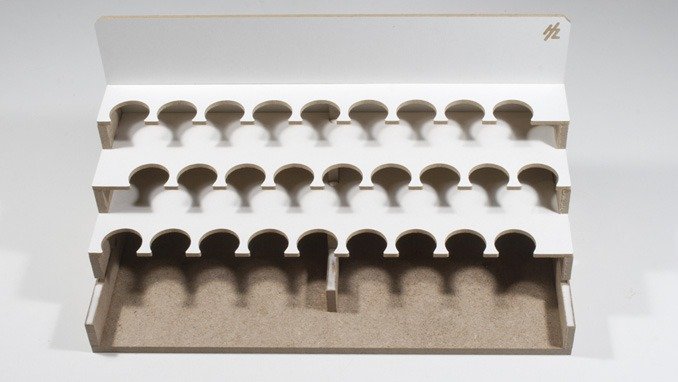
It’s important to know this for the middle 2 shelves as they are of a similar size. Something else that would be better known from the instructions.
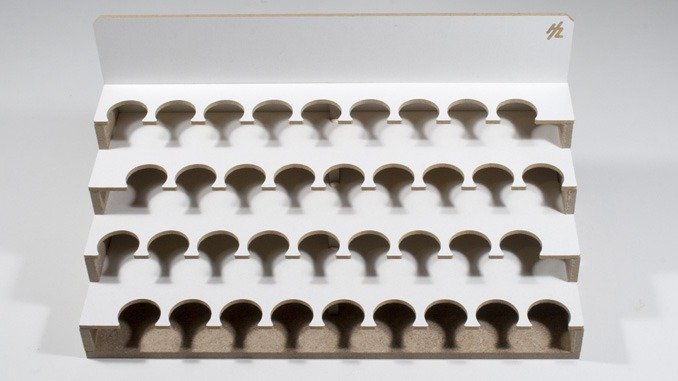
And voila.
Just wipe off the excess glue let it all dry. You can tape or clamp it if you wish.
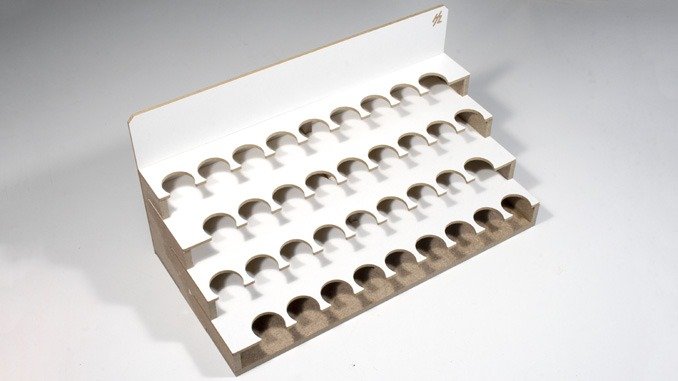
All-in-all This took about an hour to figure out and build. That’s not including drying time. But once you’ve done one, the rest only took about 30-40 minutes each (again, not including drying time). I like to be quite accurate with my builds. If you want to save some time you could just glue it and avoid the excessive wiping and cleaning. Or you could go the other way, put even more effort in and apply some wood stain or varnish to the boards, improving the finish even further.
This was a nice and straightforward build, there are much trickier ones and some easier ones. This is a great place to get started and most likely the piece you need first anyway. The good thing about this modular system is that you can buy into it piece by piece and upgrade it as you need to. I started with just a row of these paint modules and now I’m building up the complete system.
The paint holder module was a great benefit to my hobby as I was no longer sifting through boxes for one colour, everything was ordered, visible and accessible.
HobbyZone OM05s – 26mm Paints Module – Usage
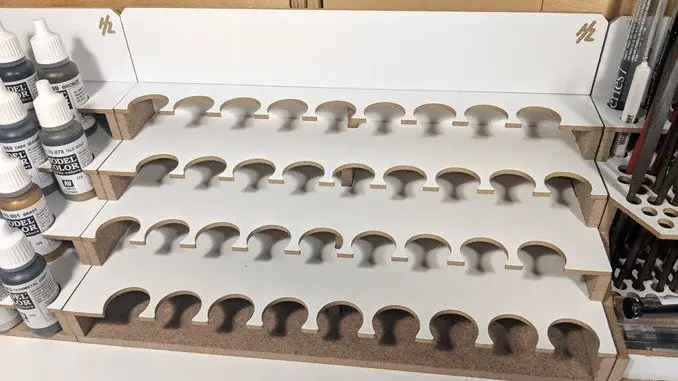
You can see the module now lined up with its brothers and sisters, on the left is another HobbyZone OM05s – 26mm Paints Module and on the right is an OM07a – Brushes and Tools Module (The first module I built and which I’ll have a review up for soon).
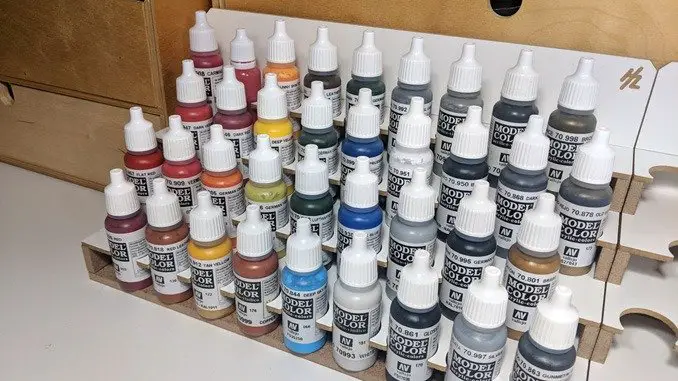
The HobbyZone OM05s – 26mm Paints Module Holds 36 Paints or other bottles with a maximum diameter of 26mm. which is perfect for;
- Vallejo – 17 ml
- AK Interactive – 17 ml
- AMMO – 17 ml
- Scale 75 – 17 ml
- Andrea – 17 ml
- Army Painter – 18 ml
Or my personal favourite, Games Workshop’s Citadel Paints after they have been transferred into 15ml dropper bottles.
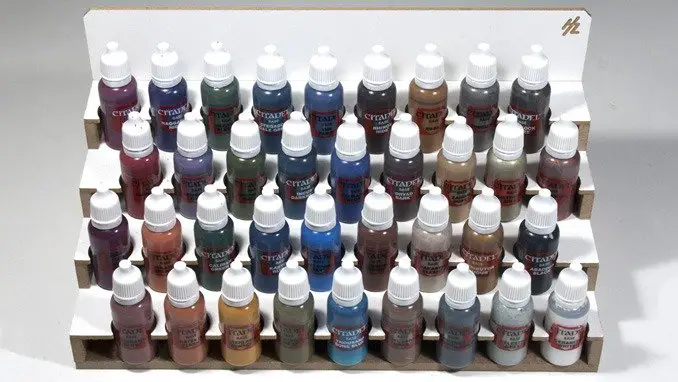
I said in my “Decanting Games Workshop Paints into Dropper Bottles” guide that a benefit of dropper bottles over citadel paint pots is that they take up less space. The proof of this is that Hobbyzone has of a few versions of this rack, the one for Citadel paints holds fewer bottles (10 fewer to be exact).
Games Workshop’s Citadel Paint Pots require the OM05b – 36mm Paints Module which has 26 holes.
The OM05b – 36mm Paints Module is great for the following paints;
- Vallejo – 30 ml / 35 ml
- AK Interactive – 35 ml /30ml
- AMMO – 35ml
- Games Workshop – 12 ml
- Life Colour – 22 ml
- Formula P3 – 18 ml
Mr. Hobby Gunze – 10 ml- Tamiya Mini – 10 ml
- Model Car World – 1oz bottles
- Testor ModelMaster – .5oz bottles
- Vallejo Primer – 60ml bottles
- Revell (enamel) – 14 ml
- Italeri – 20ml bottles
There’s also the OM05xb – Paints Module 41mm which only holds 20 bottles and really just for Tamiya 23ml, which I don’t have. I only use the 10ml Tamiya Mini Paints. I could fit my 120ml Stynylrez Primer bottles in here But I only have 3 of these, so it’s not worth taking up space on my desk when they can just sit in the cupboard with my airbrush.
They also have the OM05o – Oil Paints Module which as the name suggests is for oil pints, but you can fit up to 28 paints in this one.
Finally, the OM05u – Bottles Module which doesn’t have specific hole sizes, just 1 shelf with a 67mm depth and 2 shelves w
HobbyZone OM05s – 26mm Paints Module – Final Thoughts
In conclusion the OM05s – Paints Module 26mm is a great piece of kit. Whilst it’s not as cheap as some of the alternative paint racks, the modular nature of the unit as part of the system is something I was willing to shell out that little extra for. Whilst having “just a paint rack” would have been useful to me initially, I always knew I’d need somewhere to store extras, like tools and consumables, along with numerous other bits & bobs.
This was a fantastic start to a full Workshop System.
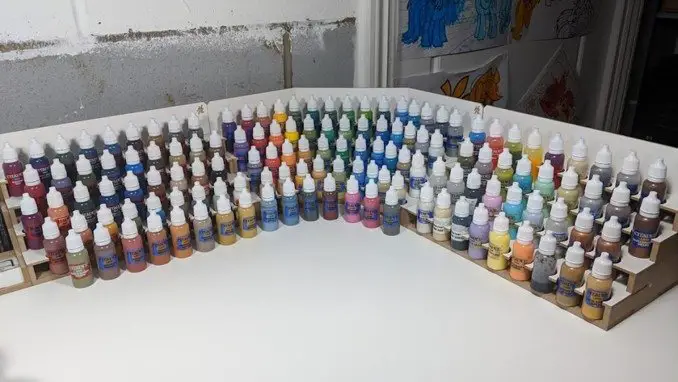
Here you can see the first part of my set up which almost, but doesn’t quite hold every Games workshop paint after I’ve transferred them all to dropper bottles, as you can see by the stack at the front. But I have
(well, HobbyZone has) another solution for that.
Also shown here is the OM06s – Corner Paints Module 26mm, which holds 48 bottles. I’m not going to provide a separate review for this as the build is pretty much the same and so is the function. This module is great for creating a Workshop System that surrounds your work-surface.
Hobbyzone also has the OM06b – Corner Paints Module 36mm which holds 34 bottles and the OM06u – Corner Bottles Module which holds your unevenly sized bottles.
It is worth noting that there is no 41mm or oil paint option in the corner units.
| Pros | Cons |
| Attractive Part of a Modular System Easy to build Various options for different bottles Sturdy & Precisely built | Instructions could use more detail |
Does the HobbyZone OM05s – 26mm Paints Module Improve my hobby?
Quite simply, yes. Having all of my paints organised and in front of me makes painting so much easier. Beyond that, I now have direct visibility of colours that I wasn’t as immediately aware of before. So it’s also encouraging me to try out a combination that I would not have considered otherwise.
There’s also something a bit sexy about it. Maybe that’s just my OCD talking but seeing the organisation and colour variance across my desk is satisfying and enforces the meditative feeling I already get from miniature painting.
If you are looking at some way of organising your paints there are tons of options out there and deciding whether to buy this really depends on how invested you are in your hobby. HobbyZone’s Workshop system modules are at the higher end of the pricing scale when you are only comparing paint racks. But they aren’t restrictively overpriced. I have been able to pull together a complete desk set up of 5 modules across the back and 2 modules down each side by 3 modules high for less than £500. If you are quite invested in your hobby then you realise that you can’t even get many minis for this price (especially Games Workshop models). This isn’t necessarily going to make you a better painter but it reduces the barrier to entry for sitting down and doing some painting. Which in turn will encourage you to dive in for some shorter sessions? Perhaps where you would normally not be bothered to pull everything out and get set-up. I find it’s worth it for that alone.
If you’ve just gotten into miniature painting or other forms of craft hobbying then before shelling out for
Buy OM05s – 26mm Paints Module on Amazon using the link below
| Global | Click here |
Buy OM05s – 26mm Paints Module on eBay using the links below
| UK | Click here |
| US | Click here |
| Canada | Click here |
| Australia | Click here |
What did you think of this review? please let me know in the comments.
If you like what I’m doing here you could really help encourage more content with a share on any social media platform.
Want to keep updated with the blog? You can subscribe in the sidebar by email or RSS
(Sidebar is below the article on Mobile Devices)