Harder & Steenbeck Infinity CR Plus Review for Miniatures & Models
Last Updated on April 23, 2021 by FauxHammer
We’ve been testing out a few airbrushes recently and I’m glad I can finally share my impressions with our Harder & Steenbeck CR Plus Review.
Please Note: This site uses affiliate links. Our Affiliate Partners are shown below
(Affiliate links will result in compensation to the site on qualifying purchases)
Click this link & buy your hobby stuff from Element Games for the UK & Europe to support FauxHammer.com – Use Code “FAUX2768” at the checkout for double reward points.
Our Affiliates / Hobby Stores
- UK: Element Games, The Outpost, Wayland Games, Mighty Lancer, Goblin Gaming, Forbidden Planet, Model Scenery Supplies, eBay, Amazon
- US/Canada: MTechCave, GameKastle, eBay (US), eBay (CA), Amazon
- Germany: Taschengelddieb
- Europe: eBay (DE), eBay (FR), eBay (ES), eBay (IT), Amazon
- Australia: eBay, Amazon
- Global: RedGrass Games, Warcolours
- 3D Printers: Phrozen 3D, Elegoo, Anycubic
FauxHammer – Latest Video on YouTube
The Harder and Steenbeck Infinity CR plus is my favourite airbrush so far. I genuinely never thought I could get this much out of airbrushing, but all the little additions to the feature set here make up a whole package that is excellent for a miniature painter. Coupled with German quality engineering at a competitive price point, I ‘m comfortable saying this is “the” airbrush you should get.
The Best Airbrush for Miniatures?
This Review is part of our Best Airbrushes for Miniature Painters and Wargames models.
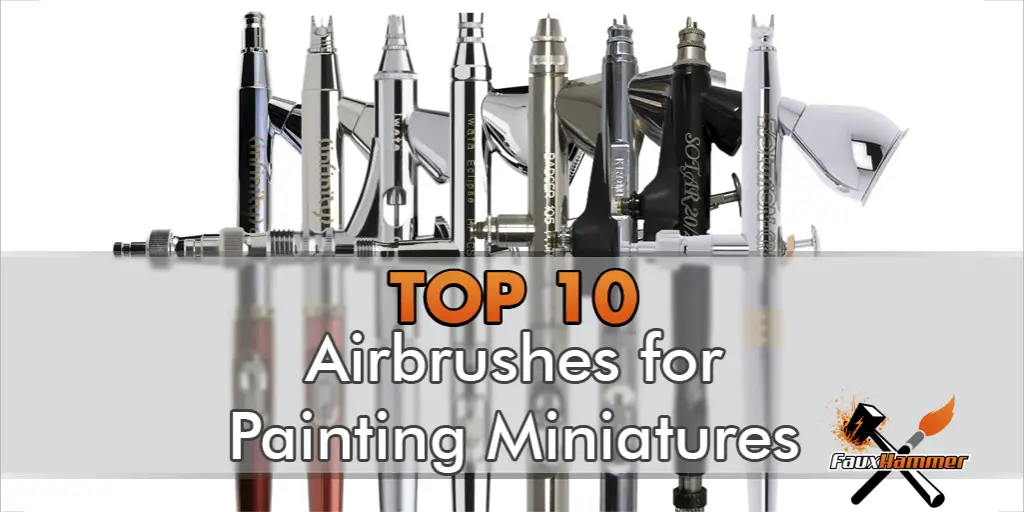
See our other reviews and the complete list of the best Airbrushes.
Harder & Steenbeck Infinity CR Plus Review – Unboxing
It’s rare an unboxing uncovers much interesting other than the carefulness of packaging and presentation of the goods inside. Here however the packaging remains a useful tool in caring for your airbrush.
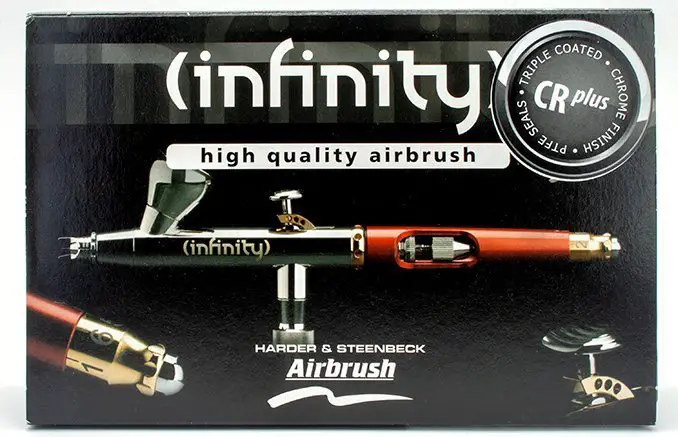
Simple packaging which advertises the contents and 2 of the main features. The quick fix end piece and the trigger (which features an adjustable torsion spring). Also noted are the Triple Coated Chrome Plating and PTFE seals. basically it will stay shiny and the seals will take an age to degrade.
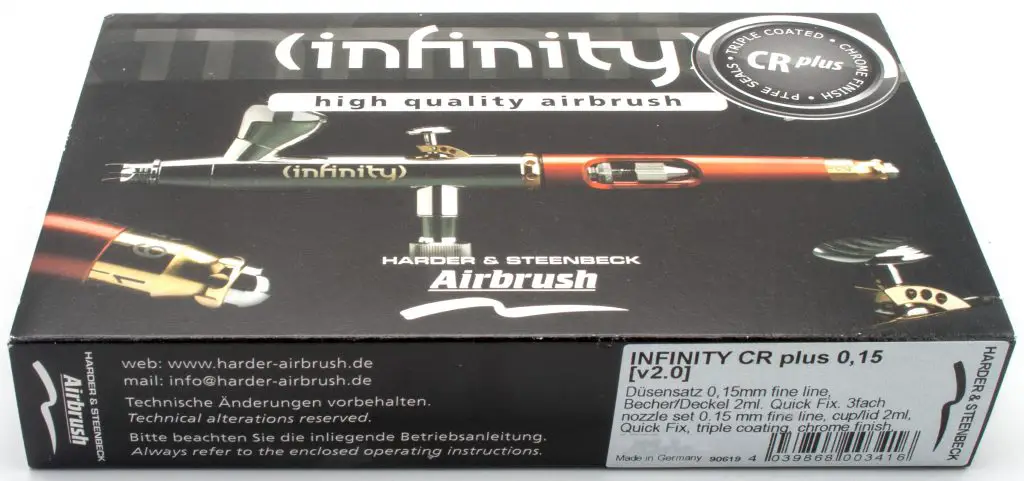
The model Harder & Steenbeck sent is the CR plus 0.15. The Infinity CR Plus is available in 5 variants.
- Infinity CRplus 0.15 – (0.15mm needle and 2ml colour cup)
- Infinity CRplus 0.2 – (0.2mm needle and 2ml colour cup)
- Infinity CRplus 0.4 – (0.4mm needle and 5ml colour cup)
- Infinity CRplus two in one (2 variants available)
The two in one variant are kits which provide you with 2 needles along with both 2ml and 5l colour cups out of the box. You can get a set containing the 0.15mm & 0.4mm needles. The other set contains the 0.2mm and 0.4mm needles.
Thankfully H&S also sent the Evolution model for review alongside this one, I’m pleased I found out that the needles, nozzles and air caps are interchangeable between the two.
Not only did this give me a chance to test out all 3 needles sizes. But it also allowed me to keep using the airbrush, becasue after using the 0.15 for a while. I erm… kinda broke it. But we’ll get to that.
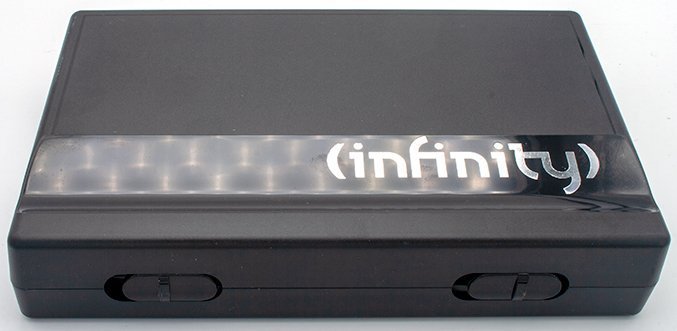
Teh case itself is a great part of the packaging, other brands will ship even their most expensive airbrushes in a cardboard box. Having this plastic case means you always have somewhere special to keep your delicate tool.
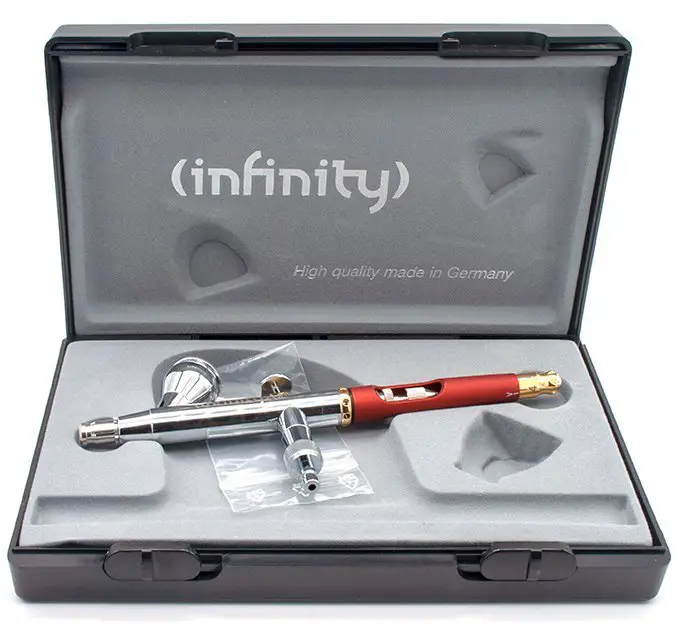
Inside the case, you can see it’s well protected. The interior casing is just plastic but the flocked surface and silver text gives it that premium look. The empty recesses are for the additional colour cup and needle in the two in one variant of this airbrush.
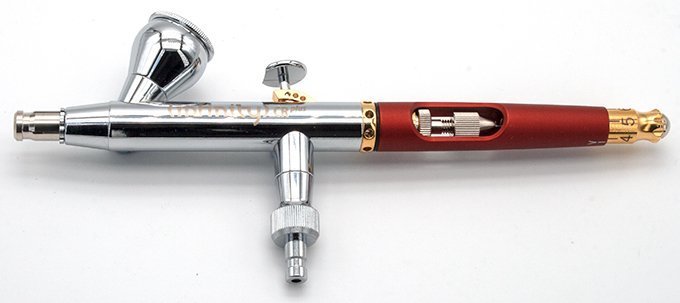
The airbrush itself is beautiful, the Tripple plated chrome will ensure it keeps its sheen for a very long time. many airbrushes (including the older Infinity) are Nickel Plated. Not only is a nickel a problem for those with allergies to it, but it also wears down quicker than you would expect and leaves a dull finish.
I love the contrast between the red and the chrome with hints of gold throughout. Some work has certainly gone into the design of this airbrush, and why not. It’s nice to have a tool for artists, clearly made by artists.
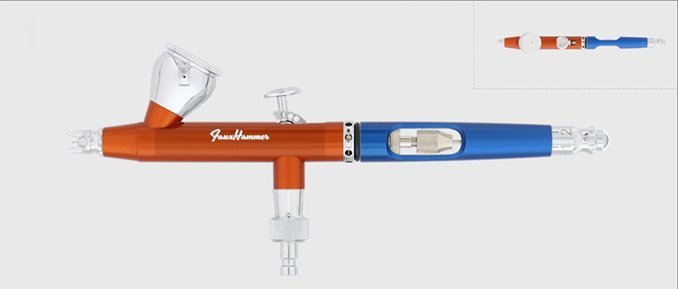
If you don’t like the standard colours, you can always create your own scheme like this garish creation above, complete with custom engraving. This, however, is only available from Harder & Steenbeck directly and unsurprisingly costs a premium.
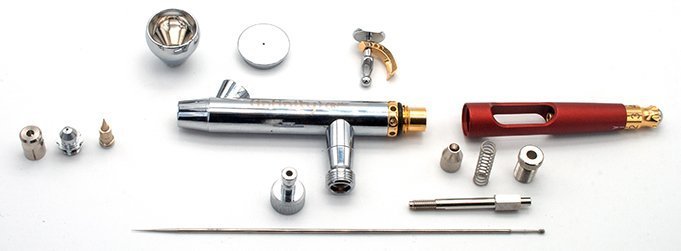
like the other airbrush reviews I’ve done, I decided to strip down the airbrush to get a good idea of the components. There’s quite a few more here than in any of the other brushes reviewed.
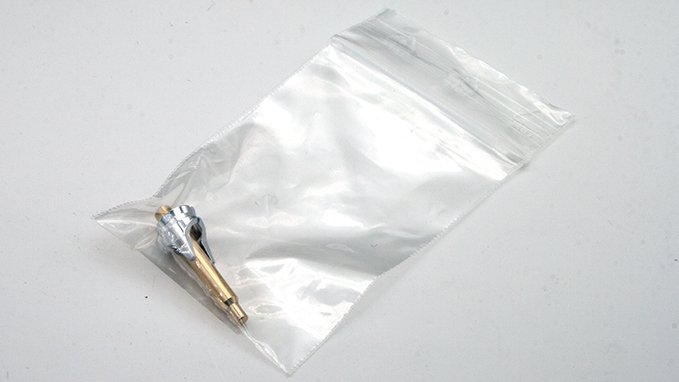
Then I took a quick glance in the box at the other two components included. one was crown cap which protects the needle whilst in use. the other is a wrench. It turns out that this airbrush can be taken apart even further.
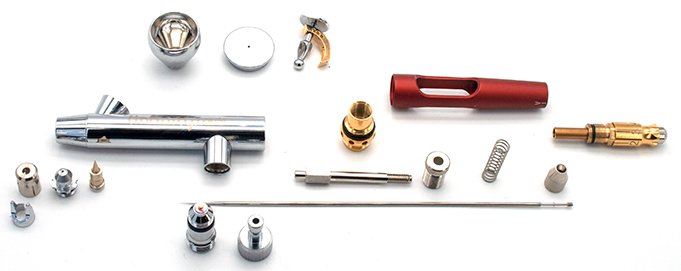
So yeah, there are quite a few components here. My concern from this was that maintenance would be much more difficult due to the extra components. But in my experience, it’s no trickier as the affected components are all still at the front of the airbrush, and the removable colour cup actually makes everything easier to access.
Please Note: This site uses affiliate links. Our Affiliate Partners are shown below
(Affiliate links will result in compensation to the site on qualifying purchases)
Click this link & buy your hobby stuff from Element Games for the UK & Europe to support FauxHammer.com – Use Code “FAUX2768” at the checkout for double reward points.
Our Affiliates / Hobby Stores
- UK: Element Games, The Outpost, Wayland Games, Mighty Lancer, Goblin Gaming, Forbidden Planet, Model Scenery Supplies, eBay, Amazon
- US/Canada: MTechCave, GameKastle, eBay (US), eBay (CA), Amazon
- Germany: Taschengelddieb
- Europe: eBay (DE), eBay (FR), eBay (ES), eBay (IT), Amazon
- Australia: eBay, Amazon
- Global: RedGrass Games, Warcolours
- 3D Printers: Phrozen 3D, Elegoo, Anycubic
FauxHammer – Latest Video on YouTube
Harder & Steenbeck Infinity CR Plus Review – Features
As someone who has been airbrushing for a while, it’s still been difficult to identify what features would make my airbrushing better. I mean, how do you know what you need before you’ve used it. The Infinity CR Plus answered that question for me. Let’s take a look at the features I never knew I needed but now cannot live without.
From Front to Back
Quick Release Crow Cap
This is the part which fits over the front of the airbrush. The point of this is to protect basing the needle into whatever you’re spraying. In this kit, you get a full protector cap and a crown cap.
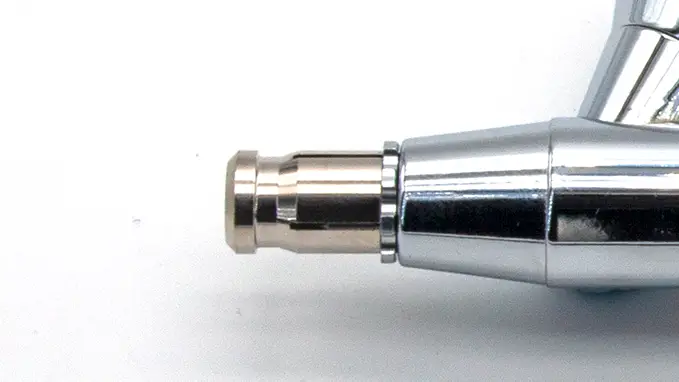
This is already smaller than most as there are only two prongs which stick out. I’ve always found that with most other brands these crown caps just get in the way for miniature painting as you can get up close. But this puts the needle itself at risk. As it only has 2 small prongs, this is already lessened but I’ve found it still needs to come off occasionally to get into some detailed areas.
The beauty of this is that it just pulls off. No screw thread, it’s just a tight fit around the air cap. Lovely, what this means to me is that I actually put it on now to protect the needle as opposed to my other airbrushes where it comes off and I eventually lose it.
Needle/Nozzle/Air Cap
When I was first introduced to the Infinity Airbrush, it was on the Siege Studios Essentials Masterclass painting course (Great Course!). one tip we were given was to have a small piece of tissue, gently soaked in airbrush cleaner to hand for wiping the nozzle down between sprays. I’d never needed this with any other airbrush I had used and pretty much ignored this advice.
However, now having used the Infinity, I have noticed that paint drying on the tip is a much more frequent occurrence than with any other brand. This is exacerbated by the new approach I have to airbrushing, which this model actively encourages (more on this below).
It is great to see that the needle nozzle & air cap are interchangeable between different airbrush models. The Aircap itself is technically different between the Infinity and Evolution, the infinity, for example, will hold the quick release crown-cap, the base Evolution model won’t (not Evolution CR plus, they use the same air cap) . The Needles and Nozzles themselves are exactly the same.
To help clearly identify the Needles and Nozzles there are notches on them. The 0.15mm has 1 notch, the 0.2mm has 2 notches and the 0.4mm has 4. again, a useful little feature but one that is highly important if you are changing out needles and nozzles. yet again, another feature I never knew I wanted until I had it.
PTFE Seals & Chrome Body
PTFE Seals or Polytetrafluoroethylene as it’s less commonly known. The more I paint miniatures the more I am being tempted away from acrylics and toward Enamel paints. Cleaning these paints can be a chore as you need some strong chemicals.
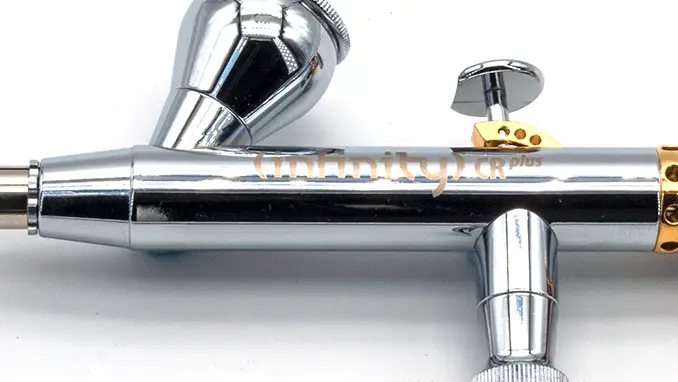
Whilst I haven’t had the time to spend “years” with this brush before the review, there are enough reports online that claim the chrome plating will last for years without issue.
To push this to the limit, I’ve used a neat isopropanol bath on the head of this airbrush overnight with no effect to chrome plating. The Viton Rubber Air Cap Seal became unsurprisingly brittle and snapped. It was cheap enough to replace.
Changeable Colour Cup
This is great for me for one reason. I can take the colour cup off and get a better clean of the internal components. I have the 2ml cup with this version and whilst I can upgrade to the 5ml, I’ve not yet needed it.
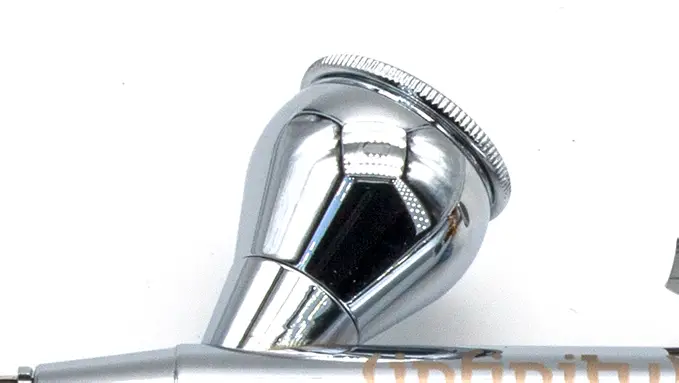
As someone who paints small squads at a time, 2 ml has been plenty large enough for base coating and priming squads of 5 minis. If you are base-coating several tanks, I can see a use for 5ml. But be aware, 5ml is a lot of paint. GW paint pots only hold 12ml
Adjustable Trigger Torsion
This is a really great feature. One of the things I love about this brush is that you can adjust the resistance of the trigger itself. If you are working on fine details, it’s great to have a trigger which is slightly harder to pull back.
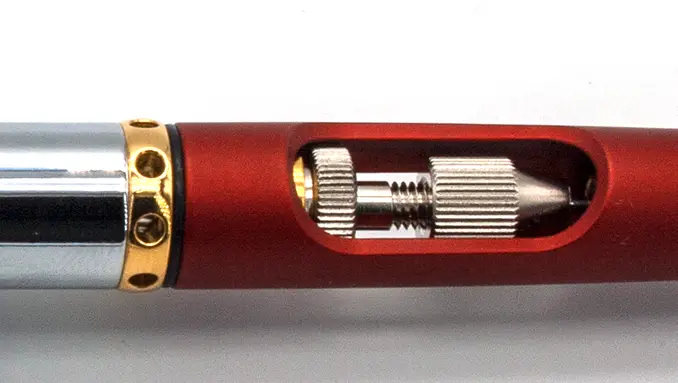
There’s not a huge difference in the tension but it is perceptible, even if t gives you that psychological nudge that you shouldn’t be pulling back as far, it will help you maintain control.
Whilst it may seem a good idea to set this resistance to high for detail work and low for large amounts of base coating. the likelihood is you’ll just find a personal sweet spot and keep it there. But it’s great that you can at least get a personal sweet-spot as opposed to just having the tension set out of the box.
Quick Fix end piece with dial
Maybe something is lost in the german translation, but this really should be called a quick “release” end cap. I suppose it’s six of one, half a dozen of the other. Either way, this is my favourite feature of the airbrush and has significantly changed my way of airbrushing.
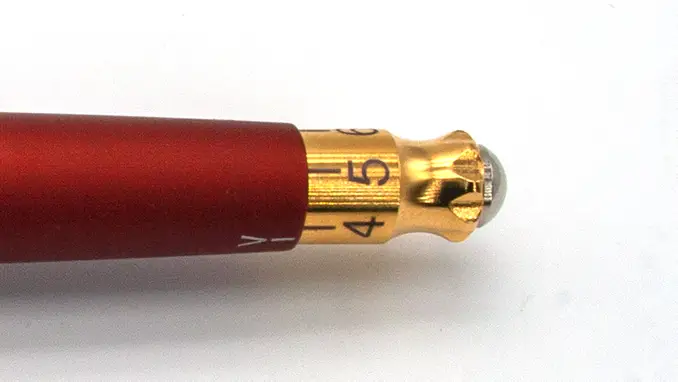
Essentially this is a dial on the back end of the airbrush which acts as a stop. Dial it down and it won’t let you pull the trigger back as far. dial it up and you can pull the trigger all the way back. Numerous brands offer an airbrush with such a dial, this brand, offers a quick-release of that set which is simply amazing.
Something noted again on the Siege Studios masterclass was that these end-stops actually restrict you from learning proper airbrush control. But then on the Lead Belt Studios Course, I went on highly favoured its use.
After that change to approach sank into my brain, I’ve come to realise it really doesn’t matter about learning proper airbrush control if the tool does it for you. after all, I get the results I want, and now I can do it sooner.
The great benefit of this feature is that with airbrushing, after your initial basecoats and shading, it’s great to add detailed nuances and subtle colour shifts to add interest o your model. This airbrush allows you to do that quickly and easily.
Simply dial it in and spray. due to the restricted needle, you are only getting minute amounts of paint on your model, building this up over several layers gives those very subtle tones and shifts without much challenge.
The downside to this is that due to very little amounts of paint covering the surfaces, it will dry on the tip very easily. A little drying retarder in your paint really helps here but the best feature of this airbrush is that you can quickly release your dialled-in setting. Blast a squirt of paint through the airbrush to remove any clogging and press then end to go back to your fixed setting. Simple.
Please Note: This site uses affiliate links. Our Affiliate Partners are shown below
(Affiliate links will result in compensation to the site on qualifying purchases)
Click this link & buy your hobby stuff from Element Games for the UK & Europe to support FauxHammer.com – Use Code “FAUX2768” at the checkout for double reward points.
Our Affiliates / Hobby Stores
- UK: Element Games, The Outpost, Wayland Games, Mighty Lancer, Goblin Gaming, Forbidden Planet, Model Scenery Supplies, eBay, Amazon
- US/Canada: MTechCave, GameKastle, eBay (US), eBay (CA), Amazon
- Germany: Taschengelddieb
- Europe: eBay (DE), eBay (FR), eBay (ES), eBay (IT), Amazon
- Australia: eBay, Amazon
- Global: RedGrass Games, Warcolours
- 3D Printers: Phrozen 3D, Elegoo, Anycubic
FauxHammer – Latest Video on YouTube
Harder & Steenbeck Infinity CR Plus Review – Application to Models
I don’t think I’ve had more fun or success with an airbrush than this.
Adding the basecoat was fine with the 0.4mm needle, Whilst you have a wider spray you can still get in really close with lower air pressure and get fine details on the model. Even though many airbrush painters would say to use the 0.4mm for base coating. I don’t see why you couldn’t use this for the whole model thanks to all the additional controls this airbrush has.
The biggest benefit of the 0.4mm needle which I could find was that I had fewer issues of tip drying than with any other needle. With the other, I was constantly having to use the quick release to blast some paint through. Or using some tissue soaked in airbrush cleaner to wipe the needle itself.
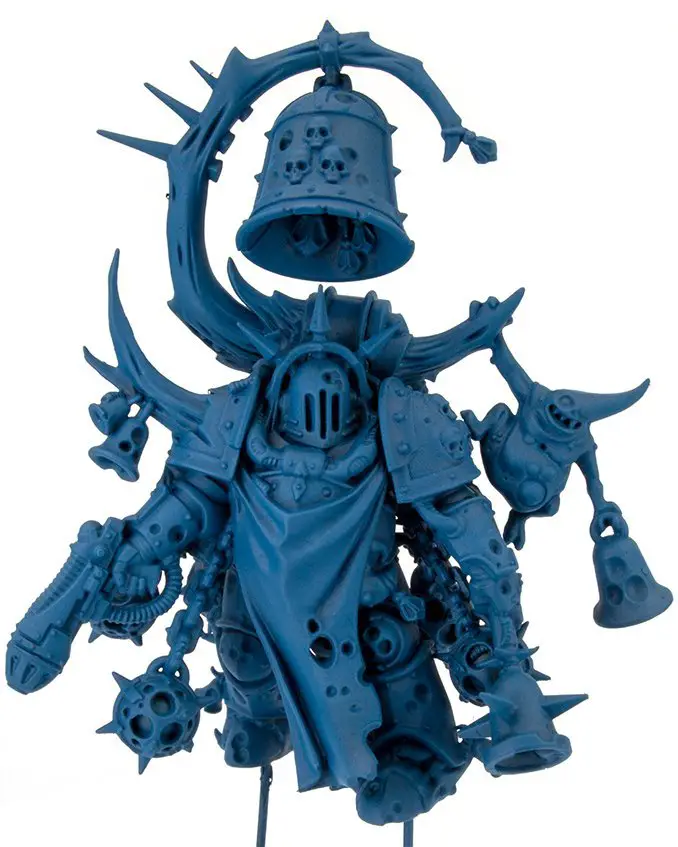
This was initially coated in Reaper Master Series (my current favourite paints) Breonne Blue. Then a zenithal highlight coat of Reaper Saphire Blue using the 0.15mm needle. There’s only a subtle shift in colour between the two and the 0.15mm needle really helped in targeting the highlights.
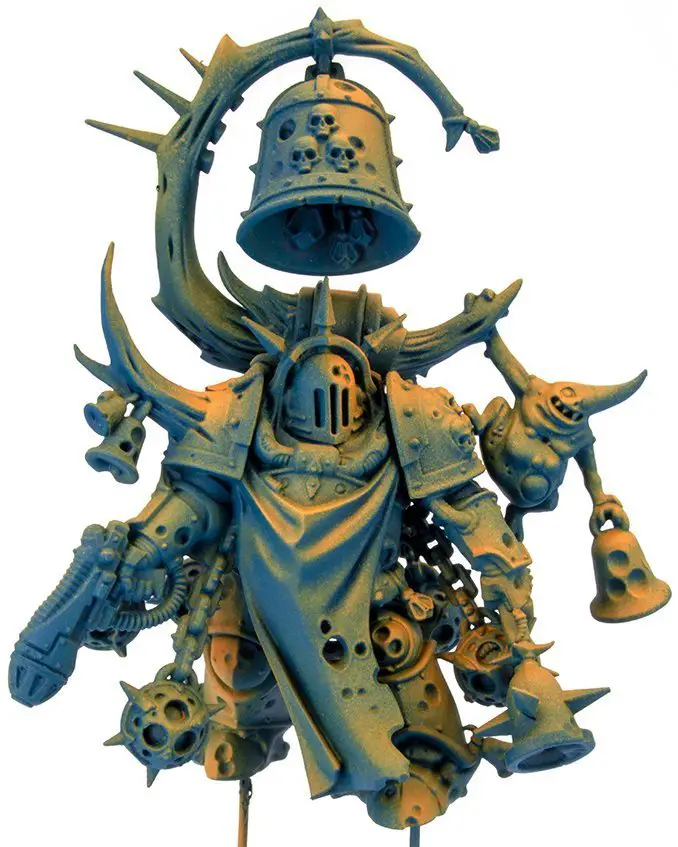
Next up was adding some contrast, what is a good contrast for Blue..? Orange.
Using Reaper Fire Orange, I easily targeted the areas I wanted to highlight thanks to the Airbrushes Quick-release. I built up the highlight spots steadily over the surface until I was happy. Looking back I’d have chosen a Darker Blue and Brighter Orange. Whilst the Orange/Blue combo has really nice contrast, The tone/shade (light/dark) is pretty equal.
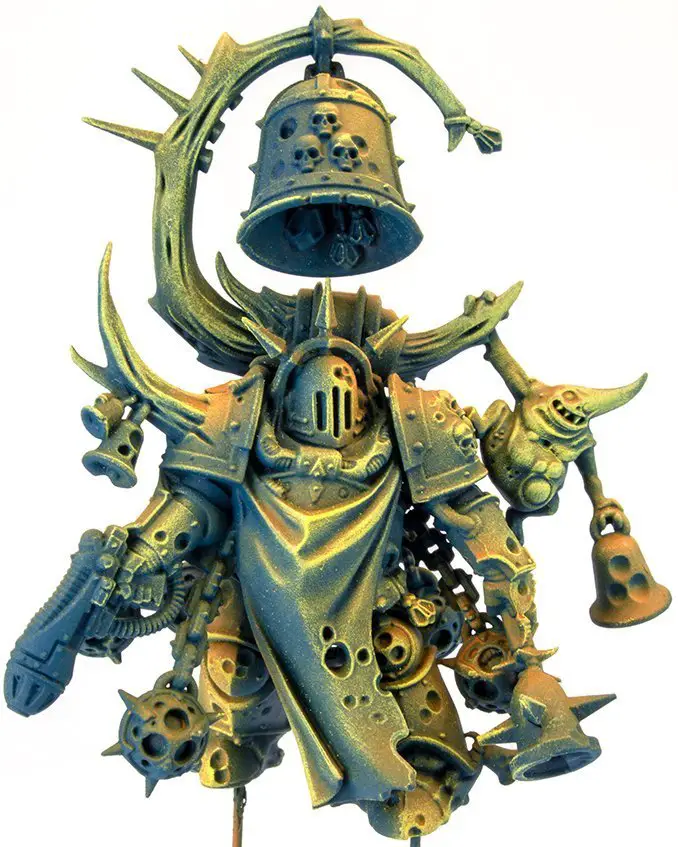
The next step was a light drybrush in Reaper Lemon yellow to pick out the edges. Nothing to do with the airbrush, but a necessary step so you don’t think I was somehow edge-highlighting with an airbrush in the next pic.
Check out our article on The Best Drybrushes for Miniatures
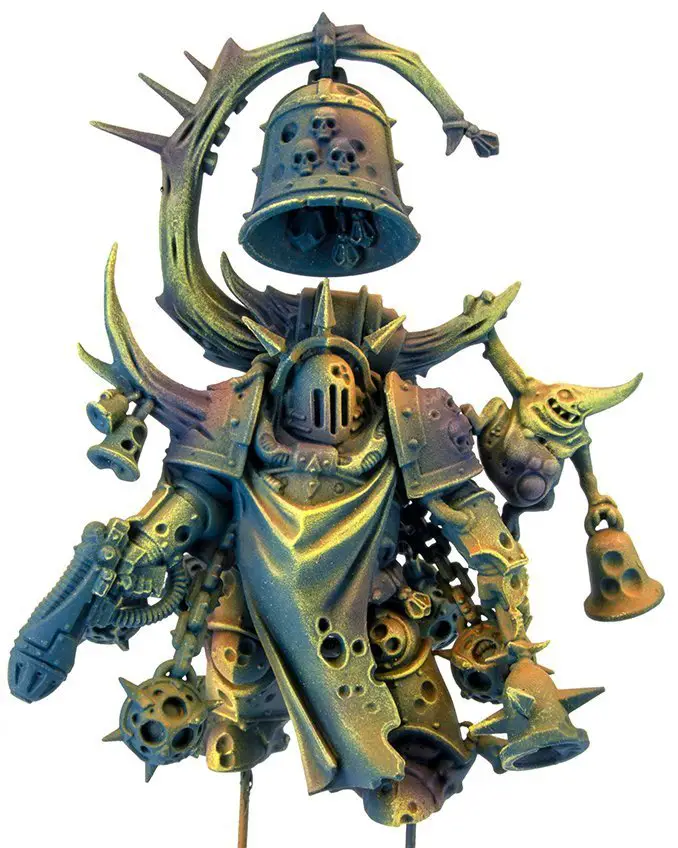
This was another step where the quick release was invaluable. Using this to build up some interest points on the armour using Reaper Clear purple. In retrospect, this wasn’t the best colour for a subtle shift as it is too harsh. But I’ll cover that on the next model.
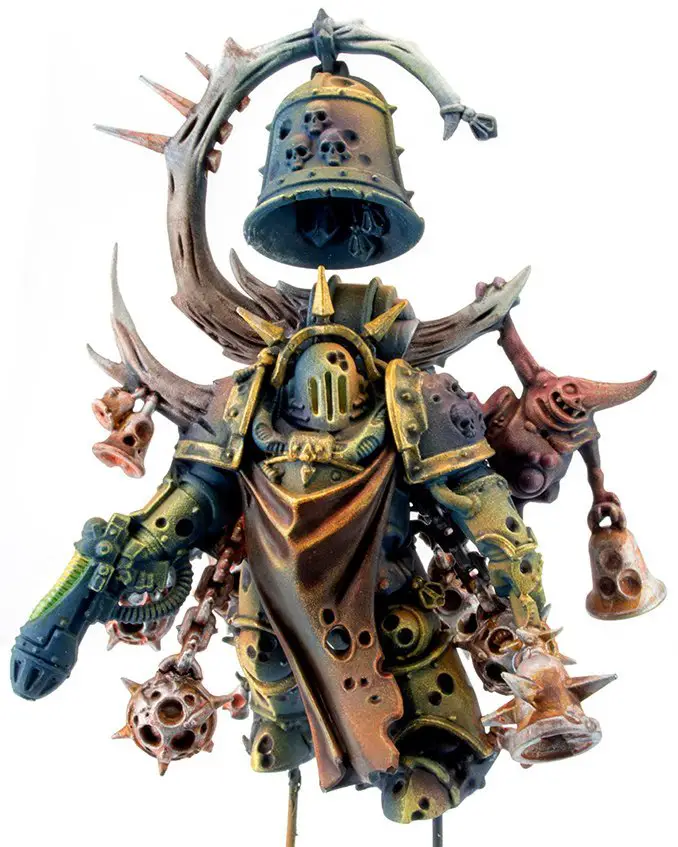
With all the airbrushing done, the base layers were incredibly quick. All that is left to do now is to add some detail work to the model. whilst this is still in progress. it was quick and easy to add lots of interest to the model before even getting any of the main colour work down.
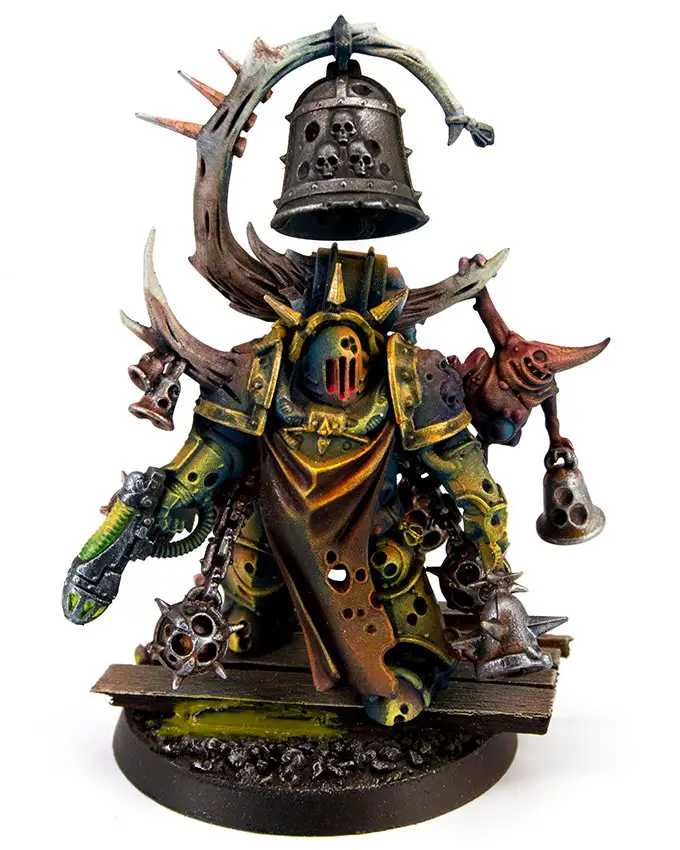
At some point when painting my minis, I must have knocked he needle and bent the tip. Another dumb thing I did was leave airbrush cleaner in overnight due to absent-mindedness. This left me with incredibly gunky gloop in my airbrush which I had to clean out using an airbrush reamer. When using this I pressed way too hard and expanded the nozzle, leaving me with the needle coming out 3 times farther than it should have! So I ordered another set. I was happy that it didn’t actually cost that much for the replacement needle and nozzle.
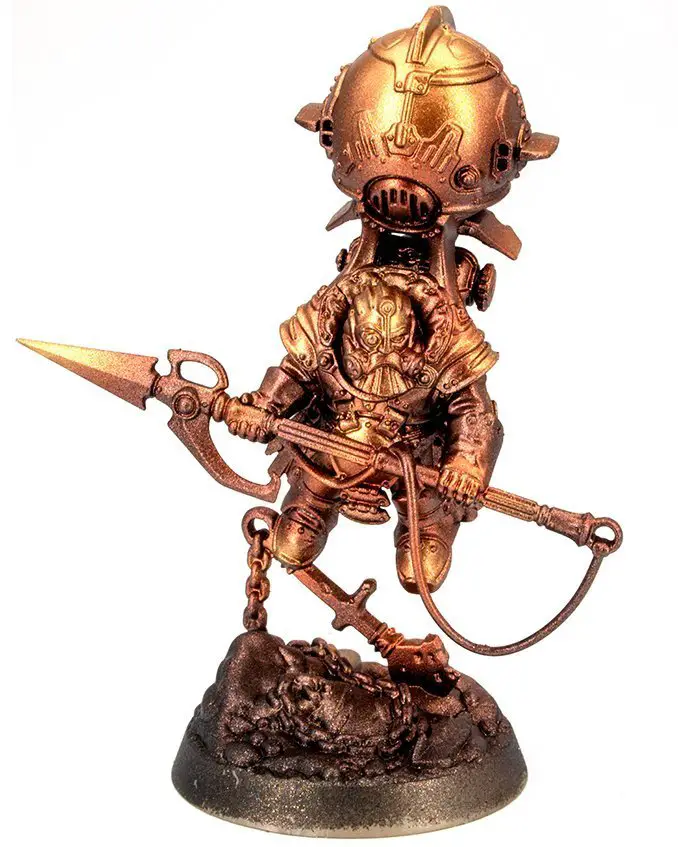
With the next series of models, I tested out Darkstar Molten Metals. I also stepped up exclusively to the 0.2mm needle due to the, erm, breakage.
This model was painted with Aged Copper, Copper & Polished Copper respectively. Once again the airbrush gave me the opportunity to build up subtle shifts in highlights without much-practised control.
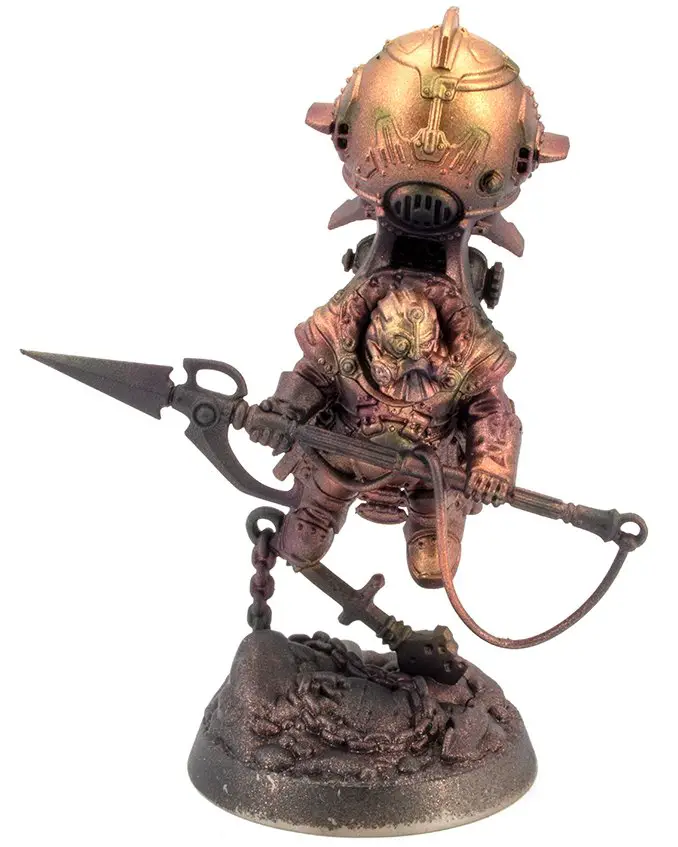
With the metals applied I then added some interest with colour shifts to any feature points on the armour. Unlike the model above, I moved away from Reaper and airbrushed Citadel Shade paints. Specifically Druchii Violet and Biel-Tan Green on the Armour and Drakenhof Nightshade on the weapon.
As you can see, this has given a much more subtle and gradual shift when compared to the purple used on the Noxious Blighbringer above.
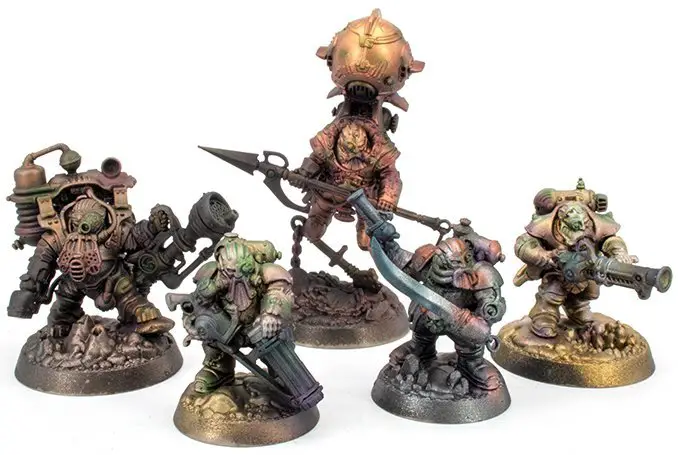
As shown from the overall squad, all painted with a variety of different Darkstar Molten Metals over a couple of hours. We’ve generated a lot of interest in the sculpts, brought out with the changes in hue. You can do this type of work with any airbrush, but you need to have nailed the trigger control. It could take years of practice.
With this airbrush, there’s no need, just use the adjustable trigger stop. It’s not cheating, it’s using the tool for what it was designed to do.
Please Note: This site uses affiliate links. Our Affiliate Partners are shown below
(Affiliate links will result in compensation to the site on qualifying purchases)
Click this link & buy your hobby stuff from Element Games for the UK & Europe to support FauxHammer.com – Use Code “FAUX2768” at the checkout for double reward points.
Our Affiliates / Hobby Stores
- UK: Element Games, The Outpost, Wayland Games, Mighty Lancer, Goblin Gaming, Forbidden Planet, Model Scenery Supplies, eBay, Amazon
- US/Canada: MTechCave, GameKastle, eBay (US), eBay (CA), Amazon
- Germany: Taschengelddieb
- Europe: eBay (DE), eBay (FR), eBay (ES), eBay (IT), Amazon
- Australia: eBay, Amazon
- Global: RedGrass Games, Warcolours
- 3D Printers: Phrozen 3D, Elegoo, Anycubic
FauxHammer – Latest Video on YouTube
Will the Harder & Steenbeck Infinity CR Plus Improve my Hobby?
I would say it certainly will, It improved mine. If you are already an accomplished airbrush user then the immediate benefit from this model will be reduced because it’s not what you are used to. But the added features speak for themselves and may be of interest to you.
If you are newer to airbrushing then I would happily say that this is the brush to go for. If you can’t quite afford it set it as the next stretch goal for yourself. It’s a top-end airbrush with a mid-tier price.
Harder & Steenbeck Infinity CR Plus Review – Final Thoughts
| Pros | Cons |
| Excellent Presentation Plastic Storage Box Trigger-Lock Snap-on Needle Cap Triple Plated Chrome Finish Custom Colour Options Interchangeable Needle/Nozzle (3 sizes) Adjustable Trigger tension All-Round Precision Easy Maintenance High Quality Multiple Purchase Options | 0.15mm needle is delicate Quick Drying Needle Regular Maintenance |
I can’t say enough about this airbrush. It’s fantastic. In regard to purchasing options, I’ve not found much use beyond the 0.2mm needle in miniature painting. I can paint anything from a fine line to base coating a tank with ease.
If you are painting mostly larger models such as tanks, then the 0.4mm needle will be useful it also makes the whole process a breeze as you are not having to clean it off as often.
The 0.15mm needle is the other way. If you find you need to paint finer lines than what you can get on the 0.2mm, grab the 0.15mm, just beware it’s a bit delicate.
If you are thinking of getting this the 0.2mm version is the sweet spot, but don’t be turned off from the idea of getting a two in one which has both the 0.2mm and 0.4mm needles and nozzles included, along with the larger paint cup.
The tip drying is an annoyance and I’m not sure if this is due to the quality of the needle or the direction which air is projected from the air cap. Keeping a piece of tissues moistened in cleaner nearby resolves this in the most part and the crown cap allows easy access to do so.
The features and configuration options, coupled with how robust this is, really does excel it to the top of airbrush standards. Unless you have a specific use case for any other airbrush, this should really be the defacto choice for all miniature painters.
Make this the next airbrush you buy. You won’t be disappointed.
Please Note: This site uses affiliate links. Our Affiliate Partners are shown below
(Affiliate links will result in compensation to the site on qualifying purchases)
Click this link & buy your hobby stuff from Element Games for the UK & Europe to support FauxHammer.com – Use Code “FAUX2768” at the checkout for double reward points.
Our Affiliates / Hobby Stores
- UK: Element Games, The Outpost, Wayland Games, Mighty Lancer, Goblin Gaming, Forbidden Planet, Model Scenery Supplies, eBay, Amazon
- US/Canada: MTechCave, GameKastle, eBay (US), eBay (CA), Amazon
- Germany: Taschengelddieb
- Europe: eBay (DE), eBay (FR), eBay (ES), eBay (IT), Amazon
- Australia: eBay, Amazon
- Global: RedGrass Games, Warcolours
- 3D Printers: Phrozen 3D, Elegoo, Anycubic
FauxHammer – Latest Video on YouTube
What did you think of this Review? Please let us know in the comments.
If you like what we’re doing here you could really help encourage more content with a share on any social media platform.
Click the share links at the bottom of this screen (or on the left for computers and tablets)
Want to keep updated with the site? You can subscribe in the sidebar for RSS or by email below
(Sidebar is below the article on Mobile Devices)


Did you ever get issues with bubbles coming out of the join to the nozzle and the main body? It doesn’t appear to effect anything but it is a little annoying.