Up next in 10


Click "...more" to see all Buying and review links for this video.
All links in our video description are affiliate links. Clicking these and making any purchase will earn us a commission at no cost to you
Buy your printers here (Alphabetical Order)
Anycubic Photon D2 - https://geni.us/PhotonUltra
Amazon - https://geni.us/AnycubicPhotonD2
Anycubic Photon Mono 2 - Anycubic - https://geni.us/PhotonMono2
Amazon - https://geni.us/AnycubicPhotonMono2
Anycubic Photon Mono X 6k S - https://geni.us/MonoX6Ks
Amazon - https://geni.us/AnycubicMonoX6kS
Anycubic Photon Mono M5 - https://geni.us/PhotonM5
Amazon - https://geni.us/AnycubicPhotonMonoM5
Anycubic Photon Mono M5s - https://geni.us/PhotonM5s
Amazon - https://geni.us/AnycubicPhotonMonoM5s
Elegoo Mars 3 Pro -https://shareasale.com/r.cfm?b=2183270&u=3060349&m=104244&urllink=&afftrack=
Amazon - https://amzn.to/3M3Mw45
Elegoo Mars 4 - https://shareasale.com/r.cfm?b=2351049&u=3060349&m=104244&urllink=&afftrack=
Amazon - https://amzn.to/48WLaC0
Show More Show Less View Video Transcript
0:00
I've spent the last year looking at all
0:01
of the top resin printers on the market
0:03
there are some good ones and
0:04
unfortunately some bad ones but right
0:07
now at the start of the new year I want
0:08
to look to the future I really want to
0:10
just go on a journey of imagination we
0:13
have all these great printers but what
0:14
will the future bring what should the
0:16
future bring and I'd love to hear your
0:18
thoughts too what do you want am I right
0:20
am I wrong please drop your thoughts
0:22
down in the comments section as I plan
0:23
to use them in future videos at the very
0:26
least I hope this will serve as a wakeup
0:28
call for the brands out there making
0:30
these printers it should also make it
0:32
easy for someone new to have a point of
0:34
reference a list of boxes they should
0:36
tick if they want to create the world's
0:38
next leading consumer resin printer so
0:41
let's get on with making things easy for
0:43
the printer brands by telling them what
0:45
we want hi I'm Ross and this is f Hammer
0:51
videos so for the format of this video I
0:53
want to go through all the different
0:54
features and functions of a printer and
0:56
talk about who's given us the best as a
0:58
springboard for what we want going going
1:00
forward and I was going to end with the
1:02
style of the printer once going through
1:03
all of the different features we'd
1:05
finish on the housing to put this all in
1:07
but in reflection if I'm watching this
1:09
I'd kind of want to be able to picture
1:11
it in my mind up front so when choosing
1:13
the style of the best 3D printer out
1:15
there I'd like to take some massive
1:17
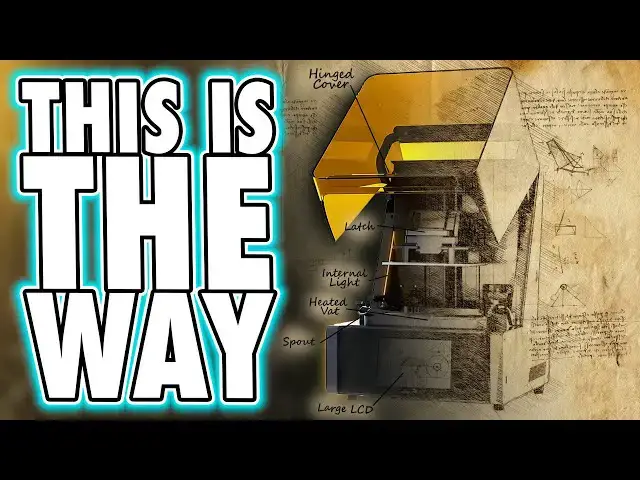
design cues from the hay Gear's
1:19
ultracraft reflex I mean this is an easy
1:22
pick surely the machine is gorgeous but
1:26
beyond that there are a ton of
1:27
functional elements in its form factor
1:29
too I mean I don't know anybody who
1:32
likes lift off Lids except maybe the few
1:34
people who use their printers in a print
1:35
farm and never have the lids on anyway
1:38
because they just keep the whole place
1:39
at room temperature there have been a
1:42
few other printers with liftup lids but
1:44
the two which come to mind most recently
1:46
are the Frozen Mega 8ks and the Nova 3D
1:49
whale 3 whilst the Frozen model has a
1:51
nice strong hinge mechanism that keeps
1:53
the lid in place as you lift it or lower
1:55
it both printers suffer from the rais
1:58
lid protruding out the back meaning
1:59
meaning you need your printer a good
2:01
distance away from the
2:02
wall the gk2 has a lift up lid but the
2:05
hinges are a bit weak and the rear
2:07
chassis curves a good 2/3 around the
2:09
sides as it covers around the build area
2:12
the reflexes lid is both angled and
2:15
hinged in such a way that it clears
2:17
plenty of space for accessing the
2:18
printer's internals whilst only taking
2:21
up additional height in your workspace
2:23
rather than empty depth too but yeah in
2:26
taking up height they would lose a lot
2:28
of customers in those forementioned
2:30
print Farms who just don't have that
2:32
height spare so however it's done design
2:35
the lid mechanism in such a way that
2:37
with only a few screws or such you could
2:39
swap this mechanism over to a lid which
2:42
can be removed entirely by just pulling
2:44
it towards you and away from the machine
2:46
but it's not just the functional feature
2:48
of that design either the visual style
2:50
of the machine and the materials all
2:52
feel robust and solid even the colorway
2:55
makes this come across as a more
2:56
professional tool than the Cheapo
2:58
plasticky of more affordable models like
3:01
most elegu and any cubic machines I do
3:04
wish however the lid was more
3:05
translucent because it's hard to see
3:07
inside this one and I also wish it was a
3:09
brighter orange what it matches my
3:12
branding of course I want a metallic
3:13
gray and orange printer when we look
3:16
inside the machine the next thing I want
3:17
to talk about is the build plate when it
3:19
comes to this component adherence is key
3:22
and I suspect many people would want me
3:23
to say they should come with a magnetic
3:25
build plate now I do see the benefit in
3:28
this where at the manufact ERS who
3:30
installed them in such a way that would
3:32
ensure that they won't come un stock but
3:35
I see so many issues with people self
3:37
installing third party ones that they
3:40
make me nervous to the point that I'm
3:42
not going to try them but as I said I do
3:45
see the benefit that you can easily pop
3:47
these off and the flex will allow you to
3:49
break models base layers away much
3:51
easier now personally I don't care if
3:53
this build surface is textured or even
3:55
laser etch like the satin printers or
3:58
smooth like on the gk2 once you've got
4:00
your base layers dialed in properly you
4:02
should have no adherence issues during
4:04
print and no over adherence after a
4:06
print though got to consider everyone
4:09
and if a bill play isn't smooth you'll
4:11
end up with some texture and that could
4:12
put off some buyers who do resin print
4:15
direct from the plate rather than
4:16
support models so I guess yeah if done
4:19
right I would like to see removable
4:21
flexible surfaces properly integrated
4:23
into printers perhaps in a variety of
4:25
styles and textures like on fdm printers
4:28
it could be cool if they add this I just
4:31
hope it includes some kind of Notch for
4:33
easy one-handed alignment the other
4:35
thing I want to talk about here is the
4:36
shape of the build plate because so far
4:39
only uniformation made a build plate
4:41
that combats this and that's a build
4:42
plate that keeps the top out of the vat
4:45
and yeah the gk2 plate may look heavy
4:47
and clunky but it's actually quite light
4:49
because well it's plastic but I'm sick
4:51
of having to wait every time a print is
4:53
complete for the resin to run off the
4:55
plate or to need to scrape it off myself
4:57
before I can move the plate to my
4:58
workbench for cleaning so if we aren't
5:01
getting removable flexible print
5:03
surfaces let's at least keep the top of
5:05
the bill plate out of the resin please
5:07
now when it comes to the connection to
5:08
the Zed arm well it's easy this one
5:11
enough with the bolts people and if
5:12
you're going to do bolts then do the
5:14
asymmetrical Leever style used on the
5:16
Nova 3D whale SE or the elu Jupiter SE
5:19
because they are much easier to loosen
5:21
and tighten but ideally a nice latch as
5:24
seen on the gk2 or the ultracraft reflex
5:27
would be ideal because that's really
5:28
simple to put the bill plate in and
5:30
pulled the latch down to lock it in
5:32
place one-handed because your other hand
5:34
is probably holding models or a tool or
5:36
is just covered in resin for the Zed
5:38
rail I'd say we'd like two rails but I
5:41
think that's obvious no matter how big
5:42
or small the print bed is stability
5:44
across the width of the arm is key and
5:47
when it comes to the screw for the
5:48
mechanism the ball screws are much
5:50
smoother than lead screws so yeah I'd
5:53
really like to see more of those
5:54
imprinters going forward especially if
5:56
you want to be classed as a quality one
5:58
as for the rotation of of this screw
6:00
well manufacturers I think should be
6:02
aware that we really need a motor
6:03
capable of a 20 Micron increment of the
6:06
plate lift height we already have
6:08
screens with sub20 Micron pixels let's
6:11
make sure we can match that in the Zed
6:13
height too or at the very least hey
6:15
Brands why don't you start publishing
6:17
the minimum step distance with your
6:19
printers if it's six microns cool but
6:21
just tell us clearly at least then we
6:24
can reduce the layer height to 18
6:25
microns instead of rounding up to 20 and
6:28
having the printer compensate for us
6:29
every few layers please just allow us to
6:32
be accurate and when it comes to speed
6:35
well the minimum movement speed I've
6:37
Ever Needed on PFA film is 60 mm a
6:41
minute or also known as 1 mm a second so
6:44
it needs to be able to go at least this
6:46
slow if it goes too fast it won't work
6:48
with some of the higher quality resins
6:50
and by quality I mean print quality and
6:53
for those out there who want fast
6:54
printers well the brands are now
6:56
competing with the likes of the Frozen
6:58
Mega 8ks which is a apparently capable
7:00
of 1200 mm a minute or 20 mm a second
7:04
and yeah that's far beyond what the
7:05
materials and pull forces are capable of
7:08
but since it's been done let's just call
7:10
this The Benchmark set and let the
7:12
materials catch up next on to the vat
7:16
and the first bit is simple make it
7:17
metal so you don't look cheap but if you
7:19
are going to make it plastic at least
7:21
make it translucent so that the few
7:23
times when we're using translucent resin
7:25
we might be able to see the layers
7:26
before they start to rise out of the vat
7:28
that would be handy
7:29
and you should also all everyone should
7:33
put a protruding Sprout on one corner
7:35
not just a different shaped corner but
7:37
an actual spout that sticks out of the
7:39
vat again like on the ultracraft reflex
7:43
so at least then when you're pouring
7:44
resin out of it it doesn't run down and
7:47
under the vat and risk going onto the Fe
7:49
or just drip everywhere and the other
7:51
thing this must have is an integrated
7:53
heater within the vat itself this has
7:55
been done on the Apex maker X1 it's the
7:58
most efficient way to heat resin and it
7:59
should be adopted by every brand and be
8:02
in every printer perhaps I don't know
8:04
give us the option to get a vat without
8:06
it to save costs but there should
8:08
definitely be an option for a heat on
8:10
every single printer made going forwards
8:13
and I know people talk about chamber
8:14
heaters but they warm the resin in the
8:16
vat last after heating the air in the
8:19
chamber and the already cured model
8:21
they're certainly useful as an addition
8:23
to a vat heater or a heater below the
8:25
resin chamber but alone they're not the
8:28
best approach
8:29
as for a release film well this might
8:31
not surprise anyone PFA all the way for
8:34
quality but ACF needs to be available as
8:37
an option for those happy to sacrifice a
8:39
bit of quality for an improved print
8:41
speed and finally when attaching the vat
8:44
to the printer no more bolts please once
8:46
again I'll sight The ultracraft Reflex
8:48
here give us some nice latches or like
8:50
the gk2 have a way to lock it in place
8:53
and whilst you're at it put some
8:55
comfortable handles on the vat itself
8:56
too please and finally something that
8:58
I'm just just making up out of nowhere
9:00
I'd really like someone to come up with
9:02
a better way of attaching the release
9:04
film to the vat itself because the
9:06
current process just it takes forever to
9:08
swap the film on any printer that's our
9:11
main technical Parts covered I want to
9:13
quickly talk about an important function
9:15
leveling first off instead of spending
9:17
the whole video imagining what we want
9:19
let's talk about what we don't want and
9:21
what we don't want is the stupid elu
9:23
ball mount on any printer and to the
9:25
seven of you who have never had problems
9:27
with yours feel free to to voice your
9:29
opinion in the comments below I know you
9:31
will and I like when you do it because
9:33
your interactions increase the reach of
9:35
this video so thanks for your help while
9:37
you're having a go at me look I know I'm
9:39
having a crack But please understand
9:41
that I've seen more comments in
9:42
agreement with this than the few of you
9:44
who don't need to relevel every three or
9:46
four prints and the typical fourpoint
9:48
screw mechanism used on every other
9:50
printer out there is certainly the
9:52
better option when done right but
9:54
honestly neither of these are the best
9:56
and that's what this video is about
9:58
right the best of everything the best
10:00
mechanism I've seen so far for leveling
10:02
the plate is used on printers like the
10:04
Apex maker X1 Frozen's Mega 8K printers
10:07
and the gk2 just to name a few of them
10:10
these use a set of inner grub screws
10:12
that set the level of the bed To Each
10:13
corner and then four outer screws which
10:16
go in the opposite direction to lock
10:18
them in place it's easy to level these
10:20
when you understand it but because I'm
10:21
yet to see one like this unlevel itself
10:24
in my opinion they should be pre-leveled
10:26
from the factory anyway and whilst we're
10:28
on the inside of this imaginary printer
10:30
let's talk about some other things we
10:32
want to get inside there shall we one is
10:34
a carbon filter like what elu has been
10:37
giving us but a better one these
10:39
shouldn't be running for the whole print
10:40
because that just wears them out faster
10:42
but it's definitely better to have one
10:44
circulating the air inside the chamber
10:46
and therefore keeping it running through
10:48
the filter over and over rather than
10:50
what elgu's done with the Mars mate and
10:52
pump it all out into your room and it'd
10:55
be nice to see these with some kind of
10:56
air quality sensor inside the chamber
10:58
too so then at least you know when it's
11:00
safer to open the lid this is probably
11:02
super expensive but again guys we're
11:04
wishing for stuff here and despite this
11:06
being in there I'd still also like to
11:08
see an optional vent cover like we have
11:11
on pretty much any of elgu's large
11:12
printer lids and also on the mega 8 KS
11:15
from Frozen with this at least we'd have
11:17
the option to pump Vapors outside and
11:20
then there's the resin pump I've said
11:21
many times that well I'm personally not
11:23
a fan of these because they're just too
11:25
messy if you're going to do one do it
11:27
but it needs some way of being
11:29
compatible with all the bottle types or
11:31
give us some empty containers like any
11:33
cubic did with the wash and cure Max and
11:35
the flip your bottle upside down options
11:37
never seem to do so well the one on the
11:40
Nova 3D printers just worries me and the
11:42
one on the ultracraft reflex is well
11:45
it's over engineered and in both cases
11:47
when swapping the bottle out they drip
11:49
everywhere so if you are going to offer
11:52
this then I like Frozen's approach make
11:54
it an optional extra for those people
11:56
who don't mind paying more to have it
11:58
and keep the pr inter costs down a bit
12:00
and speaking of Frozen one thing they
12:02
added on the MTI 8K that completely
12:04
failed was the camera but this is not a
12:07
bad idea for a feature if you're going
12:09
to do this you should do this take a
12:12
leaf out of Bamboo's book and put a
12:14
couple of very good bright lights in
12:16
your chamber so we can actually see the
12:18
model printing when checking on it
12:19
overnight and not just a silhouette
12:21
because the only light in the room comes
12:23
from outside of the printer case and
12:25
since most cameras are widescreen it
12:27
would make sense to orient it sideways
12:29
however so we can see more height than
12:31
width in the image make sure it's a
12:34
decent 1080p camera but give us the
12:36
option to upgrade to 4K if you can and
12:39
make sure the printer automatically
12:40
creates time lapses by taking a photo
12:42
when the bed lifts for each layer you
12:45
might be thinking that's an arbitrary
12:46
feature but actually if you included
12:49
that function everyone online would
12:51
share videos of your printer on social
12:53
media saying look at this that I printed
12:55
on that yes it's an expensive component
12:57
guys but it's also free marketing
13:00
afterwards so moving out of the printer
13:02
and back to the externals I'd like to
13:03
talk about ports the power socket hole
13:06
needs to be on the back of the printer
13:07
along with any type of network interface
13:09
such as ether a or anything else special
13:11
that you want to put on there that's
13:13
used by just a handful of people USB
13:16
ports should be on the front if you're
13:18
going to add Wi-Fi and you should add
13:20
Wi-Fi because in this day and age even
13:22
some toasters kettles and microwaves
13:24
have Wi-Fi but if you're going to add
13:26
Wi-Fi then please make sure the aerial
13:28
for it is inside the chassis and not
13:30
sticking out the side somewhere and the
13:33
remaining key feature is well it's the
13:35
interface with the printer this needs to
13:38
be a capacitive touchcreen and my
13:39
favorite interfaces so far are between
13:42
the satin 3 Ultra and the Apex maker X1
13:45
the former has a lot of controls and
13:47
it's very intuitive everything is well
13:49
translated and all the options are in a
13:51
sensible place but the much larger
13:54
approach taken by Apex maker is really
13:56
impressive it's just a shame that it's
13:58
let down by a few unintuitive icons and
14:01
an incomplete translation as a note to
14:03
all printer makers this is one of the
14:05
most important features of your machine
14:07
it's how your user commands the printer
14:09
to do things make it sexy make it fast
14:12
and make all of the most common features
14:14
be on the front and most obvious screen
14:17
secondary functions on the next and any
14:19
anciliary function should be on a third
14:21
or even fourth level that's it also when
14:25
the printer's printing show us
14:26
meaningful info show us a Rend of what
14:29
the currently exposed layer looks like
14:31
show us some info about the temperature
14:33
and other settings that are happening
14:34
inside the machine at the time that are
14:37
important that you might want to know
14:39
when a print is printing but more than
14:41
anything please show us a clear progress
14:44
bar with a countdown timer telling us
14:46
how long in time until the print is done
14:49
and then external to this but also in
14:51
controls please stop it with all the
14:53
proprietary weird apps to connect to
14:55
Wi-Fi and all that lock too we all know
14:58
how smart phones work the UI designers
15:00
surely have one so make all of the setup
15:02
controls as simple as a phone app and if
15:05
you're going to make a phone app too so
15:06
we can I don't know remotely monitor the
15:08
prints or control it from our phones
15:11
please make sure it's nothing like
15:12
reality Cloud's fomo style Hard Sell of
15:15
absolute crap and its unintuitive
15:18
storefront be like anchormate be like
15:20
bamboo handy then build your storefront
15:23
from a solid and sensible Foundation
15:25
once everything else Works in a good way
15:28
I mean it doesn't sound like this is too
15:30
hard yet so many Brands get it very
15:32
wrong disappointed and it will be the
15:35
first thing that was reviewers slate
15:37
when lazy design makes it harder than it
15:39
needs to be to use a printer and finally
15:42
some functional features all printers
15:45
should come with a built-in series of
15:46
exposure tests built into the onboard
15:48
control system or UI and it should walk
15:51
you through things like leveling and
15:52
further testing on the UI it should have
15:55
you print a load of squares at different
15:57
base exposure times s in one print so
15:59
you can see which one's stuck and which
16:01
ones are too stuck from this you can
16:04
then determine what your best base
16:05
exposure time is and all printers should
16:08
do what any cubic offers and let you
16:10
print a resin exposure Rangefinder at
16:12
different exposure times on one plate
16:15
and then the UI should explain to you
16:17
how to determine which one the best is
16:20
and it should then let you walk through
16:21
a series of further test to determine
16:23
things like best lift speed again this
16:25
should all be on the UI and explain how
16:27
to work out what fails look like and
16:30
finally it should let you then use these
16:32
daring settings to test different
16:33
amounts of anti-aliasing to remove all
16:36
traces of voxal and layer lines with
16:38
minimal impact on detail would this take
16:41
some time for a person to do yes but to
16:43
dial in your printer perfectly anyway
16:45
you need to do this anyway and everyone
16:47
in the world needs to learn how to do it
16:49
with a myriad of different tests and
16:51
opinions out there hoping that they've
16:53
guessed and have the best results yet
16:56
they have no validation this is why the
16:58
printer should do this and that's how
17:01
bamboo won the fdm race by having things
17:04
like calibration already set for the
17:06
user or it walks them through it and
17:08
holds their hand from the slicer and I
17:11
also want to talk about a feature that
17:12
most of you have probably never heard of
17:15
these home printers need a way for
17:17
increasing the exposure time or ideally
17:19
intensity of just the supports layer
17:22
times are so fast now anyway that it's
17:24
the lift and retract speed slowing down
17:26
resin printing so we have plenty of time
17:29
to even double up our exposure times and
17:31
still get fast prints and since we don't
17:34
have Direct Control why can't a brand
17:36
already figure out some way of when the
17:38
bed lowers it cures the objects layer
17:41
and then without moving dynamically
17:43
increases the light intensity and cures
17:45
the supports separately before lifting
17:48
and why would you do this well this
17:50
would actually Harden the supports more
17:52
and make them more brittle which means
17:54
as you pull them away from the model the
17:56
supports themselves are the weaker part
17:58
of the object and are the more likely
18:00
failure point this is what industrial
18:02
printers do in order to make parts that
18:04
are needle thin break away from supports
18:06
without any damage and doing this would
18:08
be a complete resin game Cher and
18:11
another thing that should be baked into
18:13
slices is some kind of test similar to
18:15
the cones of calibration where different
18:17
amounts of material are supported by
18:19
different thicknesses of material by
18:21
printing something like this and telling
18:23
the slicer which ones failed it would go
18:25
a long way to informing the slicer which
18:27
supports or even just parts of the model
18:30
would fail before you even start a print
18:32
because it would have been able to
18:34
determine the maximum pull forces on
18:36
different diameters of material and how
18:38
much material each of them is expected
18:40
to hold once we had something like this
18:43
Auto supports would become an absolute
18:45
Breeze but that requires someone to
18:47
actually spend time in developing one of
18:49
these slices alongside the printer
18:51
hardware and thus far every brand has
18:54
relied on chitubox lchi or Tango and
18:57
done little more than Rebrand one of
18:59
those apps to their own right then as
19:01
always we leave the best to last the
19:04
screen and as I read through this and
19:06
realize how much of my scripts I've got
19:07
to go probably should have made this a
19:09
separate video so I'm going to try and
19:11
give you the cliff notes and then I'll
19:12
do that another time now the first thing
19:14
I want to say is considering the screen
19:16
is a replaceable part everybody should
19:19
do what uniformation has done and make
19:21
it so that it's easy to access that
19:23
component with pretty much every printer
19:26
ever it's half a tear down to get access
19:28
to the screen in order to replace it
19:30
with the gk2 you pop out four screws
19:33
flip up a latch for a ribbon cable and
19:35
put the new screen in now coming back to
19:38
Imagining the final parts of the printer
19:40
I honestly don't care what the screen
19:42
size is the screen size should cater for
19:45
the needs of the user and the size of
19:47
the screen and the cost of the printer
19:49
should increase or decrease accordingly
19:51
based on how big or how small it is and
19:54
as I talk about this I've got no idea
19:56
how these things are made I have no idea
19:57
how any of this is made nor do I even
19:59
care I'm just saying what we should have
20:01
much cleverer people than me need to
20:03
work out how to actually do it but
20:05
whatever the screen size is it's the
20:06
pixel size that matters and please stop
20:09
chasing 8K 12K 24K 62k whatever let's go
20:14
through some math and by that I mean
20:16
insane math that I got off the internet
20:18
and pulled a couple of bits chucked it
20:19
all into Excel got a result and it kind
20:22
of make sense as we've learned from
20:24
retina displays the human eye cannot see
20:26
a difference between pixels when there
20:28
are around 326 pixels per inch and
20:31
you're holding it about a foot away from
20:33
your face now this is where I once again
20:35
talk crazy math in a video but go with
20:37
me and tell me if my theory is wrong in
20:38
the comments so here we go first of all
20:41
yes we'd all love this screen to be DLP
20:44
but nobody's driving DLP technology
20:46
forward as much as LCD we are years away
20:48
from seeing these resolutions on DLP if
20:51
not decades or even never but with
20:53
Technologies like cob light sources for
20:55
even distribution of UV light across the
20:57
display and forel lenses LCD is actually
21:01
close to matching the sharpness of DLP
21:03
now anyway but for the math go with me
21:06
let's assume we have a pixel density of
21:08
326 PPI like on the retina display and
21:12
let's take the Saturn 3 as our subject
21:14
to use a pretty standard size of the
21:16
x-axis print volume which is
21:19
28.8 mm in inches this would be around
21:22
8.62 in multiplying the width in inches
21:25
by 326 pixels per inch to tells us that
21:28
this imaginary screen would have 2,810
21:32
pixels on the x-axis so if we divide the
21:36
2.88 mm of that access by the number of
21:39
pixels in it that tells us that we would
21:41
have a pixel width of 78 microns and
21:45
let's just assume that this display has
21:46
Square pixels just to avoid any
21:48
confusion and I didn't need the printer
21:50
in the math I could have worked this out
21:51
from the same just using 1 mm but then
21:54
I've have nothing to show on screen and
21:55
this is a printer's video so if the
21:57
logic of written and the displays is
21:58
correct and that the human eye can't
22:00
determine the difference between pixels
22:01
at 326 pixels per inch or on pixels that
22:04
are 78 microns in size when they're 12
22:06
in away from your eye how then are we
22:08
able to see voxal lines on prints with
22:11
screens where the pixels are as low as
22:13
50 microns well here's my theory with
22:16
Retina displays it's a flat 2D plane but
22:19
your eyes have a special power when
22:21
you're lucky enough to have two of them
22:23
you can also register depth an
22:25
additional Dimension that is not present
22:27
on 2D screens these three-dimensional
22:30
objects are also affected by light
22:32
bouncing off the edges differently which
22:34
accents the forms and due to the
22:36
Cinematic lighting I tend to use in my
22:37
videos I always light subjects from the
22:40
side which makes things stand out more
22:42
light things from the front and those
22:44
voxal lines start to disappear and blur
22:46
so okay let's account for that special
22:49
depth Power by doubling the PPI to
22:52
652 and using the same math in Excel the
22:56
pixel size goes down to 39 microns and
22:58
this is where things start to become a
23:00
little less obvious this is the same in
23:03
Zed resolution too for those of you
23:04
still printing at 50 Micron layer
23:06
Heights also as an additional FYI most
23:09
of the industrial DLP printers used in
23:11
the production of things like Miniatures
23:13
operate at around 38 microns in pixel
23:16
size anyway and that's because the
23:18
industry manufacturers know that this is
23:20
as much as you probably need and when
23:23
you're around this size you just need to
23:25
add the smallest amount of anti-aliasing
23:27
and you don't need to push the
23:28
technology further to improve the detail
23:30
Beyond reasonable bluring the surface on
23:33
the edge of each layer projection will
23:35
soften all of that out without any
23:37
distinguishable loss of detail to the
23:39
overall
23:40
piece and I know there's a few of you
23:43
out there who are still thinking but
23:44
I've watched your videos F hammer and I
23:46
can still see voxal lines on your prints
23:48
with much smaller pixel sizes but again
23:51
let me stress the retina example on
23:53
phones is when the phone is 12 in from
23:55
your eyes that's a lot different to me
23:57
shooting images of it on my macro lens
23:59
and you watching it on your big screen
24:02
the model I always show of me wearing
24:03
power armor built with parts from atland
24:05
Forge is about as tall as my thumbnail
24:08
or 15 mm how many 15 mm can you fit in
24:12
the area of the screen that you're
24:14
looking at this model on and again
24:16
consider that the lighting also accents
24:18
all of the sharp edges and also when any
24:21
of us are out there shooting Miniatures
24:23
to share photos with our friends how big
24:25
are they on your screen compared to the
24:27
model itself if it's two times bigger
24:29
you'd need a printer with 19 Micron
24:31
pixels to hide those lines and we have
24:34
that in a way because these new 12K
24:36
screens have 19 Micron pixels on the
24:38
x-axis but as I look back at my Mars 4
24:41
reviews I can't see any box or lines
24:43
when I zoom in with its 18 Micron Square
24:47
pixels only the layer lines are visible
24:49
and they're 30 microns and if you wanted
24:52
four times magnification which isn't
24:54
realistic for Miniatures when you're
24:56
seeing them on a computer screen you'd
24:58
actually need 10 Micron pixels for them
25:00
to Disappear Completely so as I've said
25:03
now for over a year just enable
25:05
anti-aliasing and be happy with what
25:07
your printer does I think no matter what
25:09
printer screen size we go for yeah we
25:12
should aim for all printers to have sub
25:14
20 Micron pixels and we should print at
25:17
20 Micron layer Heights for the most
25:19
detailed prints which will allow for two
25:21
times magnification without these lines
25:23
being significantly visible but even
25:26
then you may as well enable antialiasing
25:28
to smooth everything out perfectly
25:29
anyway and to avoid any light cast
25:32
highlighting them but the thing I want
25:34
to see the most is Brands need to stop
25:36
chasing this resolution metric because
25:39
well I hope I've kind of theoretically
25:42
proven here it's
25:43
pointless and we're all sick of it and
25:46
besides no matter how good the screens
25:48
are getting most resins can't render
25:50
that level of detail anyway I hope my
25:52
insane math and specious logic Mak sense
25:55
and I hope you enjoyed coming on this
25:56
journey with me hope hopefully now we
25:58
will get some Brands listening and
25:59
heading towards this more than anything
26:02
I'd like to see all the companies
26:03
released finished printers you'll see on
26:05
my channel I haven't reviewed the Athena
26:07
yet and that's because they aren't
26:09
releasing it until it's done and for
26:11
that alone I have very high hopes for
26:13
that printer and also printer brands if
26:15
you're going to give us a USB drive and
26:17
expect that to be a key part of the
26:18
machine please give us a decent quality
26:21
one or just don't bother I want to say
26:23
thanks for watching and thanks to our
26:25
members who help us make these videos
26:27
please consider join in to get some
26:28
benefits there is a link below this
26:30
video unless you're on iPhone the link
26:32
is in the description please don't
26:33
forget to like hit subscribe the
26:35
notification Bell but especially leave a
26:37
comment what do you think what do you
26:39
want in a future printer until next time
26:42
life finds a way faux hammer
26:46
[Music]
26:56
out